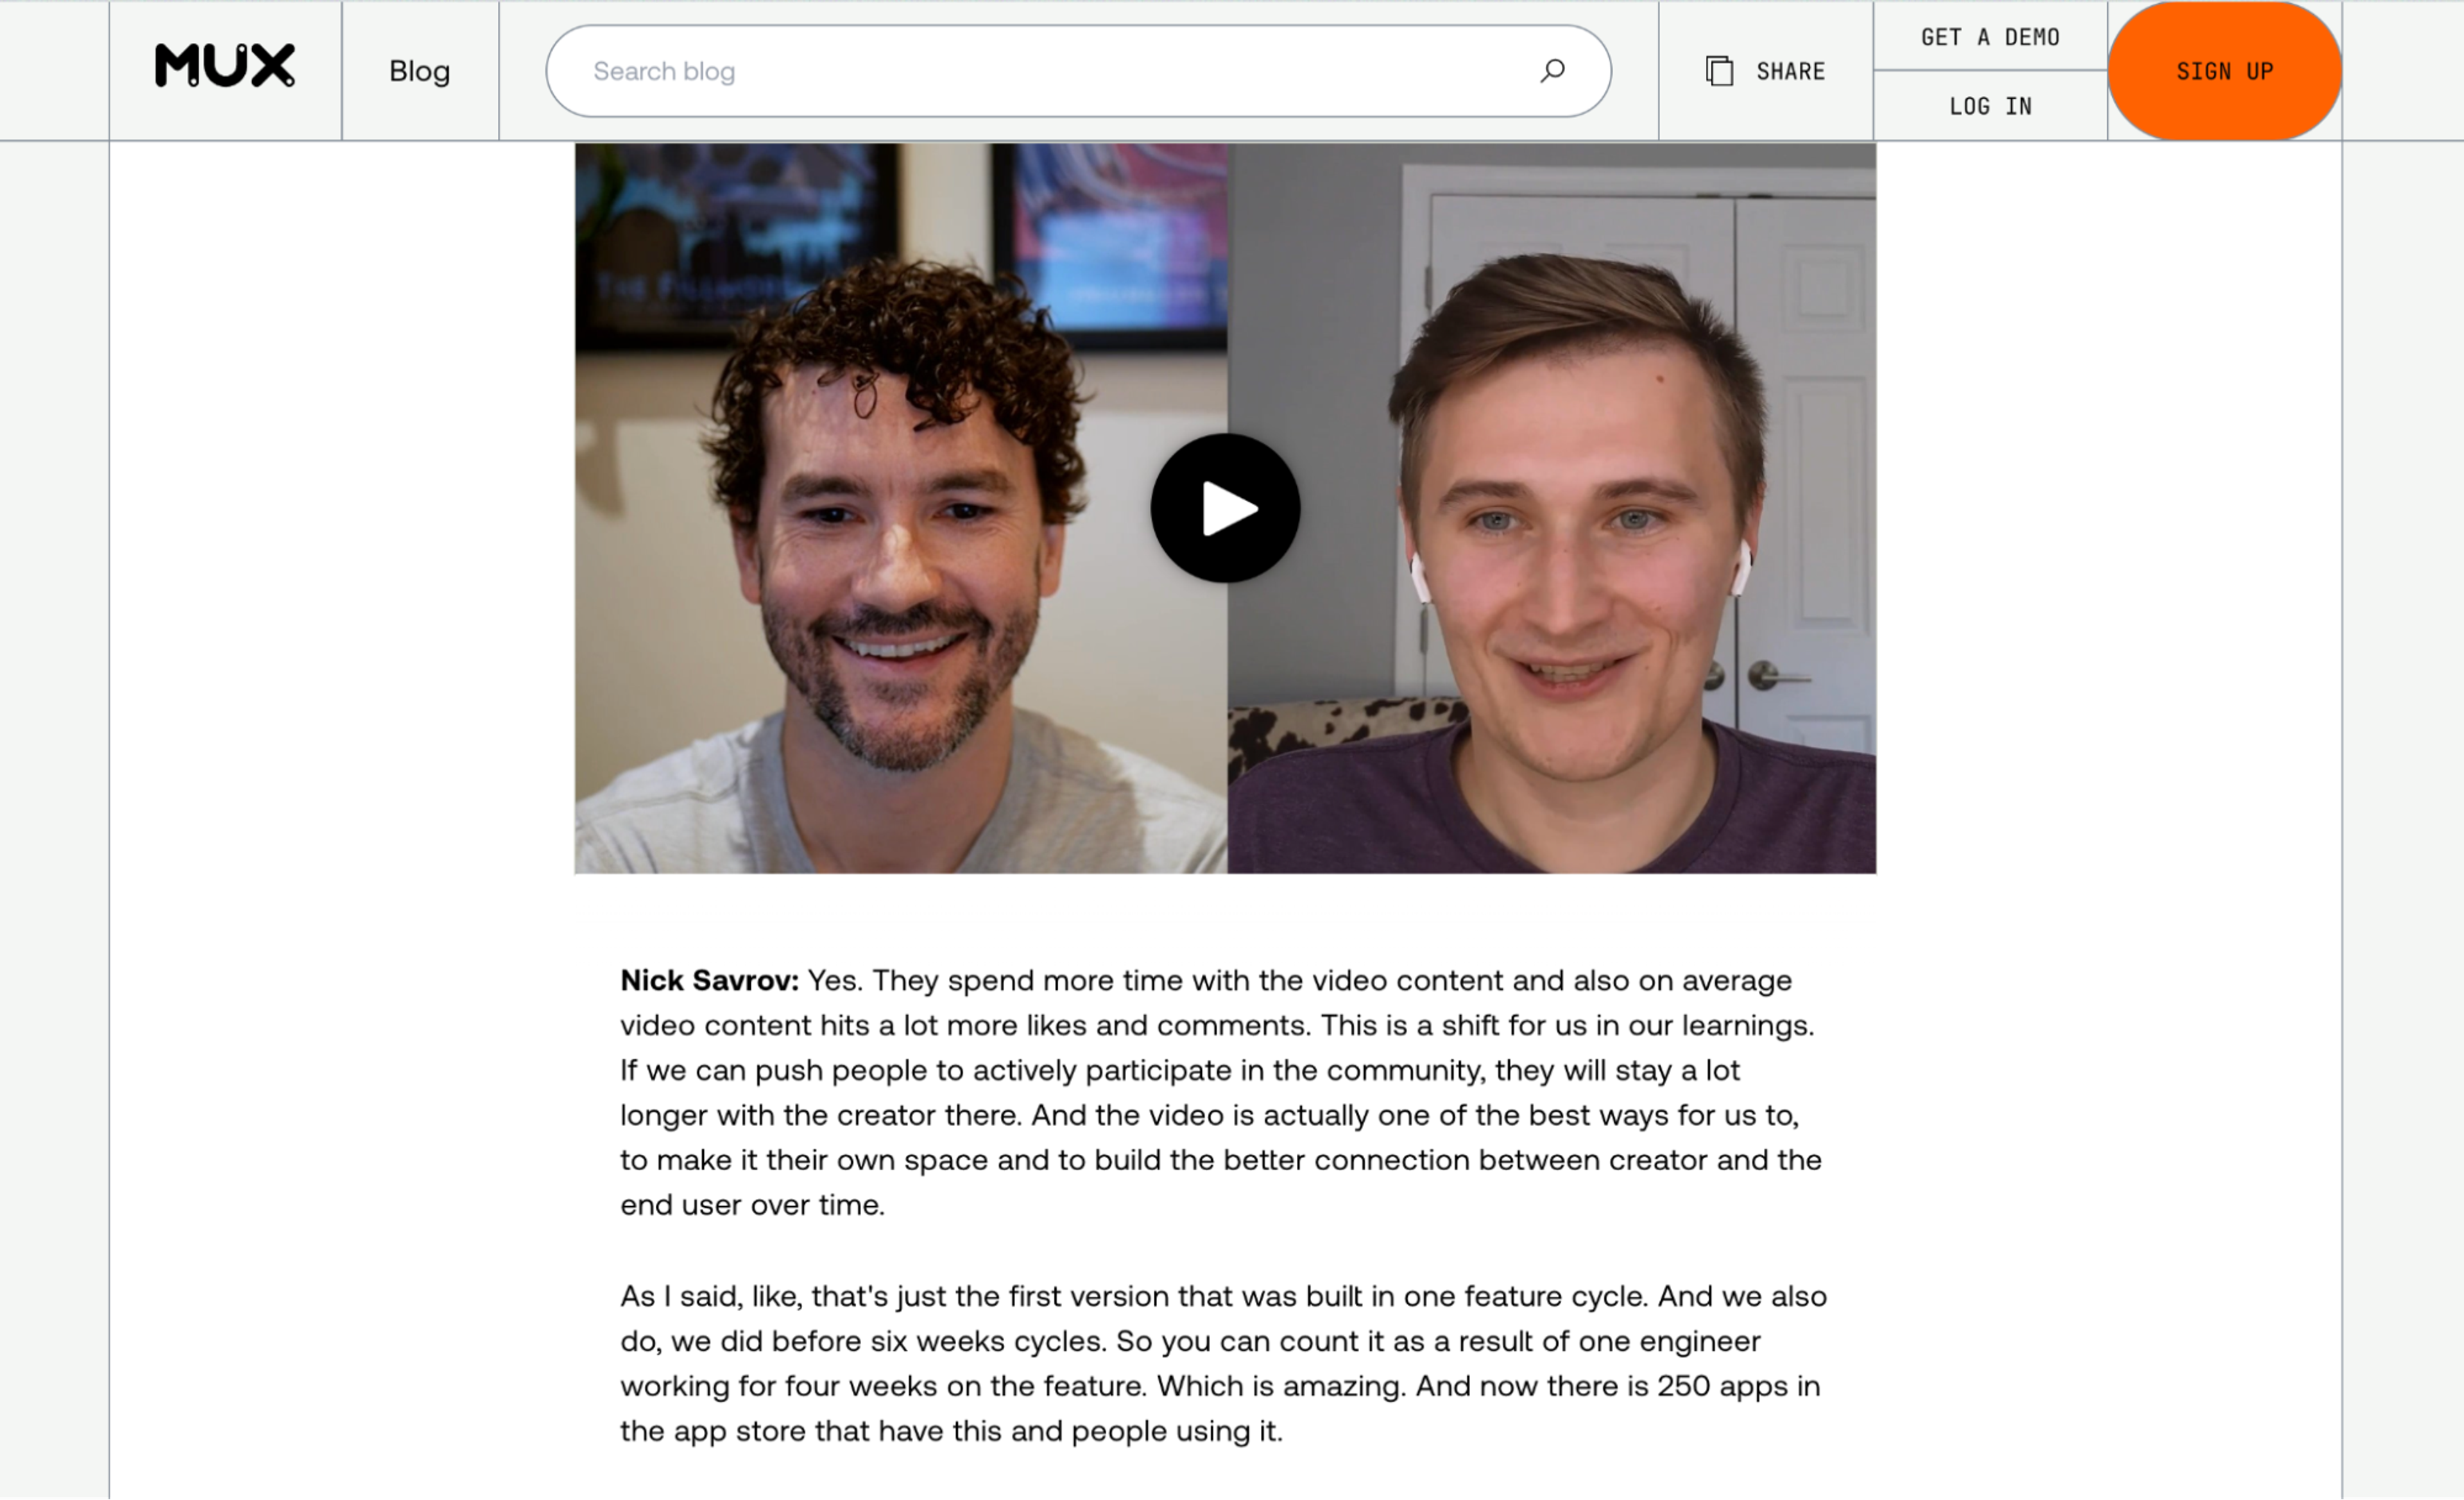
About a year ago, Christian wrote a great blog post about building an interactive video transcript with Mux Player CuePoints. Here’s what he built in that post:
Interactive video transcripts are great. They’re great for SEO because they make every word of your video eligible for search results. They’re great for accessibility because they make reading the content of a video easier. And they’re great for impatient people like me who don’t want to watch a video but are willing to scan the good parts of a blog post.
So, of course, following Christian’s blog post, I ended up building an interactive video transcript for our own blog!
In the year since Christian’s blog post, a lot has changed, fueled by a tidal wave of AI products and services. There’s good reason to be AI-skeptical, but hear me out. 10 years ago, I spent literal months at an internship trying to train a machine learning model. Now? It’s as easy as calling an API. And, as it turns out, some of those APIs are really useful for dealing with video and audio.
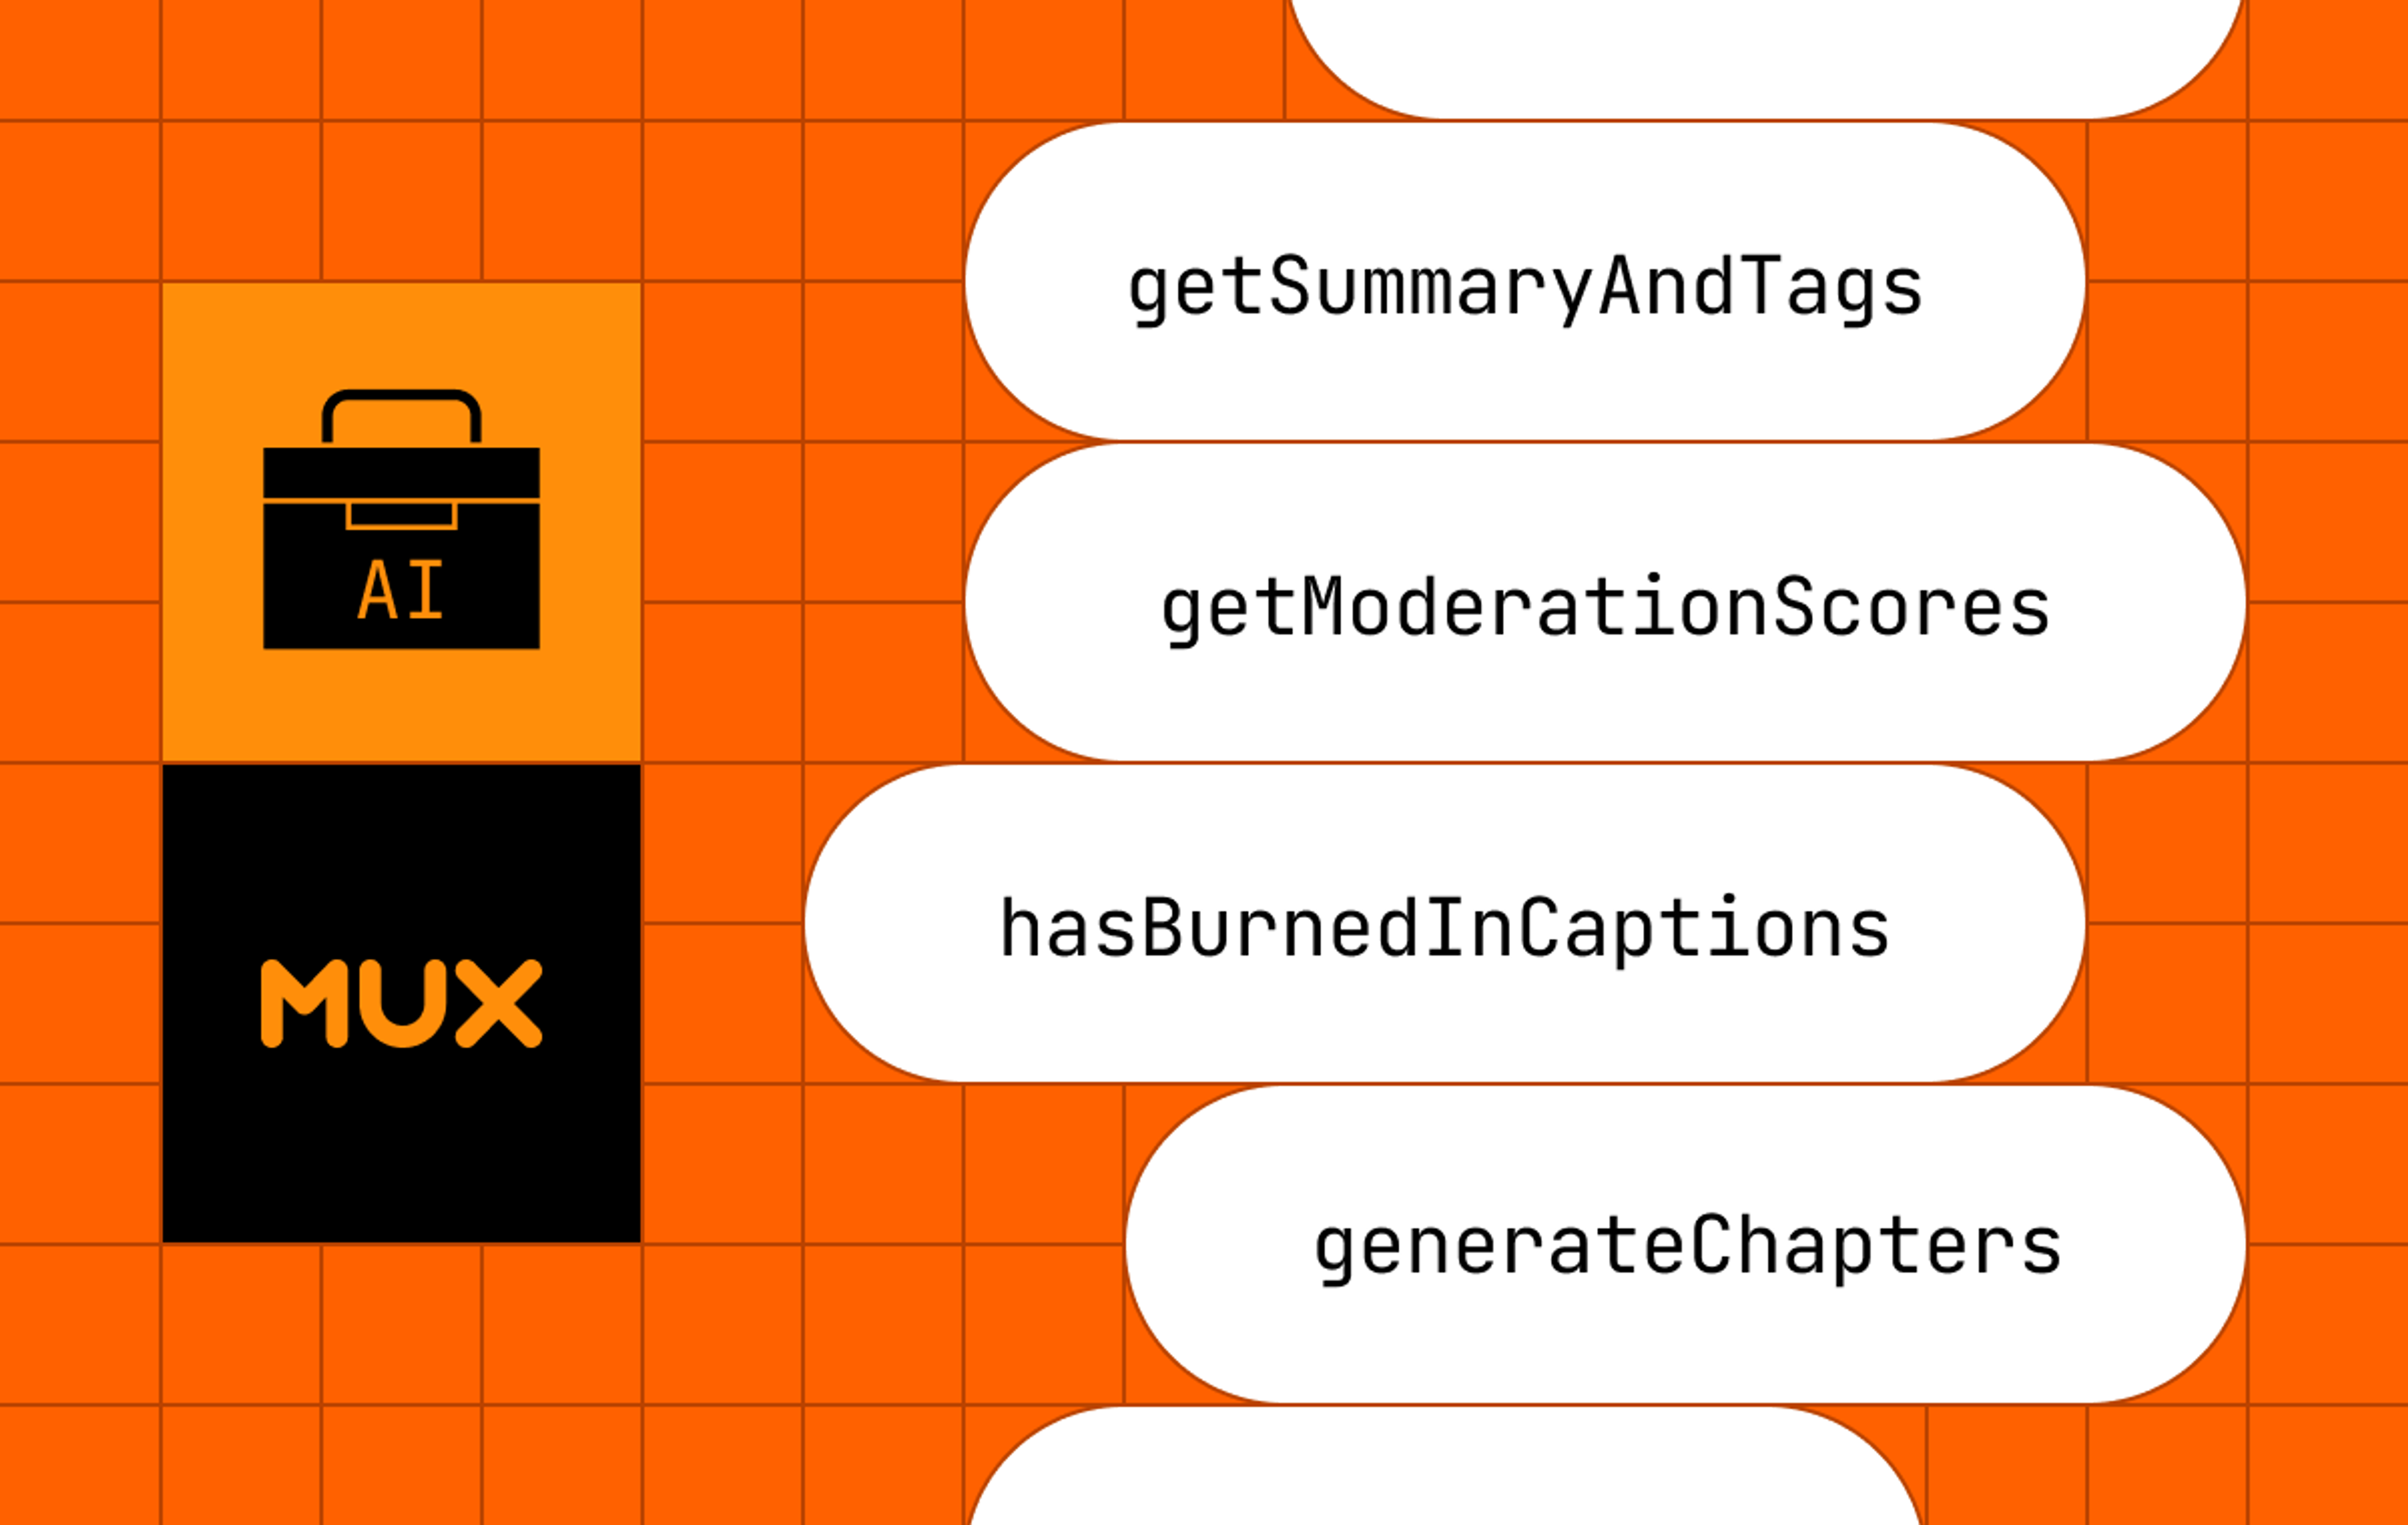
So let’s see what these AI APIs can do for us! Let’s enhance a video transcript with AI in three ways:
But before we get to the AI goodness, let’s recap what Christian taught us on building an interactive video transcript:
Building an interactive video transcript with Mux Player CuePoints (the fast version)
What are CuePoints?
Great question. CuePoints are a way of attaching data to certain times throughout your video. Or, put another way, attaching cues to points throughout your video. (Hah, get it? Cue… points? I just figured that out while writing this.)
A cue might look like this:
const cue = {
  startTime: 2, // seconds
  endTime: 6, // seconds
  value: {
    text: "It was the best of times, it was the worst of times, it was the age"
  }   // `value` could be anything
}
Two things make CuePoints magic. First, you can access the playerElement.activeCuePoint to access the cue that corresponds to the current video time. Second, you can listen for cuepointchange events and react to them. With these two tools, you can sync your UI to your video. This lets you do things like pop up actor information (like Amazon X-Ray) for a certain scene, or pop up a question for an educational video, or… sync a transcript to your video!
How do I build an interactive video transcript with CuePoints?
We want an interactive transcript to have two pieces of functionality. First, when we click on a part of the transcript, the video jumps to that point. Second, when the video plays, the transcript highlights the active text.
To implement the first part – clicking the transcript to seek the video – we don’t need CuePoints. We can use the good ‘ol currentTime property. When the transcript is clicked, we’ll set the video’s currentTime to make the video jump to that point.
To implement the second part – highlighting the transcript as the video plays – we’ll use the oncuepointchange event. When the video changes CuePoints, we’ll let the transcript know so it can highlight the appropriate part.
Together, that looks something like this:
const VideoWithTranscript = () => {
  const [currentTime, setCurrentTime] = useState()
  const [activeCuePoint, setActiveCuePoint] = useState()

  return (
    <MuxPlayer
      currentTime={currentTime} // listen to the transcript
      onCuePointChange={setActiveCuePoint} // send CuePoints to the transcript
    />
    <Transcript
      onCueClick={setCurrentTime} // send data to MuxPlayer
      activeCuePoint={activeCuePoint} // listen to CuePoints
    />
  )
}
This is just a quick recap to get on the same page, so we’re not going to go into implementation. For all the details, do check out Christian’s post, check out his CodeSandbox, and read our docs on Mux Player CuePoints.
Today, we’ll be mostly focusing on how to make the text of the transcript itself better.
How can we make this better?
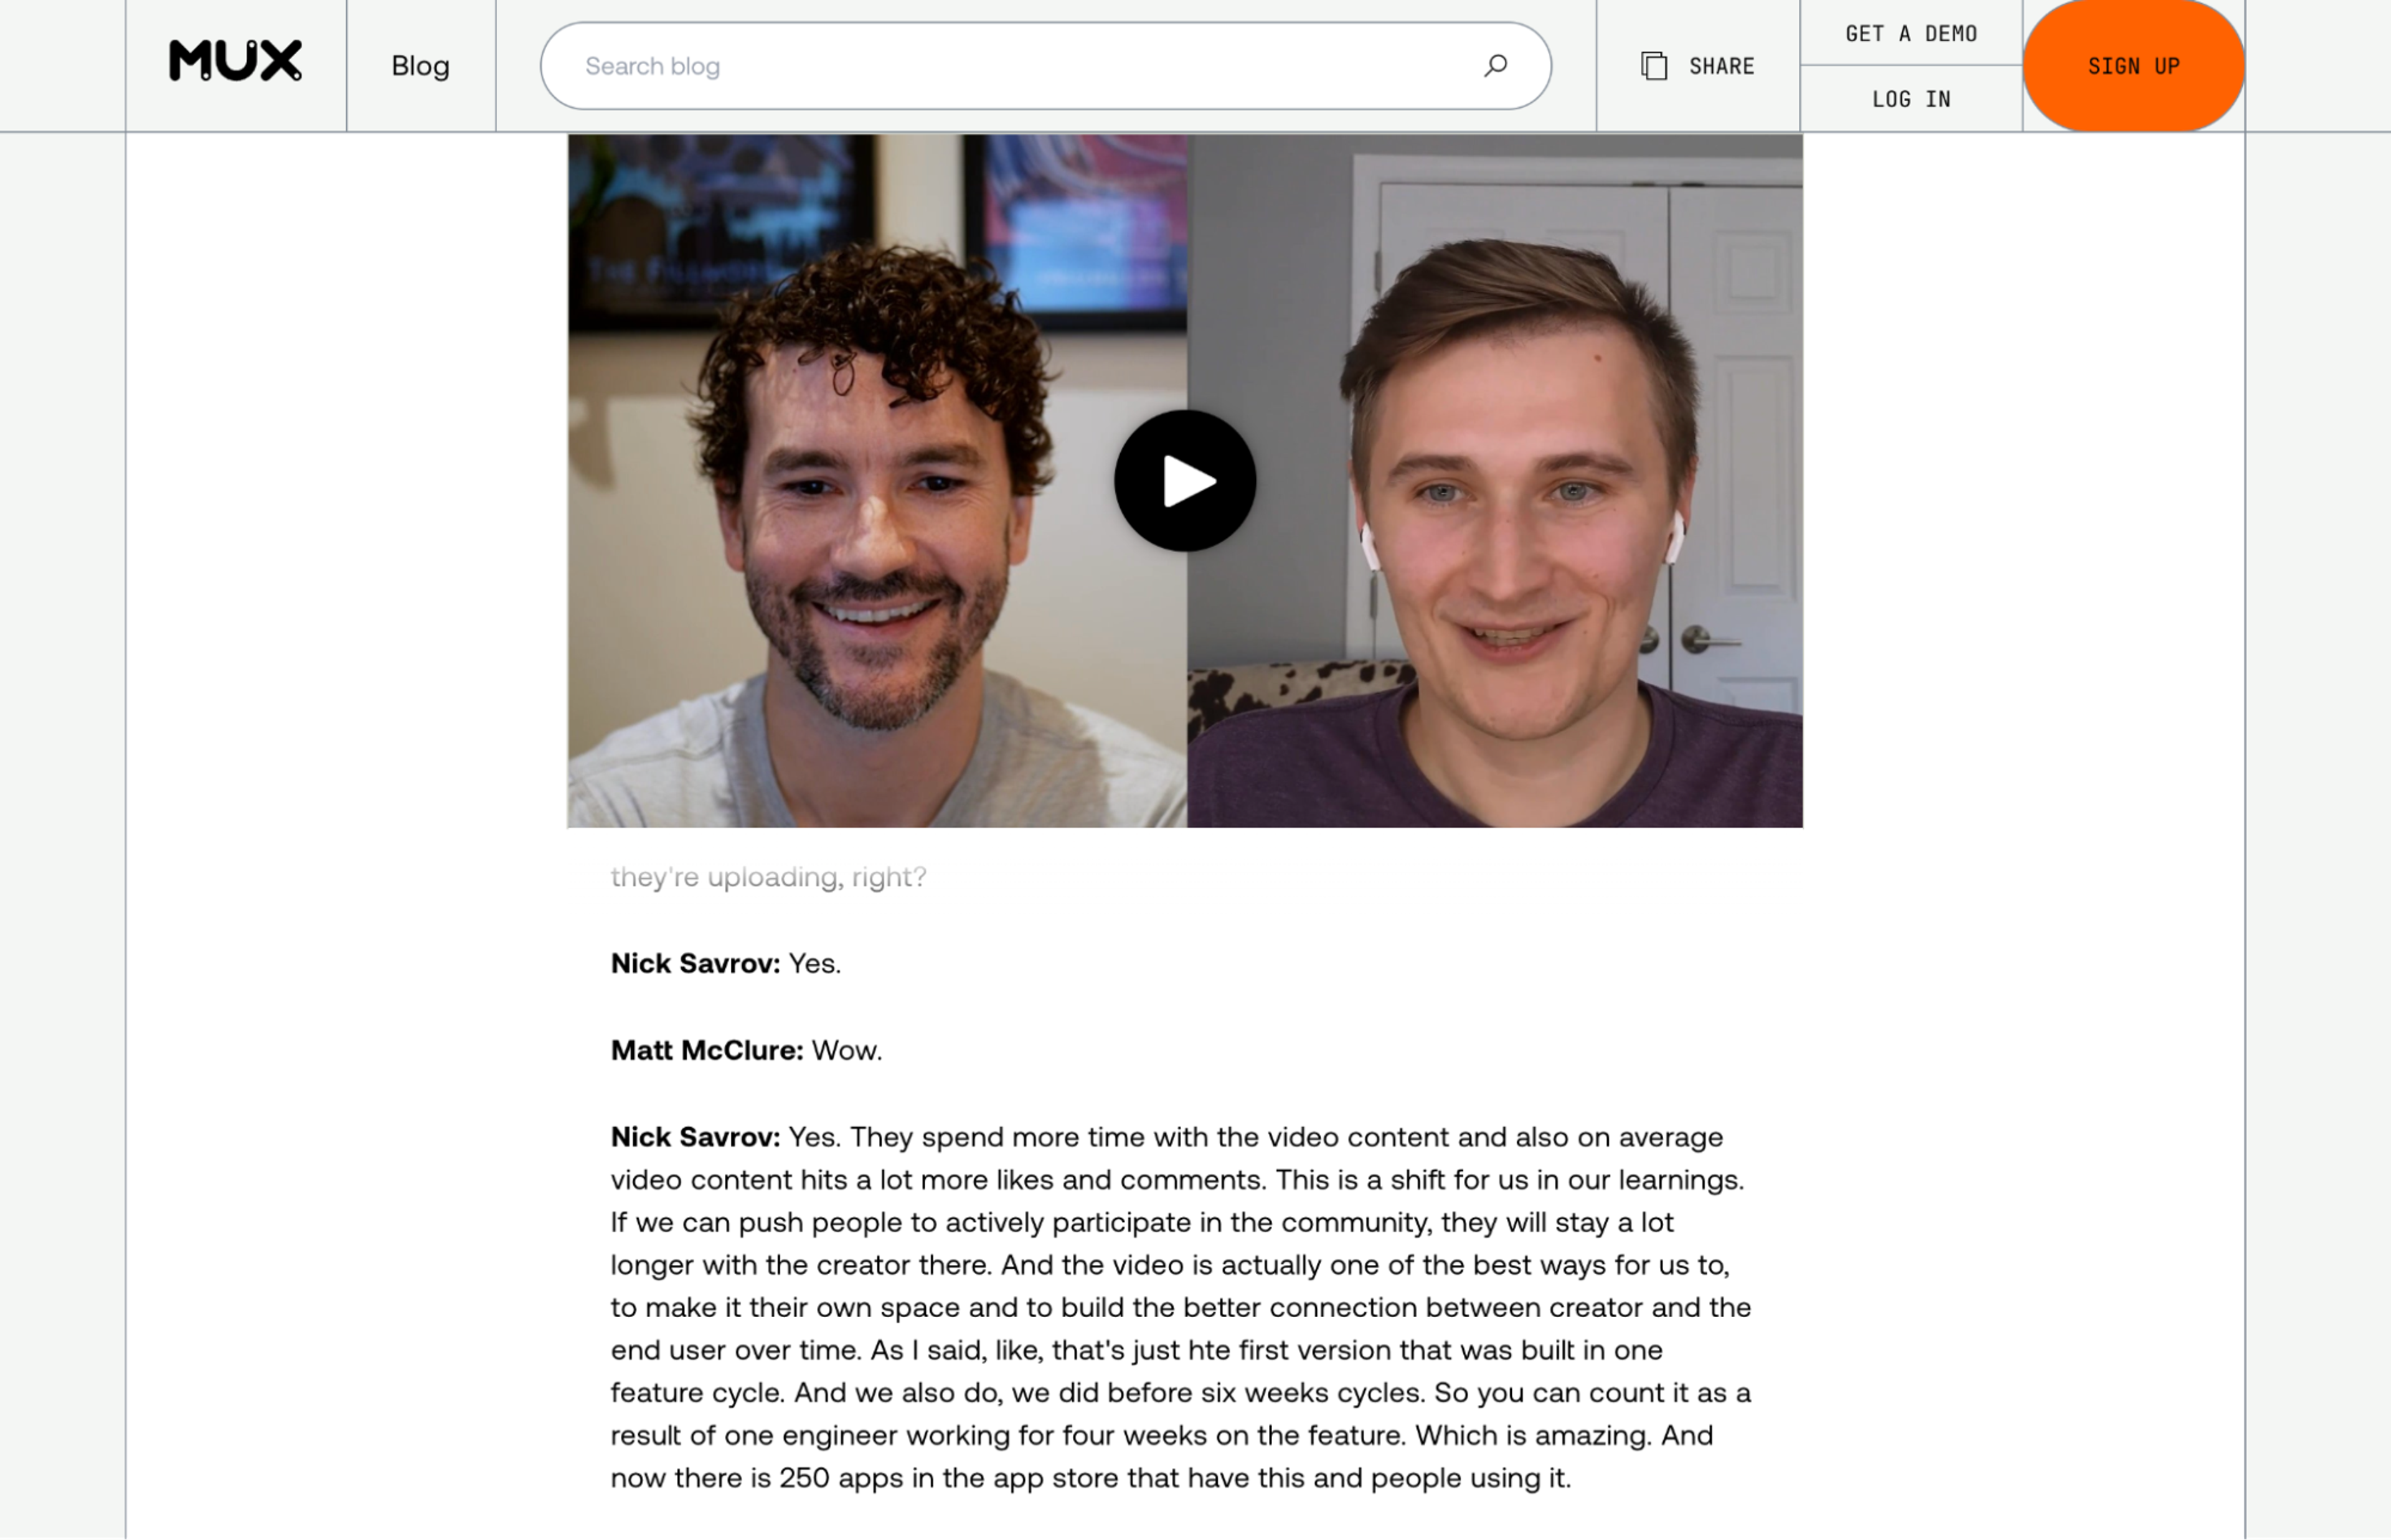
There’s a few things we can do to Christian’s implementation to make it a bit nicer for our blog. First, we can generate our transcript automatically. Second, we can label our speakers so readers know who’s talking without having to play the videos. And finally, we can add some formatting – like paragraph breaks – to make the reading experience even nicer. Here’s what it all looks like:
And if you’re impatient and don’t want to read anymore, you can cut to the chase and check out the code here.
Generate your transcript with Mux’s AI-powered auto-generated captions
Where does our transcript come from? Turns out, you can turn a caption track into a transcript pretty easily. And you can get a caption track from Mux using our AI-powered auto-generated captions.
Let’s talk about how to enable auto-generated captions, and how to turn those captions into a transcript.
Enable auto-generated captions
When uploading a video to Mux through the dashboard or through the API, you can auto-generate captions with the generated_subtitles field, like this:
{
  "input": [
    {
      "url": "...",
        "generated_subtitles": [
            {
              "language_code": "en",
              "name": "English CC"
            }
        ]
      }
  ],
  "playback_policy": "public",
  "encoding_tier": "smart",
  "mp4_support": "audio-only"
}
(Later on, we’ll be working with an audio-only static rendition of this video, so we added the mp4_support field here, too.)
Note that you can only enable auto-generated captions on videos in the smart encoding tier. Read more about encoding tiers here.
To learn about adding generated captions to direct uploads, or retroactively adding generated captions, be sure to check out our docs.
Turn your captions into CuePoints and a transcript.
Your video now has captions! Cool! For our next trick, let’s turn those captions into CuePoints and a transcript.
Let’s begin by downloading the captions so we can work with them. To do that, we can use the following endpoint:
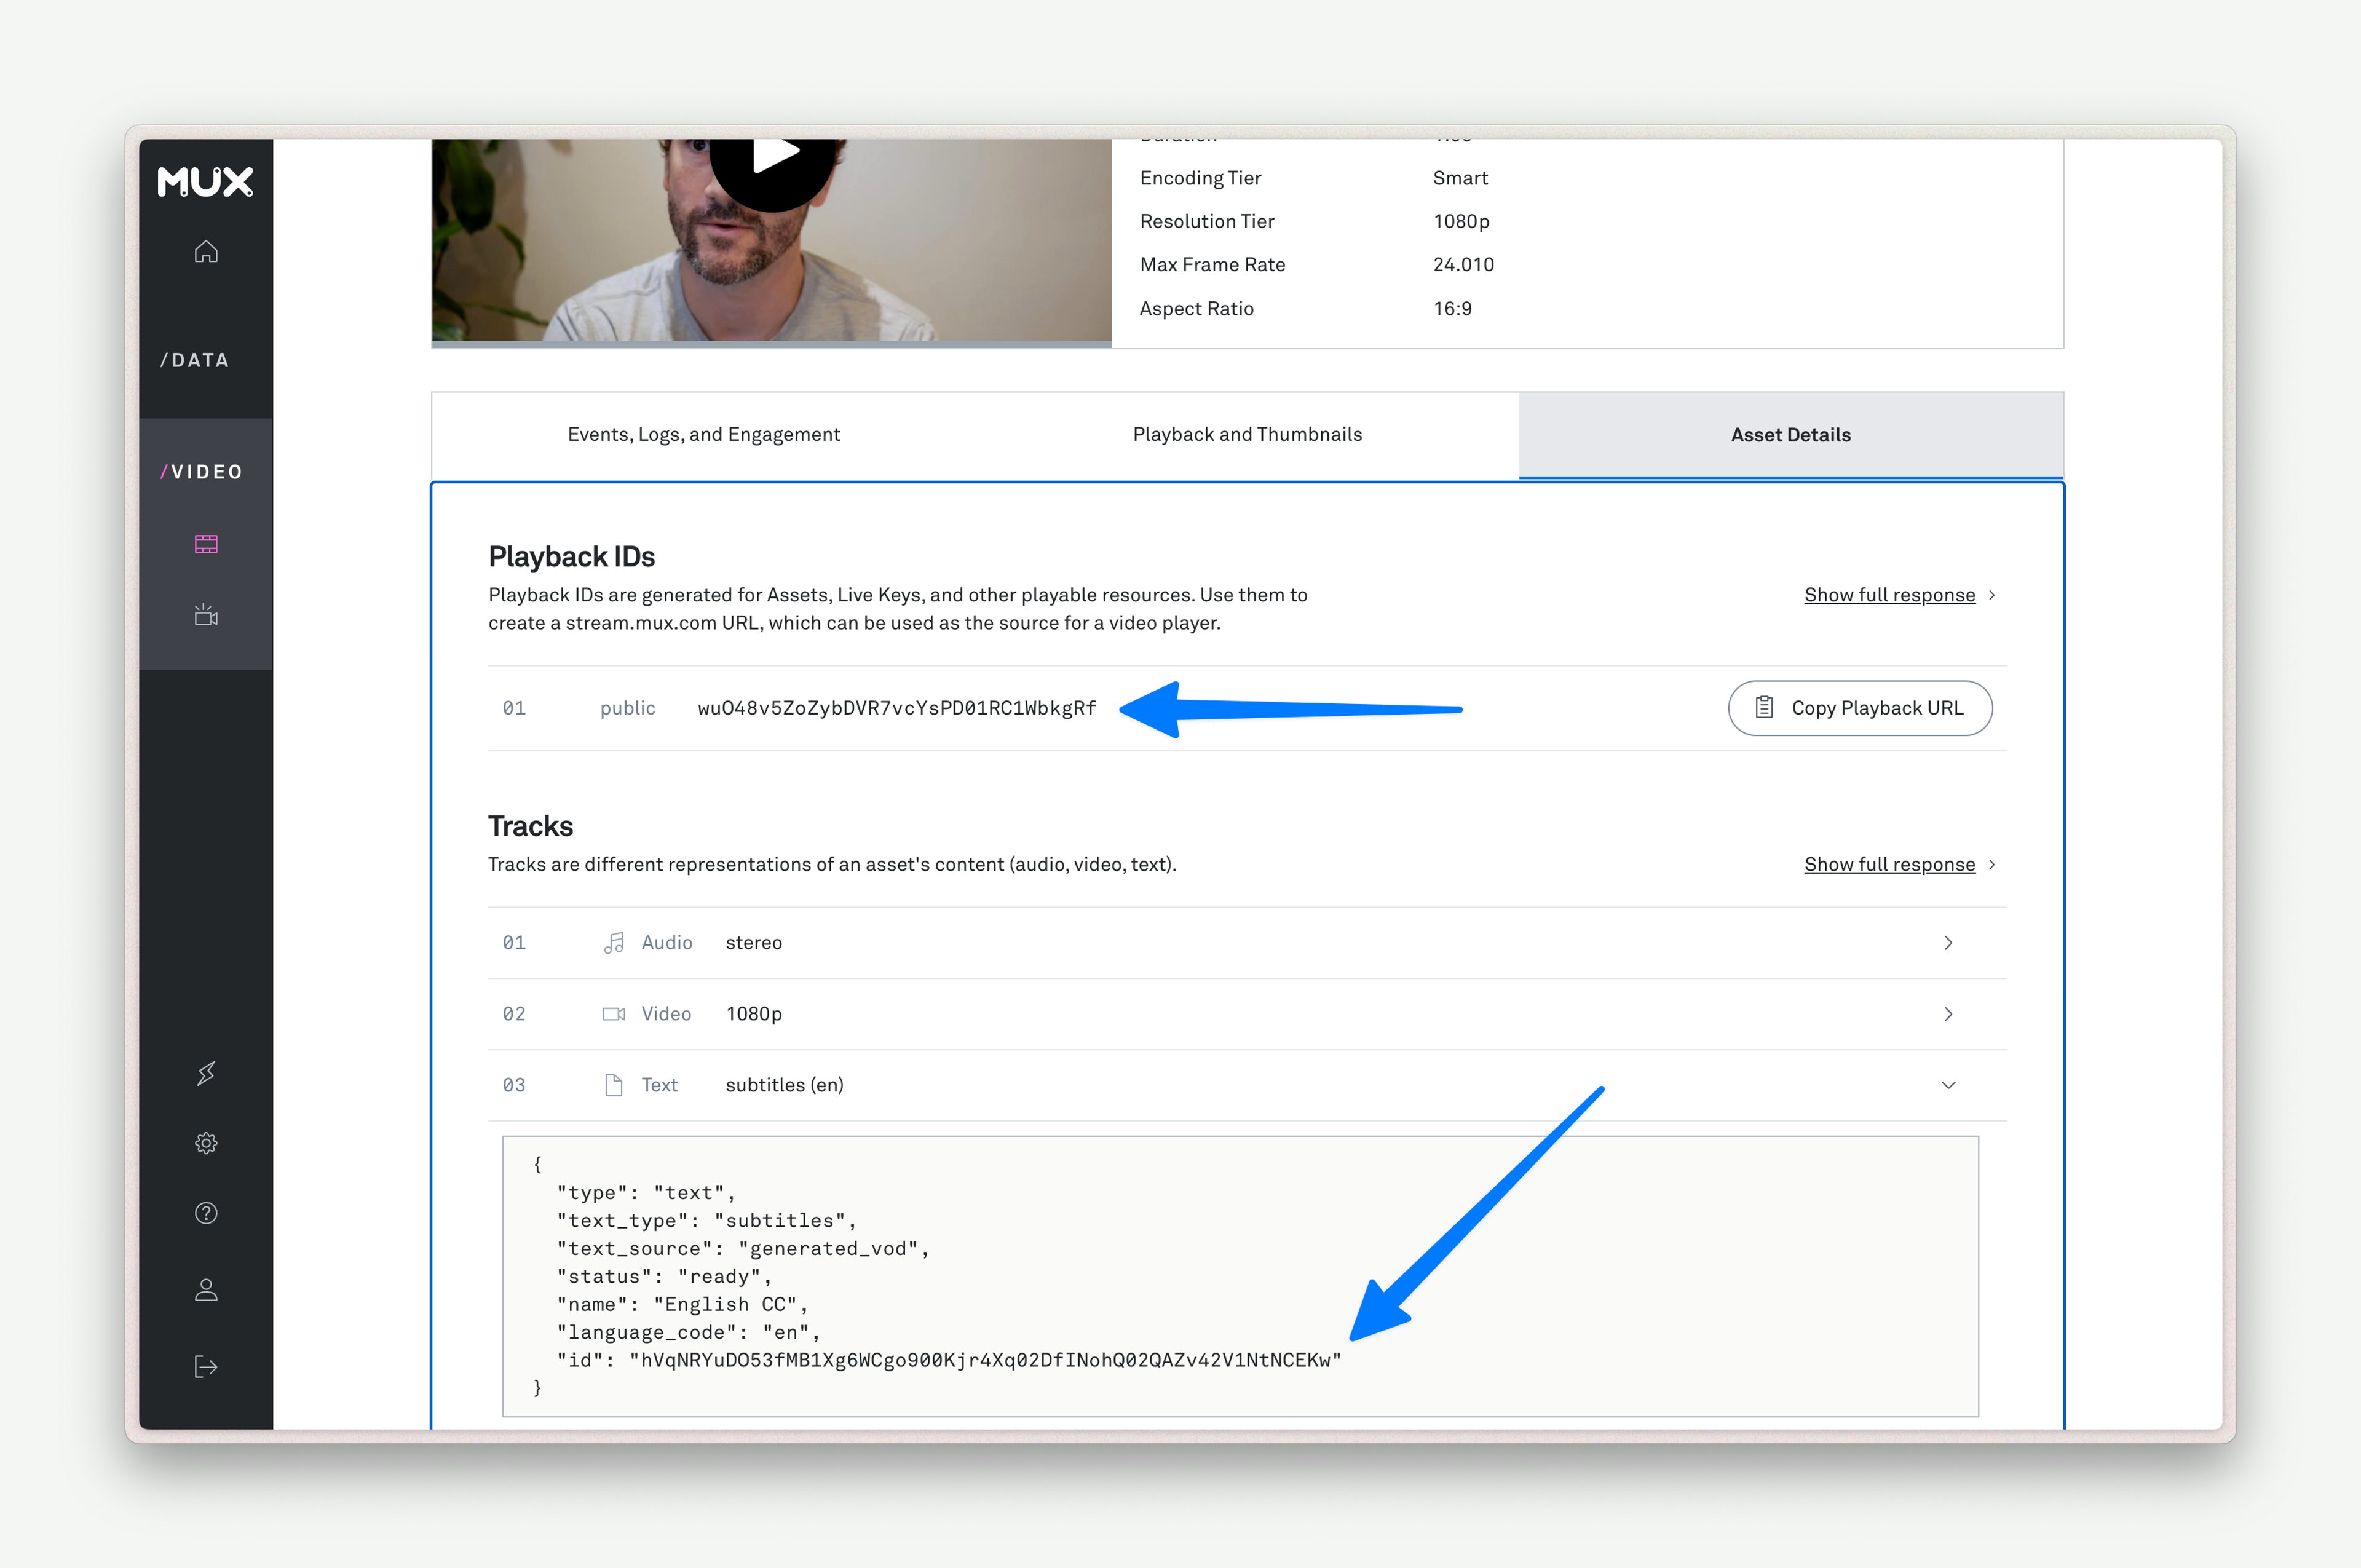
https://stream.mux.com/{PLAYBACK_ID}/text/{TRACK_ID}.vttBut where do PLAYBACK_ID and TRACK_ID come from? If you’re in a hurry, you can copy-paste them from your Mux dashboard. Or, you can get them programmatically with mux-node. Screenshot and code sample below.
import Mux from '@mux/mux-node';

// you may need to pass your Mux token to this constructor.
// check the mux-node docs for details
const client = new Mux();

const asset = await client.video.assets.retrieve(assetId);
const transcriptTrack = asset.tracks.find(track => track.type === "text");
const playbackId = asset.playback_ids.find(playbackId => playbackId.policy === "public");

const TRACK_ID = transcriptTrack.id;
const PLAYBACK_ID = playbackId.id;
Cool. Now that we have a TRACK_ID and a PLAYBACK_ID, let’s go ahead and grab the text of our captions.
const vttUrl = `https://stream.mux.com/${PLAYBACK_ID}/text/${TRACK_ID}.vtt`;
const vttResponse = await fetch(transcriptUrl);
const vttText = await transcriptResponse.text();
Rad. This is going really well. Let’s seal the deal by translating the captions into CuePoints. Our captions come in a format called WebVTT. It looks like this:
WEBVTT

1
00:00:00.000 --> 00:00:05.120
you're seeing people actually write more copy on video content that they're

2
00:00:05.120 --> 00:00:05.600
uploading rather

3
00:00:05.600 --> 00:00:06.600
than how.

4
00:00:06.600 --> 00:00:09.920
Yes, they spending more time with the video content.

5
00:00:09.920 --> 00:00:14.800
And also on average, video content hits a lot more likes and comments.
There’s a few different ways to parse WebVTT. For our purposes, the library subtitle will do!
import { parseSync } from "subtitle";

const vttNodes = parseSync(vttText);
That’ll produce an object that looks like this:
[
  {
    "type": "header",
    "data": "WEBVTT"
  },
  {
    "type": "cue",
    "data": {
      "start": 0,
      "end": 512,
      "text": "you're seeing people actually write more copy on video content that they're"
    }
  },
  // additional vtt cues...
]
Well, that just about looks like the CuePoints we were talking about earlier! One last transformation to get us over the line.
const cuePoints = vttNodes
  .filter(node => node.type === "cue")
  .map(node => ({
    startTime: node.data.start / 1000,
    endTime: node.data.end / 1000,
    value: node.data.text,
  }));
Heck yeah. We now have an object that we can pass to our player and our interactive transcript component.
Here it is, all together:
import Mux from '@mux/mux-node';
import { parseSync } from "subtitle";

// you may need to pass your Mux token to this constructor.
// check the mux-node docs for details
const client = new Mux();

// get track id and playback id from asset
const asset = await client.video.assets.retrieve(assetId);
const transcriptTrack = asset.tracks.find(track => track.type === "text");
const playbackId = asset.playback_ids.find(playbackId => playbackId.policy === "public");

const TRACK_ID = transcriptTrack.id;
const PLAYBACK_ID = playbackId.id;

// get subtitles from mux
const vttUrl = `https://stream.mux.com/${PLAYBACK_ID}/text/${TRACK_ID}.vtt`;
const vttResponse = await fetch(vttUrl);
const vttText = await vttResponse.text();

// turn subtitles into cuepoints
const vttNodes = parseSync(vttText);
const cuePoints = nodes
  .filter(node => node.type === "cue")
  .map(node => ({
    startTime: node.data.start / 1000,
    endTime: node.data.end / 1000,
    value: node.data.text,
}));Identify speakers with AssemblyAI
If your video has multiple speakers, readers need to know who’s talking. And if folks aren’t watching the video, they can’t pick it up from visual context. In other words, we need to identify our speakers in our transcript.
Since Mux doesn’t support this (yet?), we’ll need to turn to a third-party service that supports speaker identification. (If you want to impress your friends at parties, you can also call it “speaker diarization” 🥳) Today, we’re using AssemblyAI. We’ll be able to send AssemblyAI the audio from our video and it’ll tell us who’s speaking.
Getting your speaker identities
For this bit, you’ll need to set up an account and get your API key from their dashboard. You’ll also need to tell your function who’s speaking. (After all, how else would it know what to name your speakers?) Finally, you’ll also need to make sure that you have static audio renditions enabled for your video. (If you’ve been following along, you enabled them earlier with the mp4_support field earlier.)
And then, I kid you not, this is the simple code to get a transcript with speaker identities:
const assemblyai = new AssemblyAI({
  apiKey: process.env["ASSEMBLY_AI_KEY"]
});

// AssemblyAI will identify speakers as "A" and "B". Here, we give them names.
const speakers = { "A": "Matt", "B": "Nick" };

const aaiTranscript = await assemblyai.transcripts.transcribe({
  audio_url: `https://stream.mux.com/${PLAYBACK_ID}/audio.m4a`,
  speaker_labels: true,
  speakers_expected: Object.keys(speakers).length,
});
aaiTranscript will be a huge object filled with all sorts of metadata. What we’re most interested in, though, is aaiTranscript.utterances. (An utterance, by the way, is a continuous block of speech.) This object will tell us what was said, and by whom.
utterances: [
  {
    "confidence": 0.889725294117647,
    "start": 440,
    "end": 6334,
    "speaker": "A",
    "text": "You're seeing people actually write more copy on video content that they're uploading rather than yes, wow.",
    "words": [...]  // an array of every word. Gonna skip that for brevity's sake.
  },
  {
    "confidence": 0.941572638888889,
    "start": 6422,
    "end": 65280,
    "speaker": "B",
    "text": "Yes, they spending more time with the video content. And also, on average, video content hits a lot more likes and comments. This is shift for us in our learnings. If we can push people to actively participate in the community, they will stay a lot longer with the creator there. And the video is actually one of the best ways for us to make it their own space and to build the better connection between creator and the end user over time. As I said, that's just the first version that was built in one feature cycle, and we also did before six week cycles. So you can count it as a result of one engineer working for four weeks on the future, which is amazing. And now there is 250 apps in the app store that have this and people using it.",
    "words": [...]
  }
],CuePoints with speaker identities
If you’re okay with longer cues, you can just take this object and provide it to Mux Player. Unlike in the last section, instead of storing just text, we’ll store both the speaker and the text.
const cuePoints = aaiTranscript.utterances.map(utterance => ({
  startTime: utterance.start / 1000,
  endTime: utterance.end / 1000,
  value: {
    speaker: utterance.speaker,
    text: utterance.text
  }
}))
Utterances can be kinda long, though. If you would prefer the shorter cues that we got in our previous section, I’d suggest using AssemblyAI to generate a VTT file with shorter cues1:
const vttText = await assemblyai.transcripts.subtitles(aaiTranscript.id, "vtt");To identify the speaker of each cue, we’re going to use aaiTranscript.words. Just like aaiTranscript.utterances gave us the speaker for every utterance, words will give us the speaker for every word.
It just takes a small modification to our VTT script from the previous section to identify the speaker of each cue…
import { parseSync } from "subtitle";
const vttNodes = parseSync(vttText);
const cuePoints = vttNodes
.filter(node => node.type === "cue")
.map(node => {
const wordInNode = aaiTranscript.words.find(
word => word.start >= node.data.start && word.end <= node.data.end);
return {
startTime: node.data.start / 1000,
endTime: node.data.end / 1000,
value: {
speaker: speakers[wordInNode?.speaker],
text: node.data.text
},
}
}
);Making it look pretty
Finally, let’s make some small changes to the TranscriptRenderer we talked about in the other post. If this is the first cue from a speaker, let’s add their name. And if it’s the last cue from a speaker, let’s follow it with a paragraph break.
const TranscriptRenderer = ({ cuePoints = [] }: { cuePoints: CuePoint[] }) => {
return (
<div className="transcript">
{cuePoints.map((cuePoint, i) => {
const previousSpeaker = cuePoints[i - 1];
const currentSpeaker = cuePoint.speaker;
const nextSpeaker = cuePoints[i + 1];
const name = currentSpeaker !== previousSpeaker
? <b>{currentSpeaker}: </b>
: null;
let spacer = null;
if (i < cuePoints.length - 1) {
spacer = currentSpeaker === nextSpeaker
? " "
: <><br/><br/></>
}
return (
<Fragment key={cuePoint.time}>
{currentSpeaker}
<TranscriptCuePointRenderer cuePoint={cuePoint} />
{spacer}
</Fragment>
);
})}
</div>
);
};Which makes it look like this!
Formatting text with ChatGPT
There’s one last bit of polish I want to apply before we head out. Sometimes, when a speaker speaks for a while, their text ends up being a bit long. It sure would be nice if there were paragraph breaks every so often to improve legibility.
Luckily, LLMs are great at this kind of task. Let’s ask GPT-4o to add some paragraph breaks. The easiest way to do this would be to just feed the model our entire CuePoints object and ask for some new lines. However, feeding an LLM a bunch of data it won’t use (like startTime and endTime) would increase latency (and cost). So let’s create a smaller object for the model to consume…
const cues = aaiCuePoints.map(cue => ({
    speaker: cue.value.speaker,
    text: cue.value.text
  }))
And then feed that to the model. First, you’ll need to set up the OpenAI SDK. Then, we’ll use that SDK to ask the model to add line breaks. We’ll also use ChatGPT’s new Structured Outputs API to make sure that our output object is of the correct format.
import OpenAI from "openai";
import z from "zod";
import { zodResponseFormat } from "openai/helpers/zod";

// initialize OpenAI client
const openai = new OpenAI({
  apiKey: process.env["OPEN_API_KEY"],
});

// define a response format that's identical to the input format
const cueFormat = z.array(z.object({
  speaker: z.string(),
  text: z.string(),
}));
const responseFormat = z.object({ cues: cueFormat });

// ask ChatGPT nicely.
const completion = await openai.chat.completions.create({
  messages: [
    {
      role: "system",
      content:
        "You are an AI that processes video transcripts to make them more readable. I have a JSON object representing a transcript. The transcript is broken into cues. Each cue contains a speaker and some text. The UI will concatenate these cues after you have completed your task. Your task is to add a paragraph break (represented by a pair of newline characters: '\n\n') where a speaker changes topics or where a logical pause would naturally occur, making it easier to read. Your output will be identical to the input, except for any paragraph breaks you add to the text field of the cues. You will not concatenate or split any cues, so the output will contain the same number of cues as the input.",
    },
    { role: "user", content: JSON.stringify(cues) },
  ],
  model: "gpt-4o-2024-08-06",
  temperature: 0.7, // don't get _too_ creative
  response_format: zodResponseFormat(responseFormat, "cues"),
});
Disclaimer: I’m not a prompt engineer and this is my first time using the ChatGPT API. If you have any suggestions, hit me up @darius_cepulis.
This one seems to work, though!
// ... cues before
{
  startTime: 37484,
  endTime: 41572,
  value: {
    speaker: "B",
    // one paragraph break, just where we need it
    text: "user over time.\n\nAs I said, that's just the first version",
  },
},
// ...cues after
One last change: normally, HTML will collapse those newline characters. In order to force the CSS to display, you’ll have to add the CSS white-space: pre to your styles. Et, voilà!
Homework
Here’s an example endpoint running on Val Town. Fork it, give it your asset ID and a list of speakers, and it’ll do the rest.
However, there’s more you can do!
First, the rendering code we wrote earlier relies on new lines (<br/> and \n) for line breaks. Ideally, you’d use <p/> paragraph tags instead.
Next, you might want this code to run automatically! Point a Mux Webhook at your endpoint and then save the data to your CMS:
export default async function(req: Request): Promise<Response> {
  const body = await request.json();
  const { type, data } = body

  if ( type === 'video.asset.track.ready') {
    // this might be our Mux auto-generated caption being added
    // if so, we can work with the VTT here
  } else if (type === 'video.asset.static_renditions.ready') {
    // our audio.m4a file is ready! We can now work with AssemblyAI
  } else {
    // handle other types of events
  }
  return Response.json({ message: 'ok' });
}
Finally (and this is important!)
Writing this whole blog post, I was reminded of the true nature of our ongoing AI craze. AI is an incredible tool, but it's imperfect. Right now, it works best when it does tedious tasks for us and we supervise it. For example: I can't live without GitHub Copilot where I'm supervising and approving suggestions that I understand. But I'd be hard-pressed to replace our docs with an AI, where a chatbot might provide incorrect suggestions to customers2.
Lucky for us, this is the good kind of AI task. You and I know what speaker labels and paragraph breaks are supposed to look like so we can easily supervise our models.
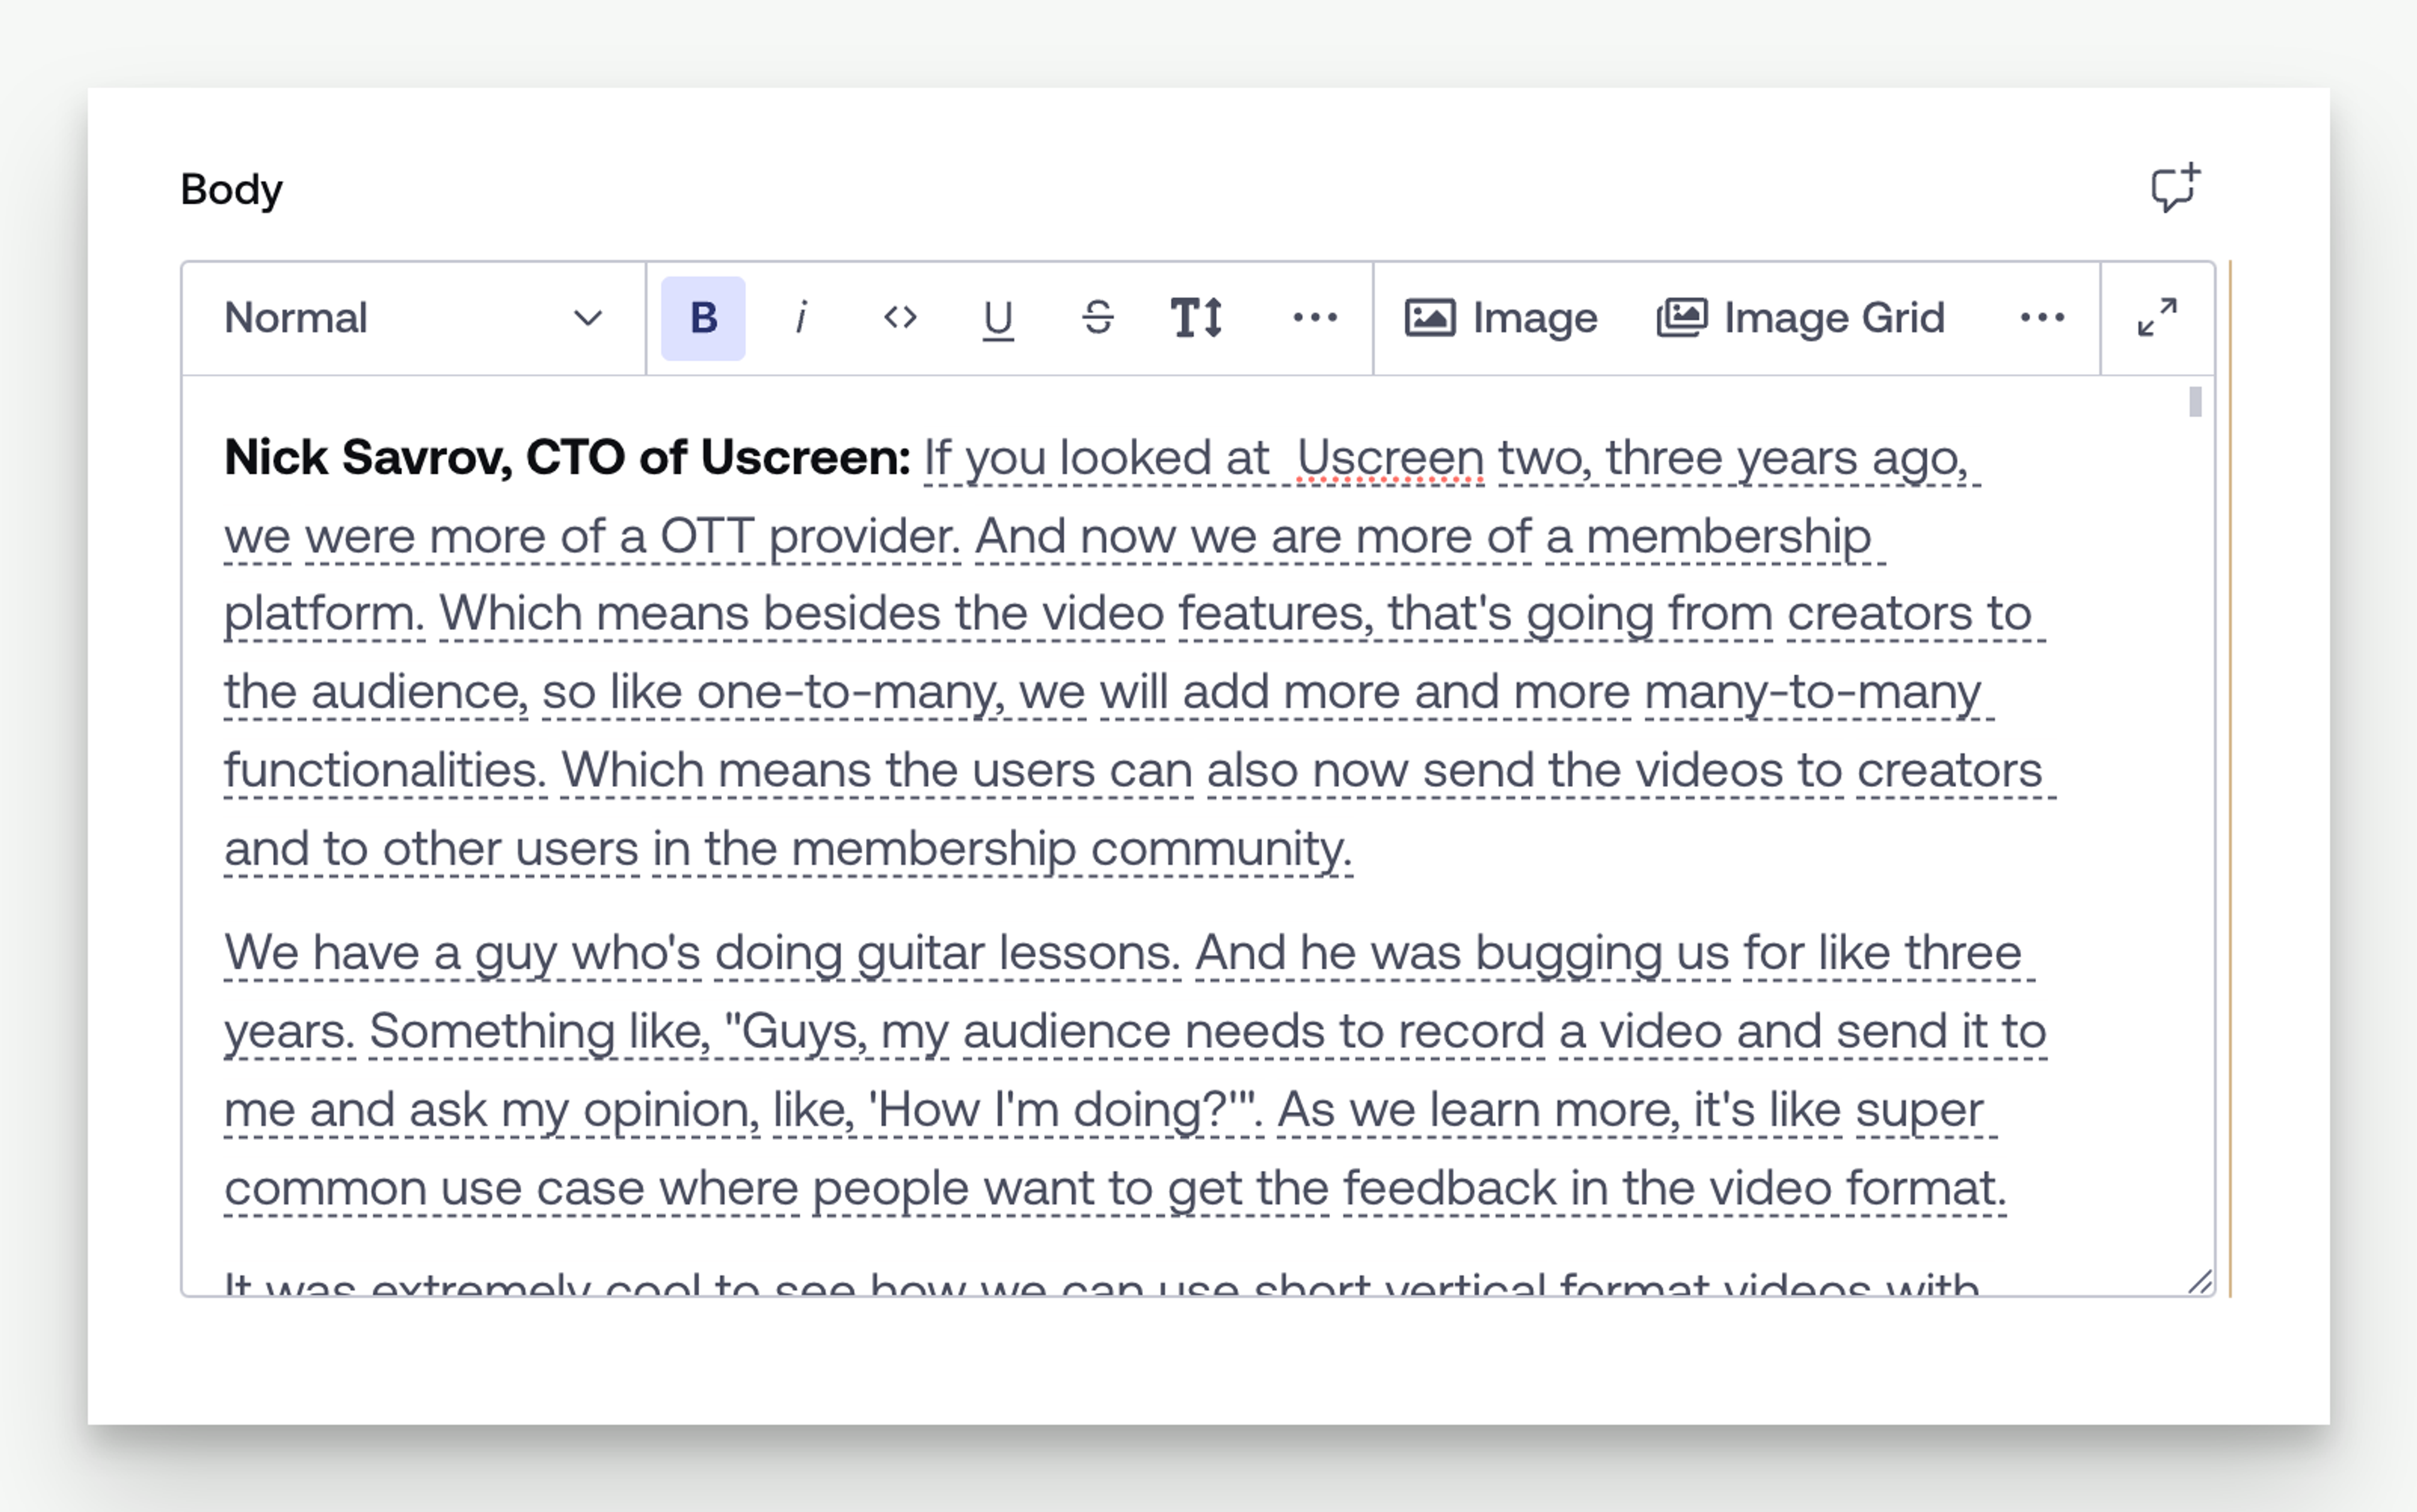
I'd suggest adding some sort of preview in your CMS so you can edit any mistakes your AI might’ve made. It might look like ours:
The End
You’ve got a lot of data attached to your Mux assets. Here, we played with auto-generated captions and static audio renditions to build an interactive video transcript. But we’ve also got thumbnails, storyboards, and video renditions, too. Combined with webhooks and all these fun, new, AI APIs, you can build some really cool stuff.
When you do, let us know – @MuxHQ!