High-performance video for your Astro application
Mux is the best way to quickly add video to your Astro application. Mux solves the hard problems with embedding, storing, streaming, and customizing video.
---
import { MuxPlayer } from '@mux/mux-player-astro';
---

<MuxPlayer
  playback-id={playbackId}
/>
Bring state of the art video infrastructure to your Astro application
Adaptive Bitrate Streaming
Leverage the latest technology in video streaming, and deliver optimized video to your viewers based on their network environment for the best possible viewing experience
Easily integrate into your app
Mux will integrate into whatever app you're building. Integrate with your CMS, or use our APIs to build your own video workflow
Full control of your playback
Mux Player gives you a customizable, accessible player with features like thumbnails and Chromecast built right in. Need more? You can bring your own HLS-compatible player, too.
Data for your viewing experience
Mux Data measures video quality-of-experience metrics, the same way you measure front-end page performance
How to add video to Astro
Quickly drop in a video with mux-player
The quickest way to add a video to your site is with Mux Player. Here's what Mux Player looks like in action:
---
import { MuxPlayer } from '@mux/mux-player-astro';
---

<Layout>
  <MuxPlayer playback-id={playbackId} />
</Layout>
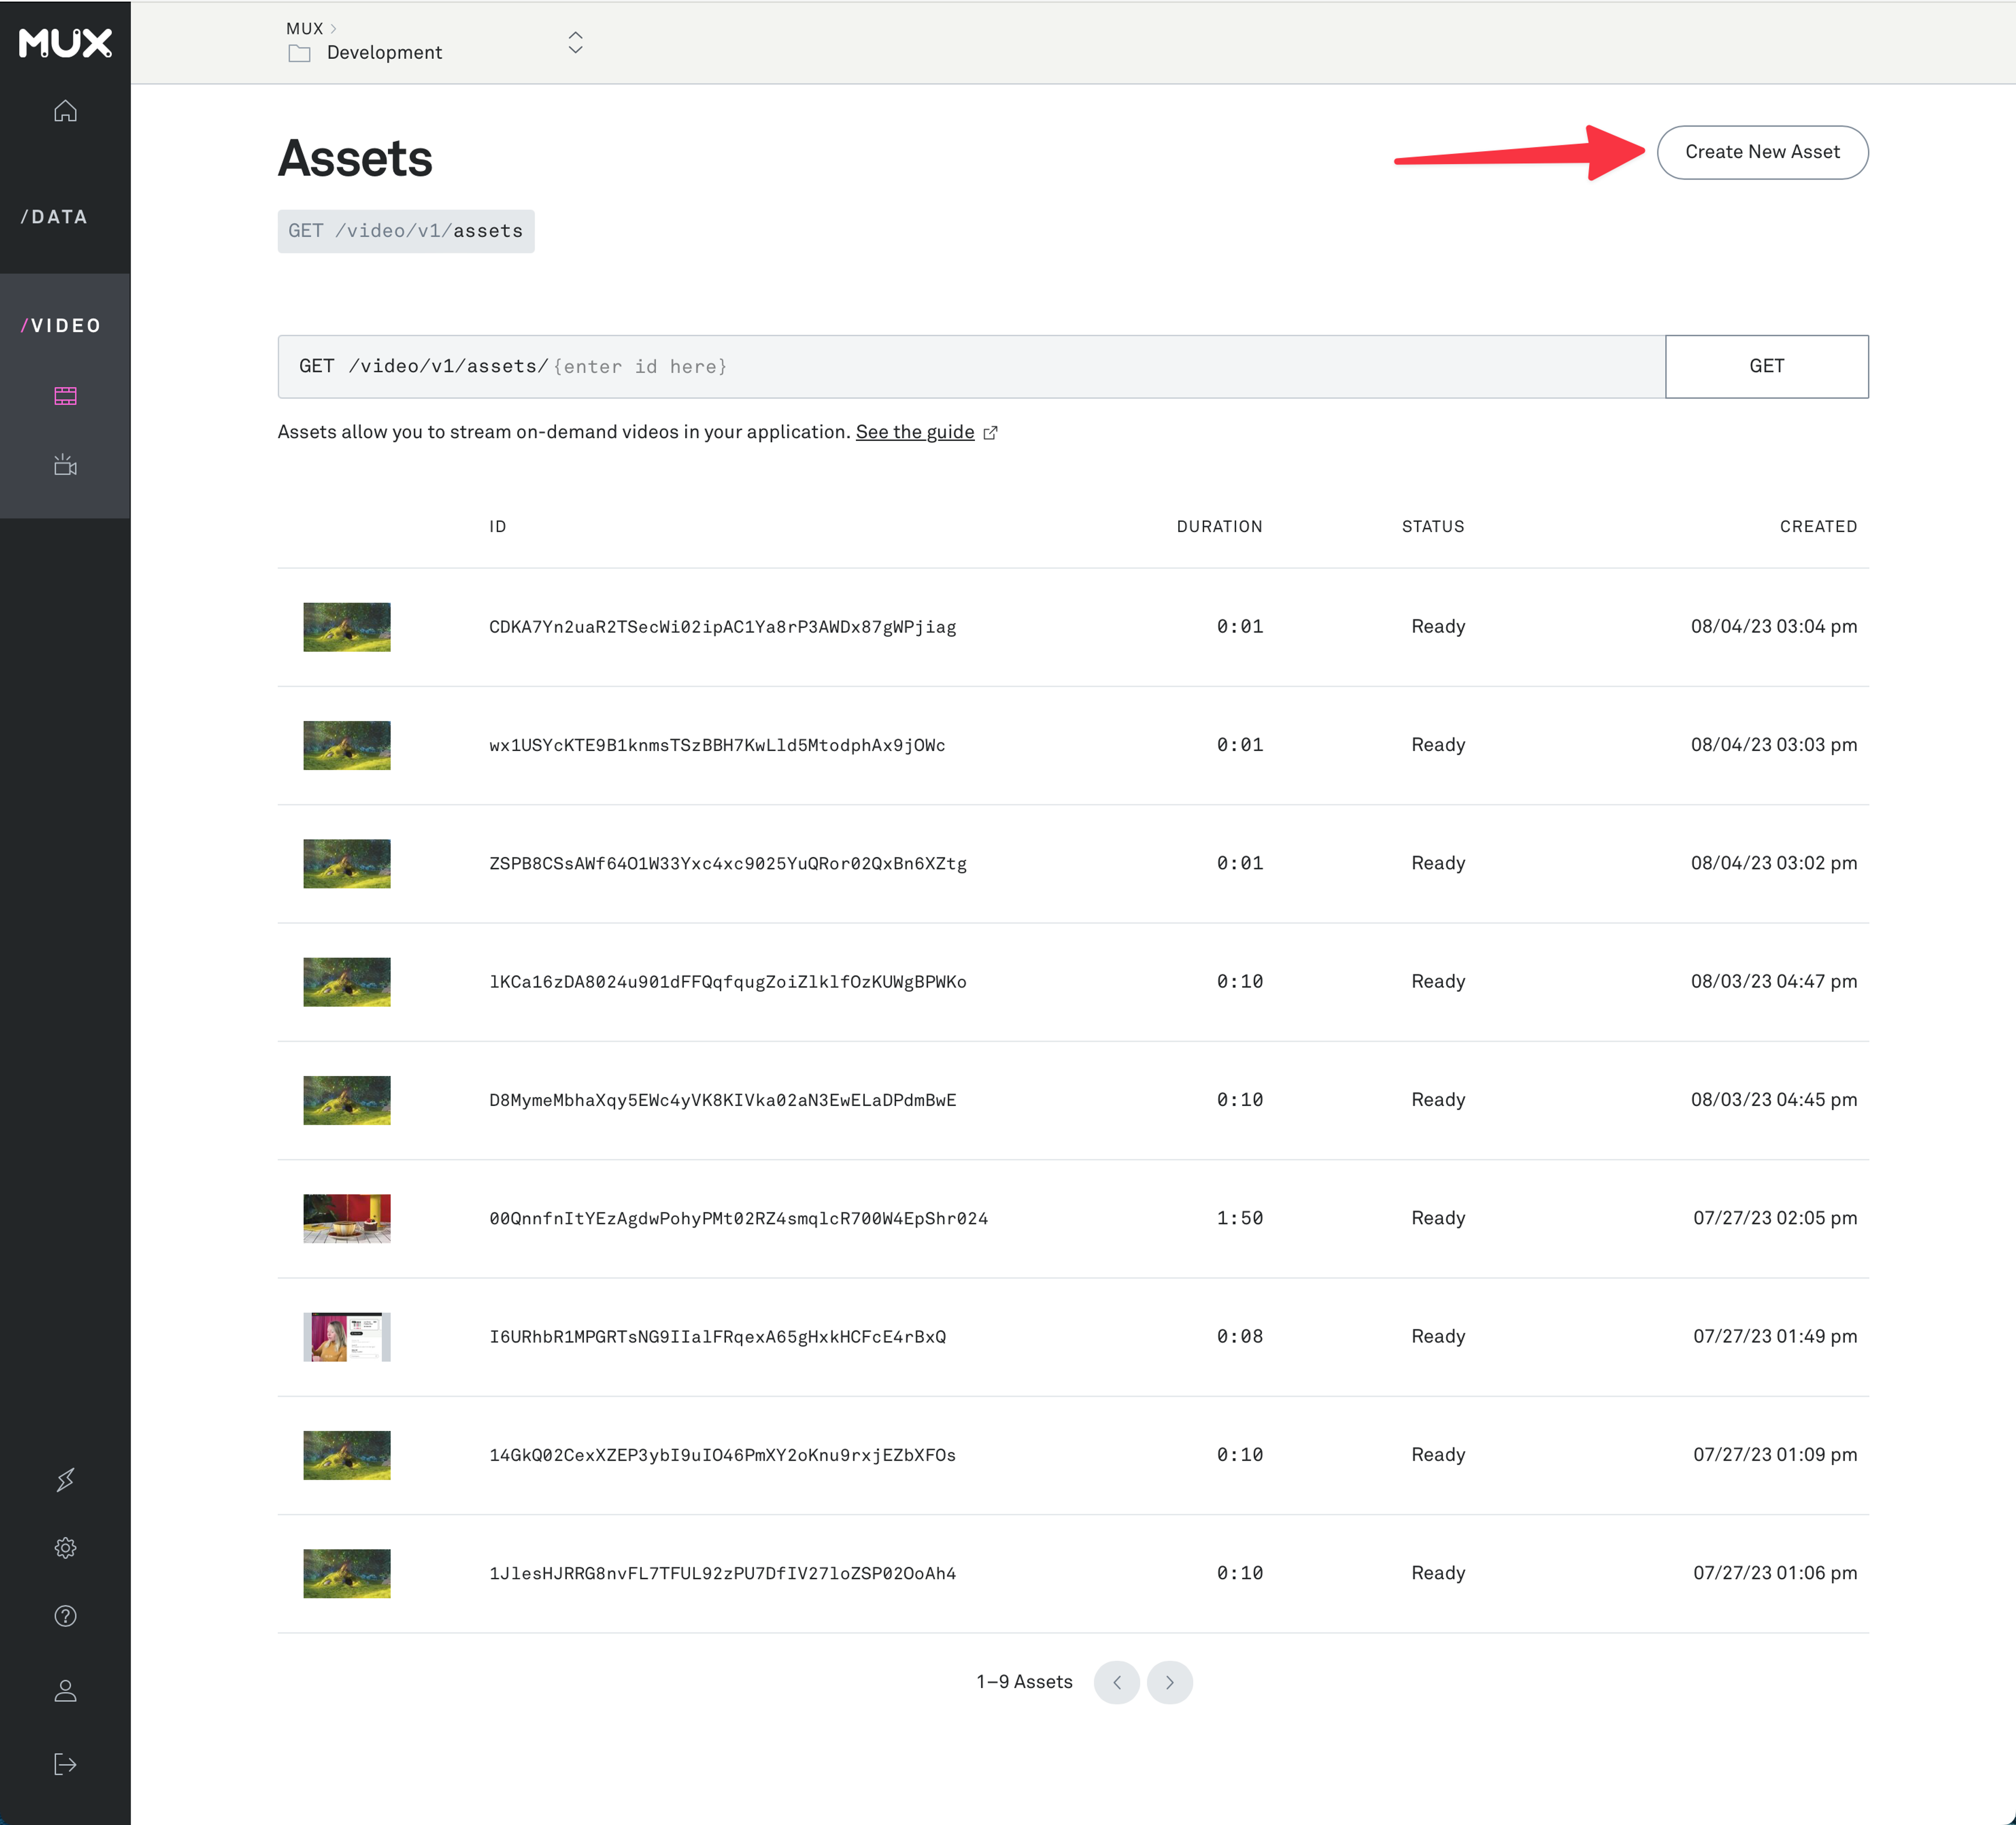
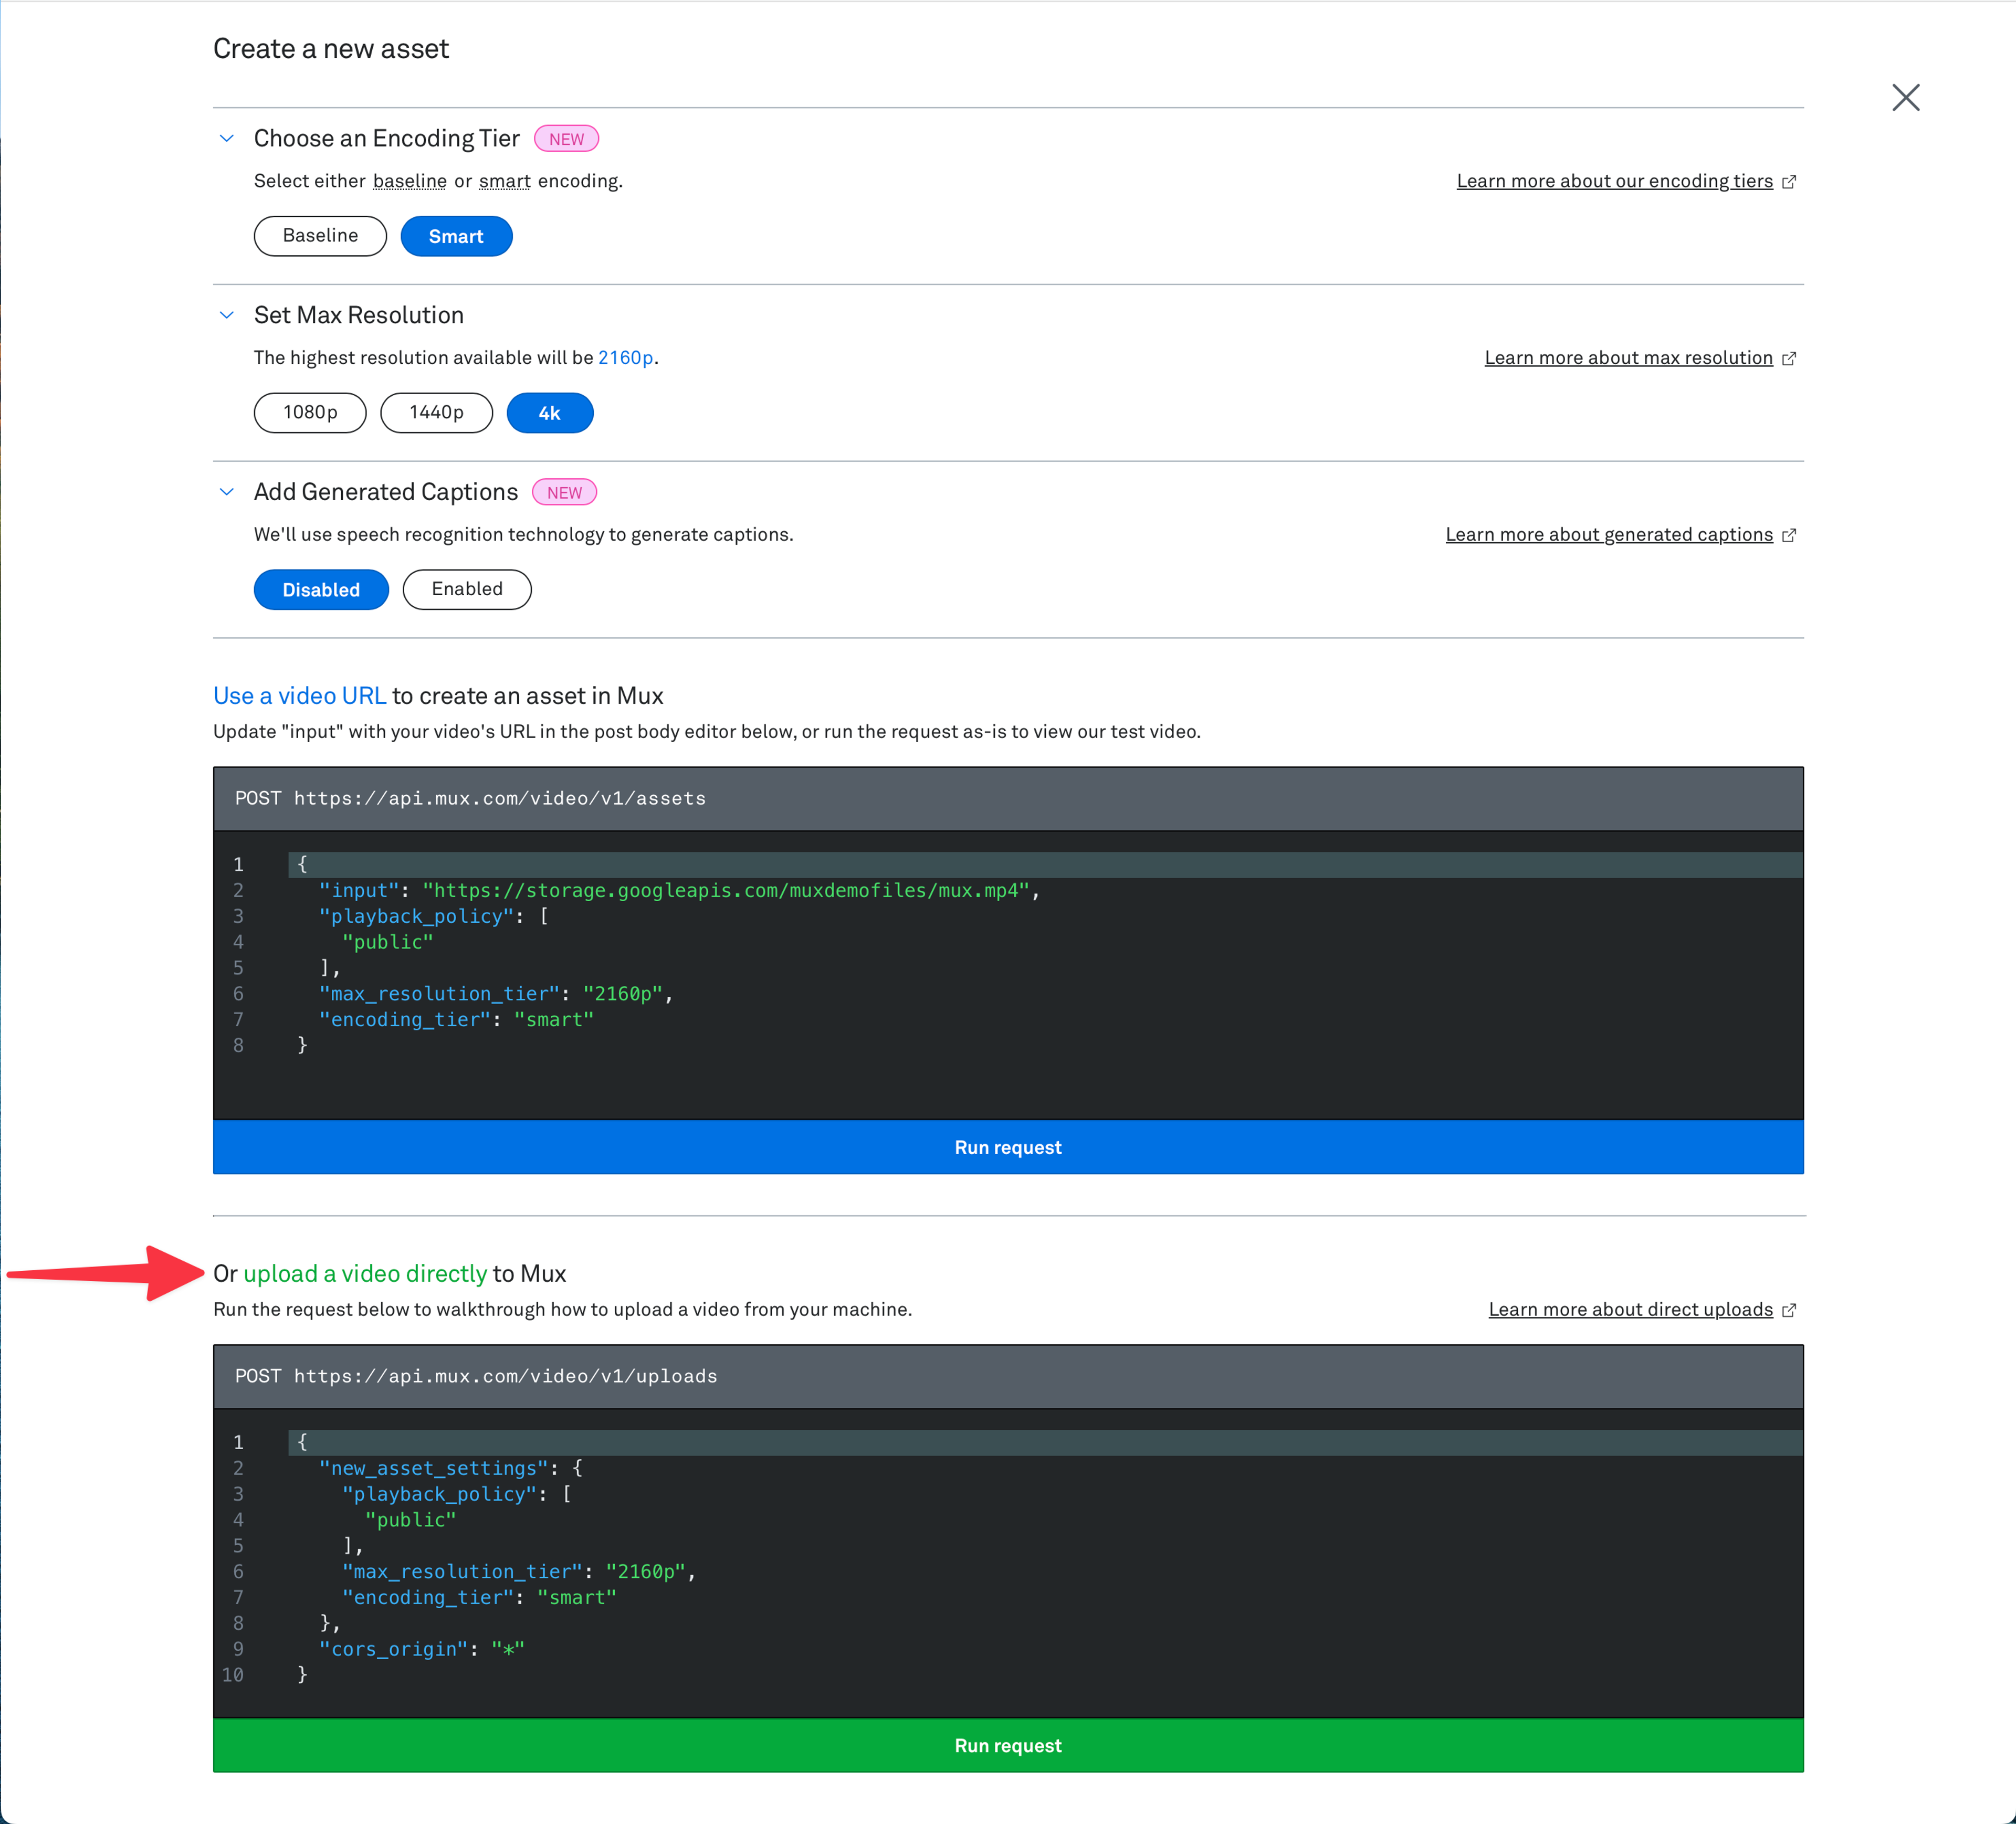
If your site has just a few videos, you might upload them to Mux directly thorugh the dashboard. In the Mux Dashboard, on your video assets page, select "Create New Asset". On the next screen, you can upload a video directly to Mux.


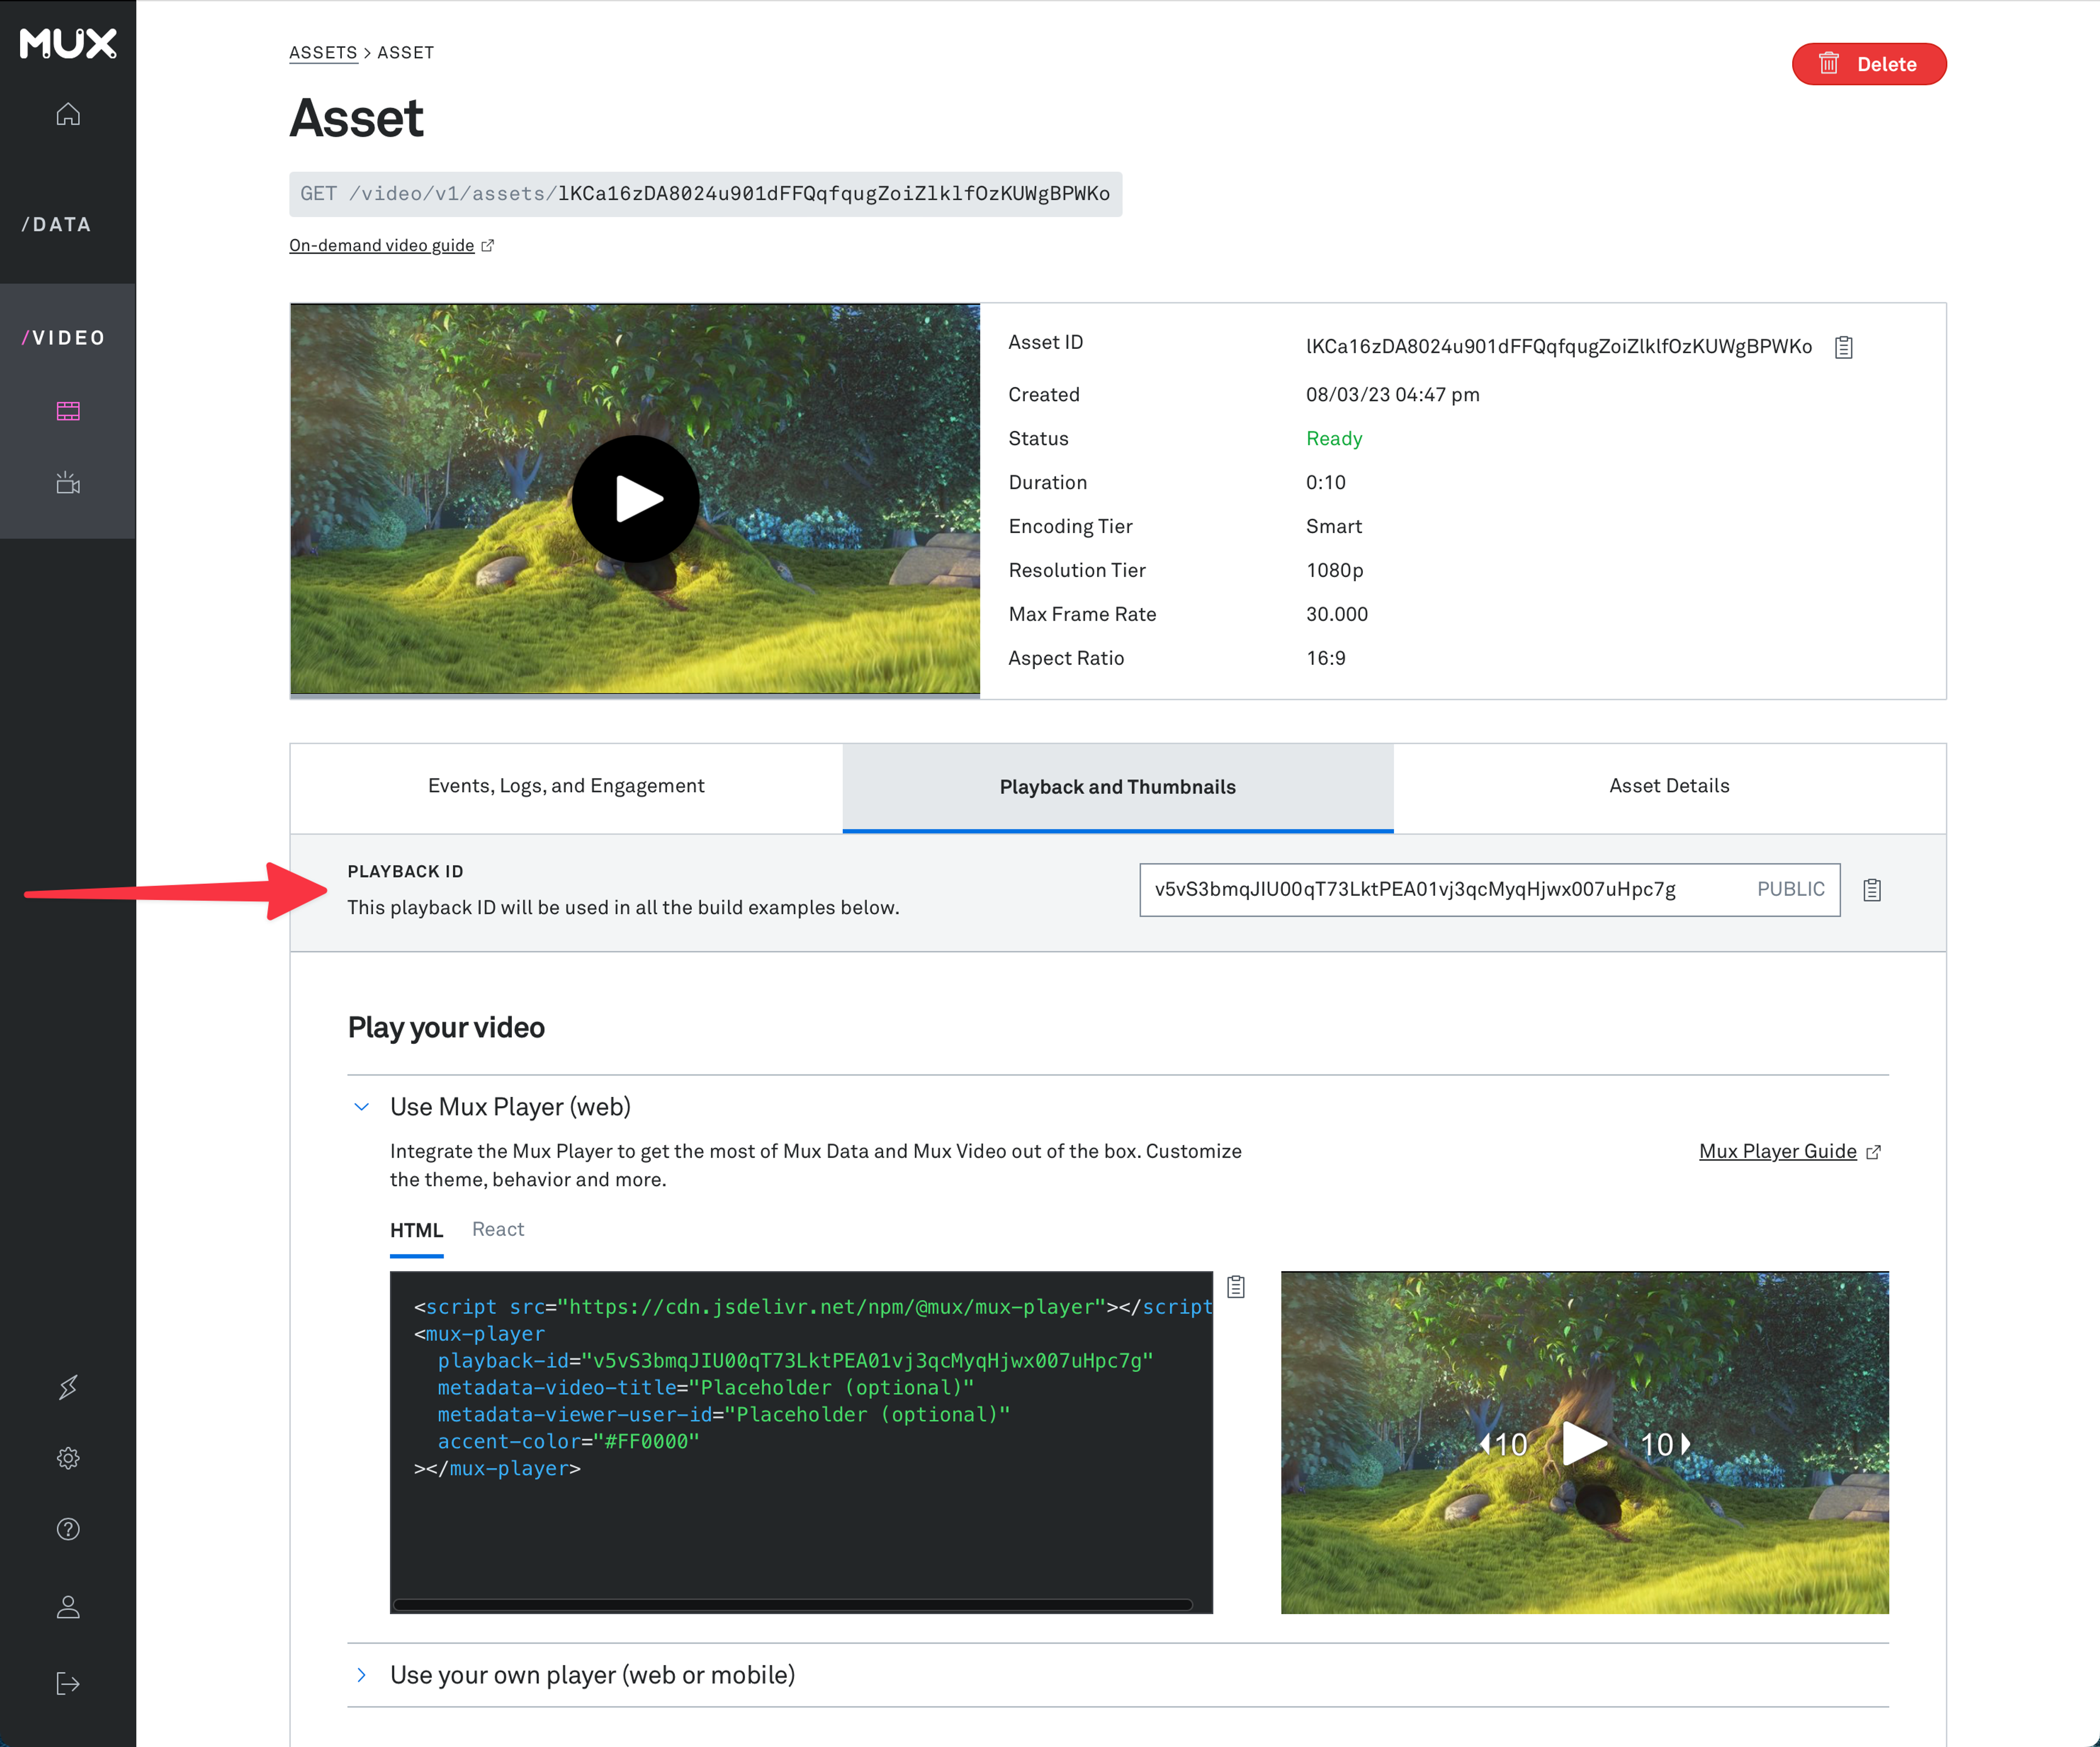
You'll then be able to see your new asset on your video assets page. When you click on the asset, you can find the asset's playback ID in the "Playback and Thumbnails" tab. This playback ID can be used in the playbackId prop of the Mux Player component.

You can read more about Mux Player, including how to customize its look and feel, over in the Mux Player guides.
If you're managing more videos, you might take a look at our CMS integrations.
Or, if you need more control over your video workflow, read on.
Use the API to build a video workflow
Want to build your own video workflow? Here's an example of what you can do with the Mux API.
Since we'll be doing a lot of work on the server that will be different for every user, make sure you place your app into SSR mode before you begin.
All good? Great. Let's move on.
Let's start by creating an upload URL using the Mux Node SDK and the Direct Uploads API. Users will upload to that URL with Mux Uploader:
---
import Layout from '../../layouts/Layout.astro';
import Mux from "@mux/mux-node";
import { MuxUploader } from '@mux/mux-uploader-astro';

const mux = new Mux({
  tokenId: import.meta.env.MUX_TOKEN_ID,
  tokenSecret: import.meta.env.MUX_TOKEN_SECRET
});

const upload = await mux.video.uploads.create({
  new_asset_settings: {
    playback_policy: ['public'],
    encoding_tier: 'baseline',
  },
  cors_origin: '*',
});
---
<Layout title="Upload a video to Mux">
  <MuxUploader endpoint={upload.url} />
</Layout>
Next, we'll listen for Mux webhooks. When we receive the notification that the video is ready, we'll add it to our database.
export const POST: APIRoute = async ({ request }) => {
  const { type, data } = await request.json();
  if (type === 'video.asset.ready') {
    saveAssetToDatabase(data);
  } else {
    /* handle other event types */
  }

  return new Response(JSON.stringify({ message: 'ok' }), {
    headers: {
      'Content-Type': 'application/json',
    },
  });
};
Finally, let's make a playback page. We retrieve the video from our database, and play it by passing its playbackId to Mux Player:
---
import Layout from '../../layouts/Layout.astro';
import { MuxPlayer } from '@mux/mux-player-astro';

const { playbackId } = Astro.params;
const { title } = getAssetFromDatabase(Astro.params);
---
<Layout title={title}>
  <MuxPlayer playback-id={playbackId} metadata={{ video_title: title}} />
</Layout>

<script>
	import '@mux/mux-player';
</script>
And we've got upload and playback. Nice!
What's next? Check out our full walkthrough in the docs, or the example project below:
Example Project

muxinc/examples/astro-uploader-and-player
This is a bare-bones starter application built with Astro that uses:
@MuxHQ was an absolute lifesaver for videos on a previous project. Thumbnails, truly instant play via livestreaming, resizing, whole bit. I’m often skeptical of third-party services but I never could’ve competed with the UX they let me deliver
WWW designer-developer for climate @watershed
Noteworthy: @muxhq is SO good! Amazing how fast that upload went…
CEO at Vercel
Mux is trusted by


No credit card required to start using Mux.