High-performance video for your Laravel application
Mux is the best way to quickly add video to your Laravel application. Mux solves the hard problems with embedding, storing, streaming, and customizing video.
// Authentication Setup
$config = MuxPhp\Configuration::getDefaultConfiguration()
    ->setUsername(getenv('MUX_TOKEN_ID'))
    ->setPassword(getenv('MUX_TOKEN_SECRET'));

// API Client Initialization
$assetsApi = new MuxPhp\Api\AssetsApi(
    new GuzzleHttp\Client(),
    $config
);

// Create Asset Request
$input = new MuxPhp\Models\InputSettings(["url" => "https://storage.googleapis.com/muxdemofiles/mux-video-intro.mp4"]);
$createAssetRequest = new MuxPhp\Models\CreateAssetRequest(["input" => $input, "playback_policy" => [MuxPhp\Models\PlaybackPolicy::PUBLIC_PLAYBACK_POLICY] ]);

// Ingest
$result = $assetsApi->createAsset($createAssetRequest);

// Print playback ID
print "Playback ID:" $result->getData()->getPlaybackIds()[0]->getId()
Bring state of the art video infrastructure to your Laravel application
Adaptive Bitrate Streaming
Leverage the latest technology in video streaming, and deliver optimized video to your viewers based on their network environment for the best possible viewing experience.
Easily integrate into your app
Mux will integrate into whatever app you're building. Integrate with your CMS, or use our APIs to build your own video workflow.
Full control of your playback
Mux delivers video in the HLS adaptive streaming format, you can use Mux Player, or use your own video player. You are in complete control.
Global multi-CDN delivery
Mux's Video API delivers video globally with a multi-CDN strategy to ensure every viewer has the best possible playback experience.
How to add video to Laravel
Quickly drop in a video with mux-player
The quickest way to add a video to your site is with Mux Player. Here's what Mux Player looks like in action:
<script src="https://cdn.jsdelivr.net/npm/@mux/mux-player"></script>
<mux-player
playback-id="EcHgOK9coz5K4rjSwOkoE7Y7O01201YMIC200RI6lNxnhs"
metadata-video-title="Test VOD"
metadata-viewer-user-id="user-id-007"
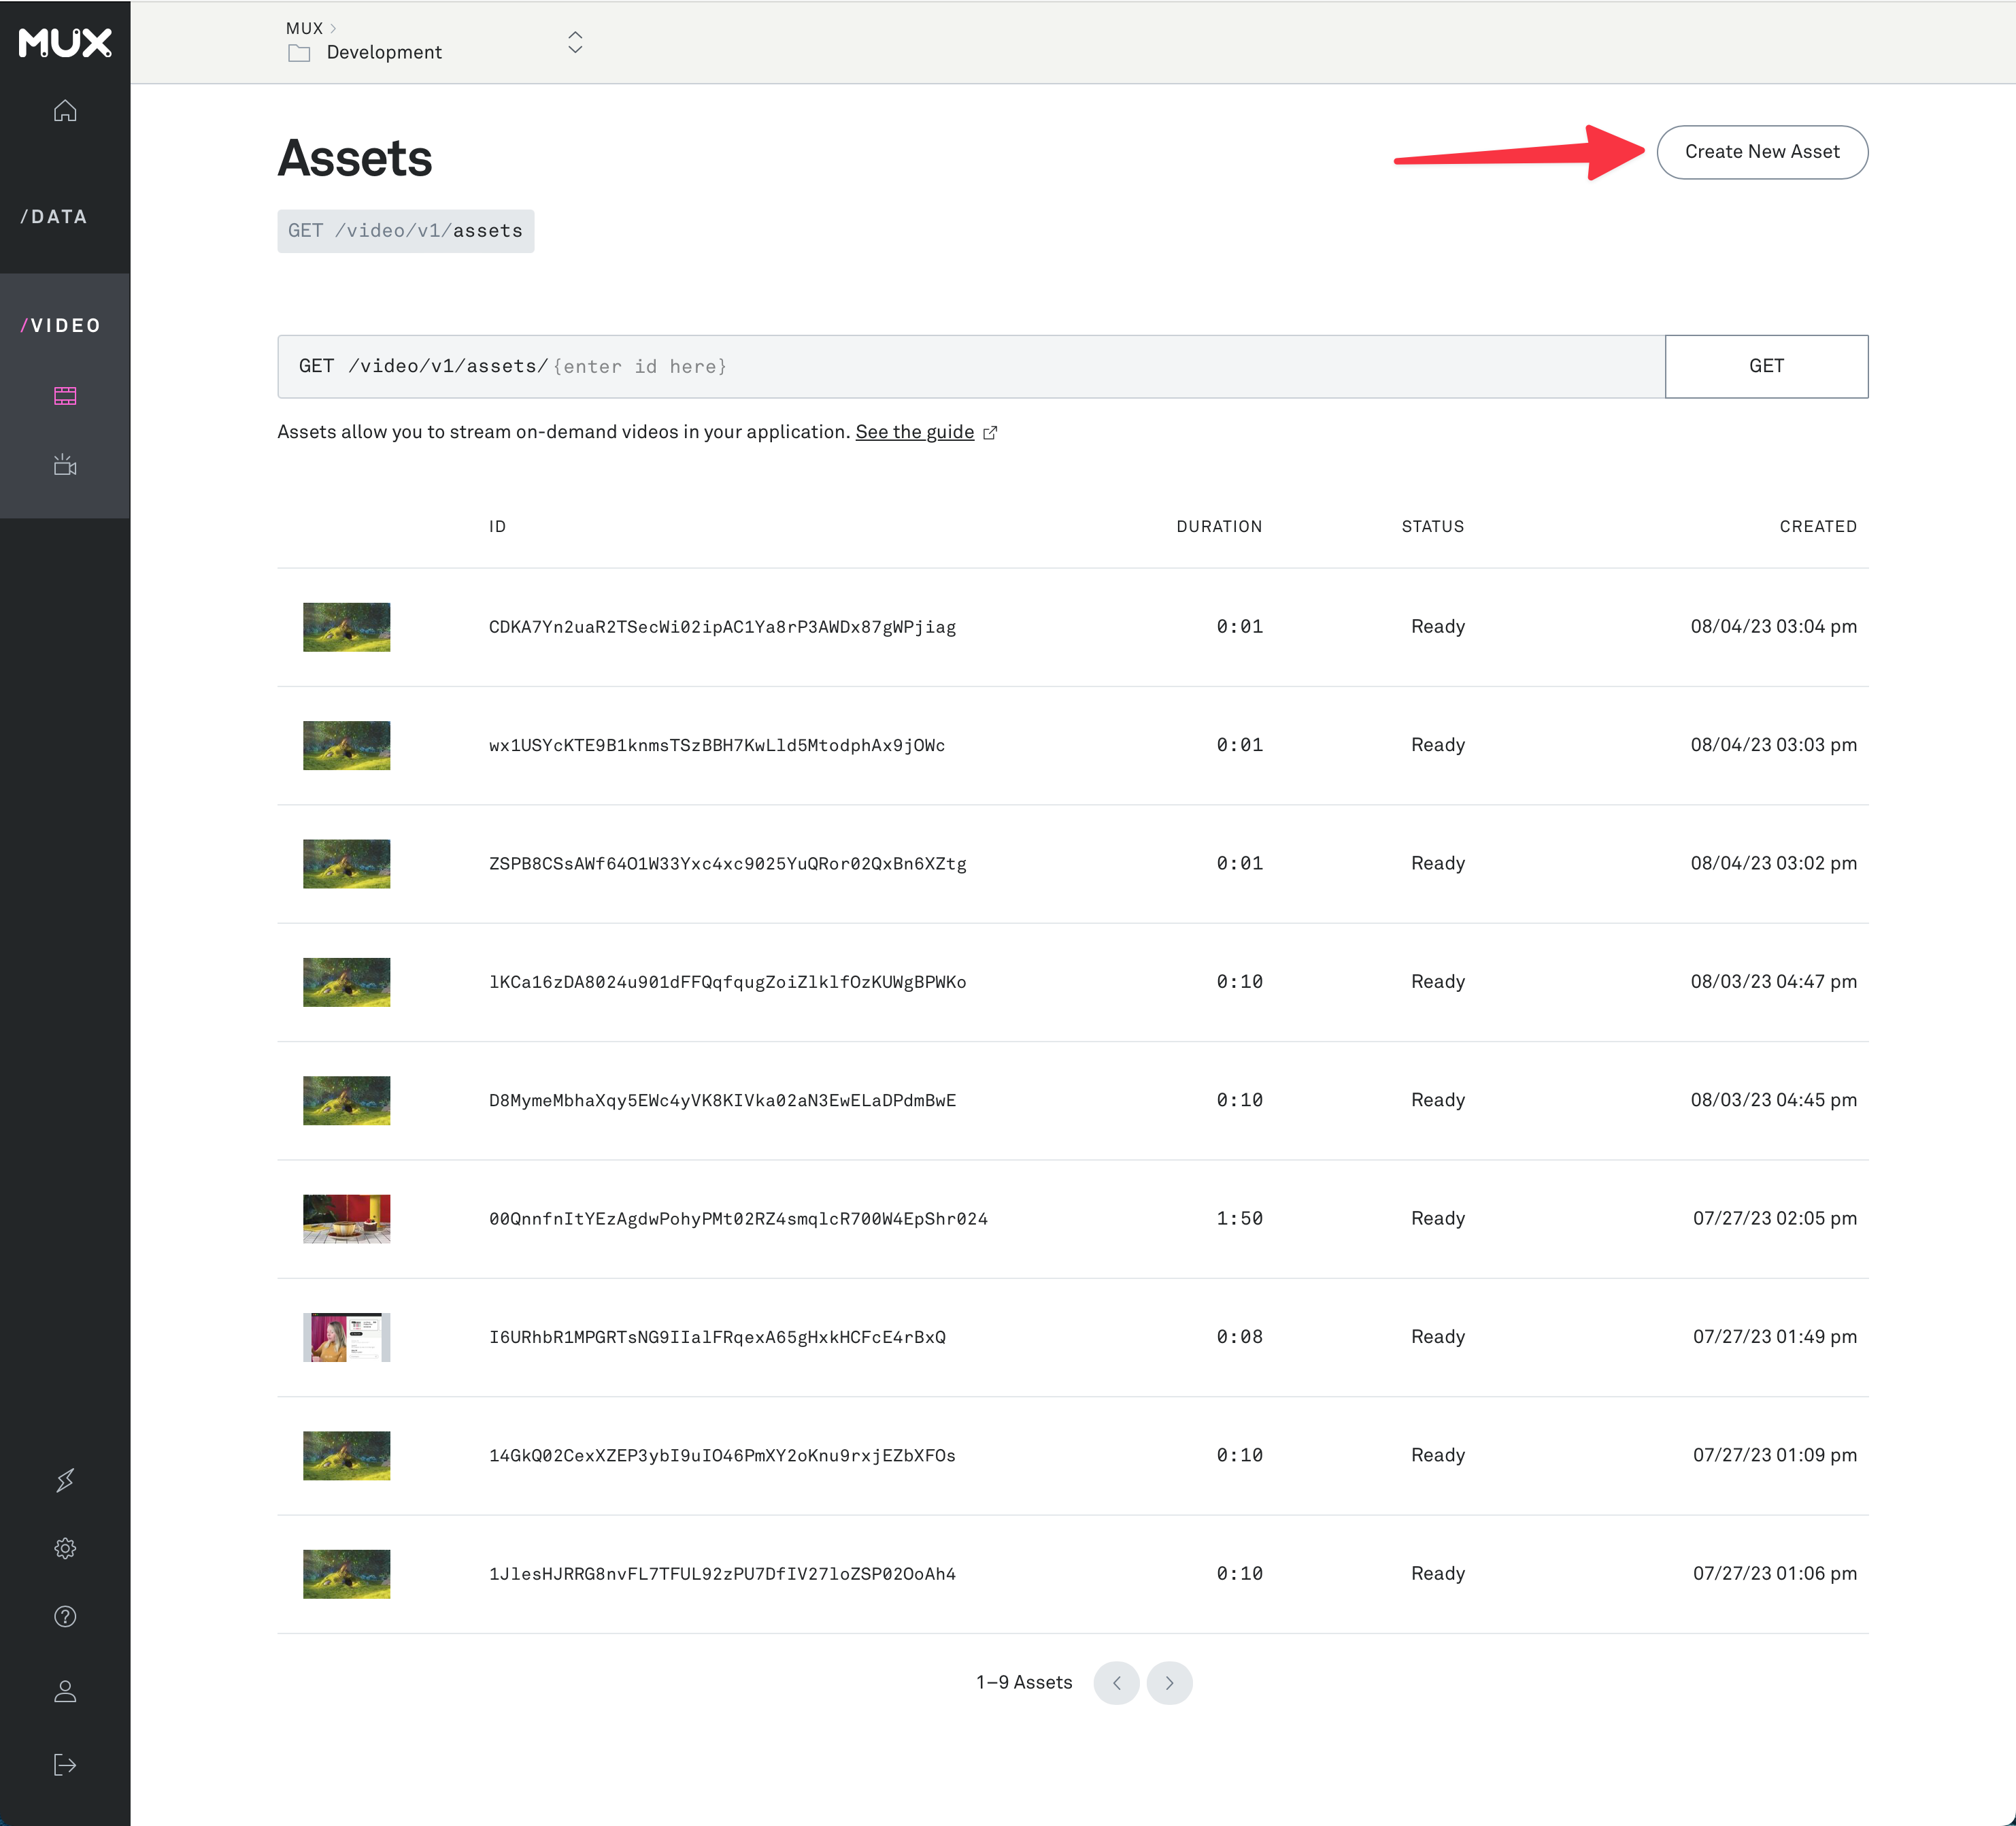
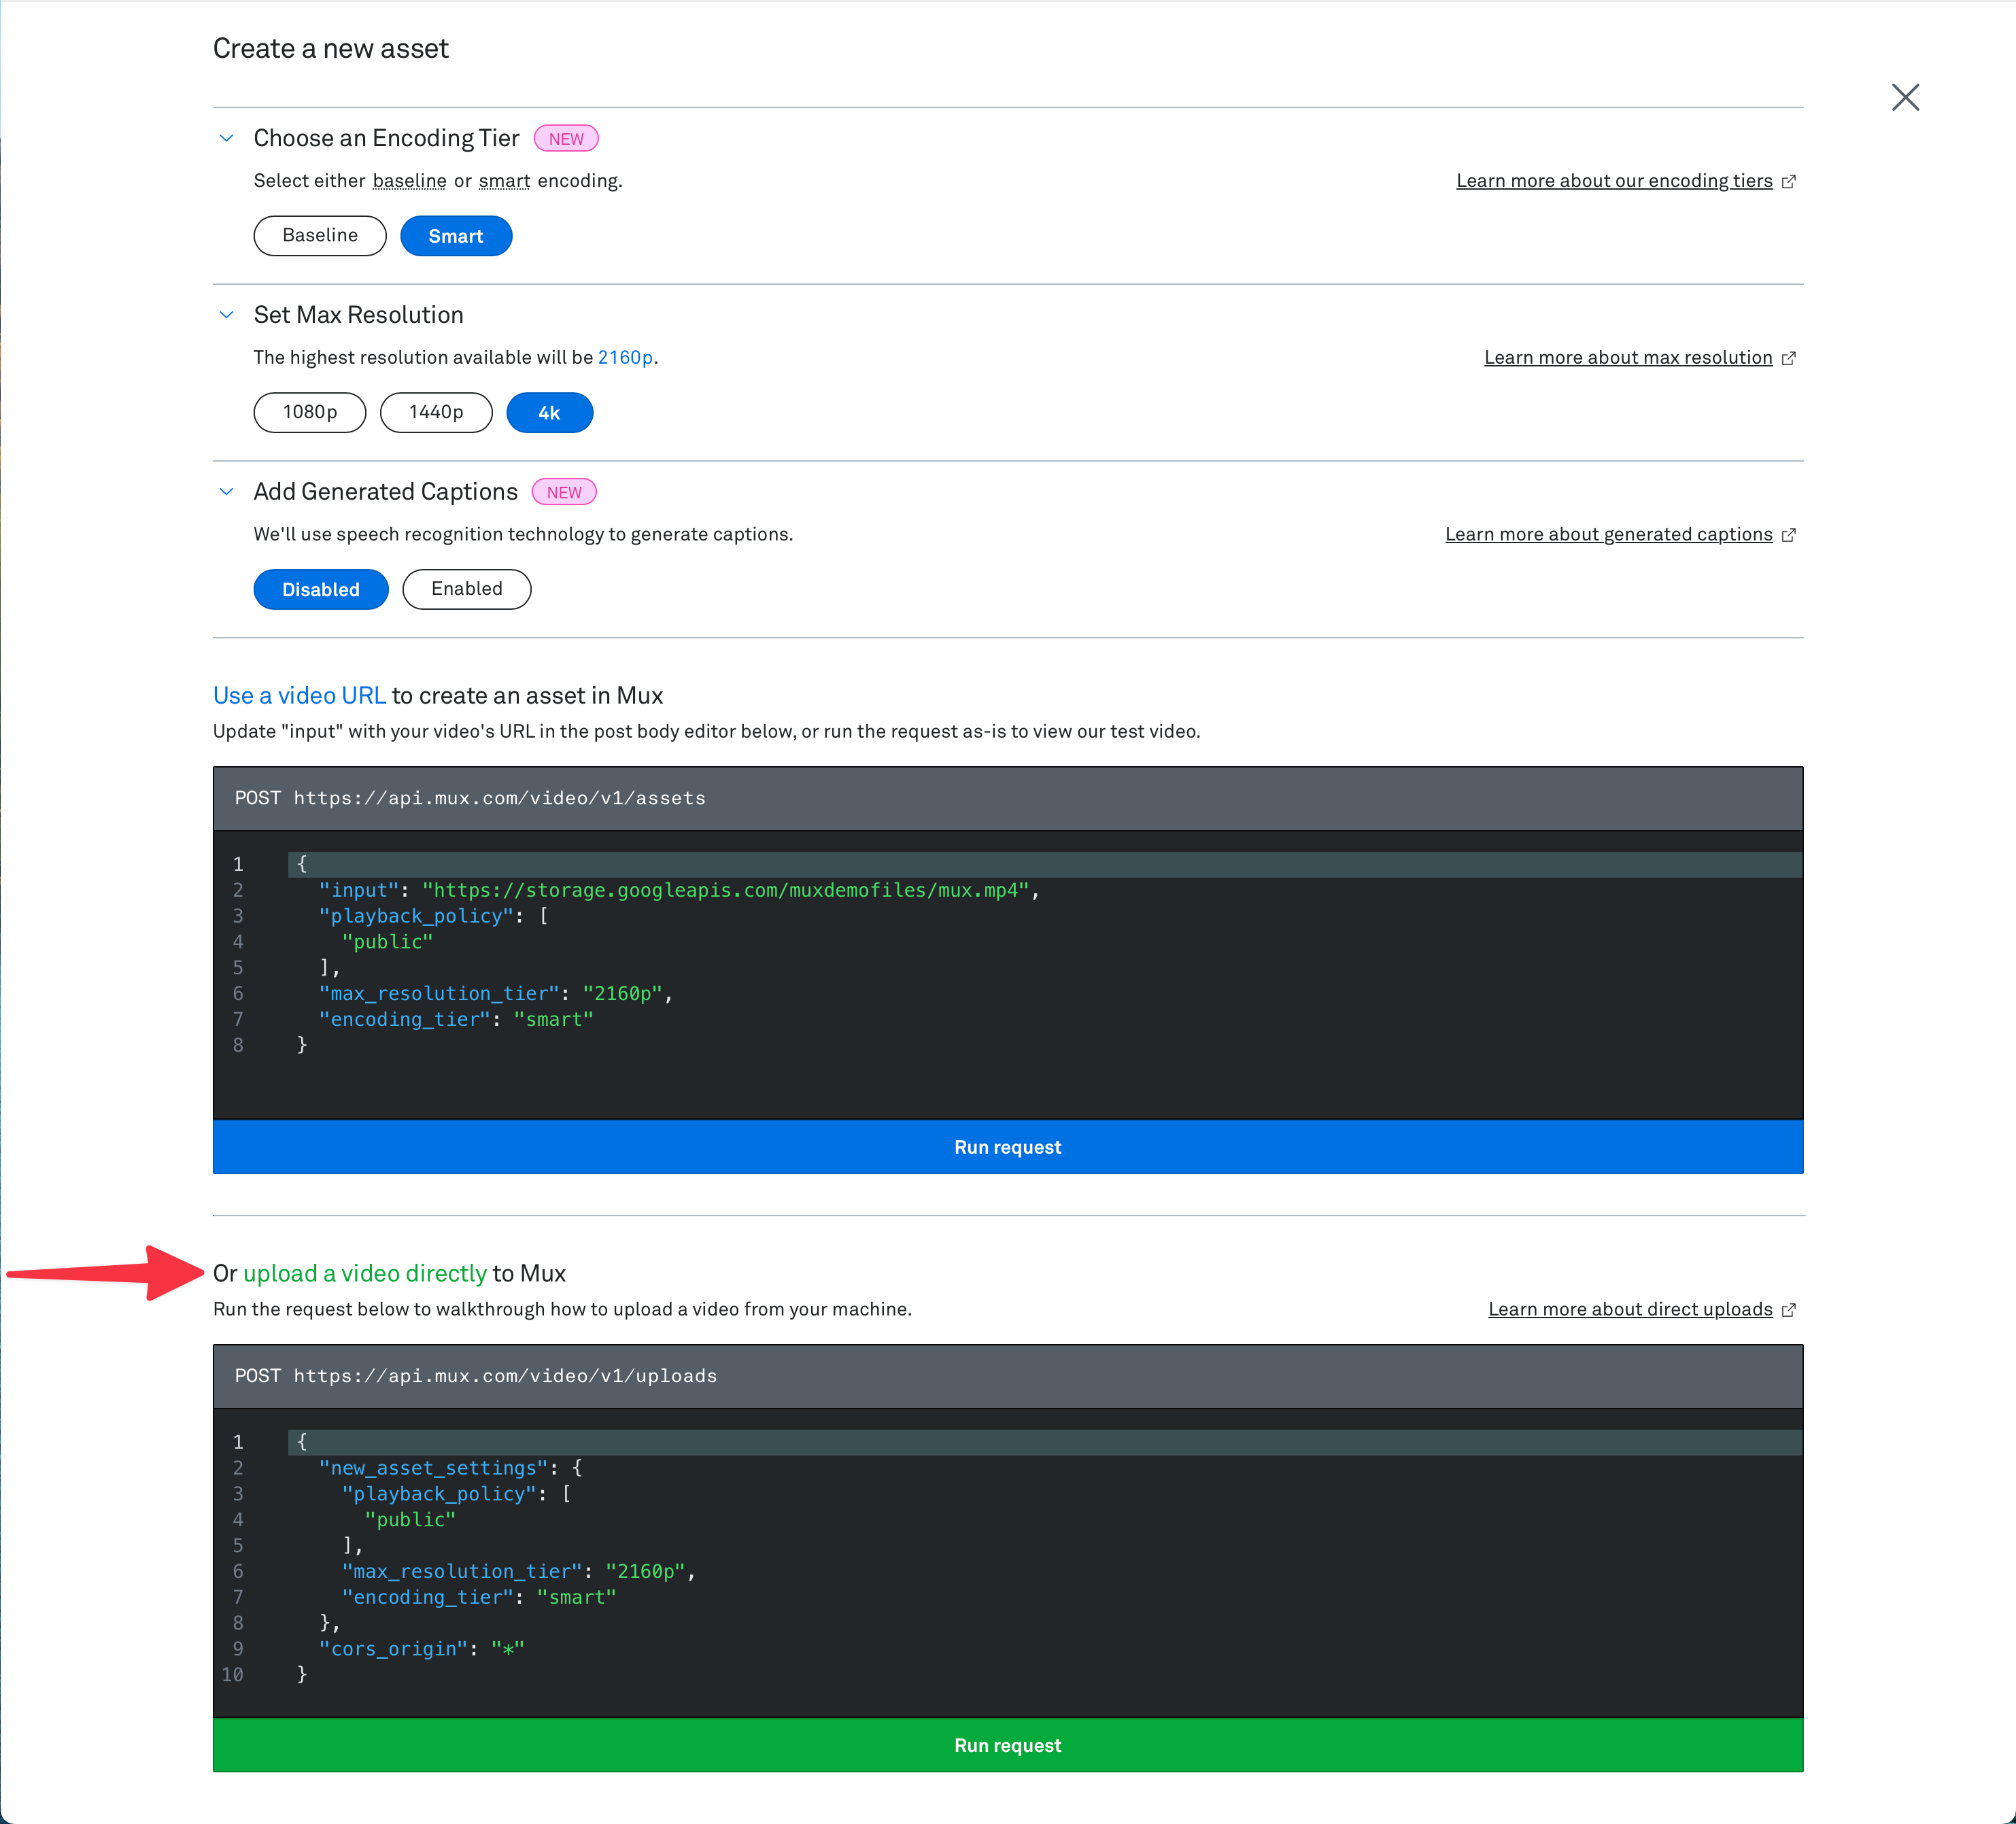
></mux-player>If your site has just a few videos, you might upload them to Mux directly thorugh the dashboard. In the Mux Dashboard, on your video assets page, select "Create New Asset". On the next screen, you can upload a video directly to Mux.
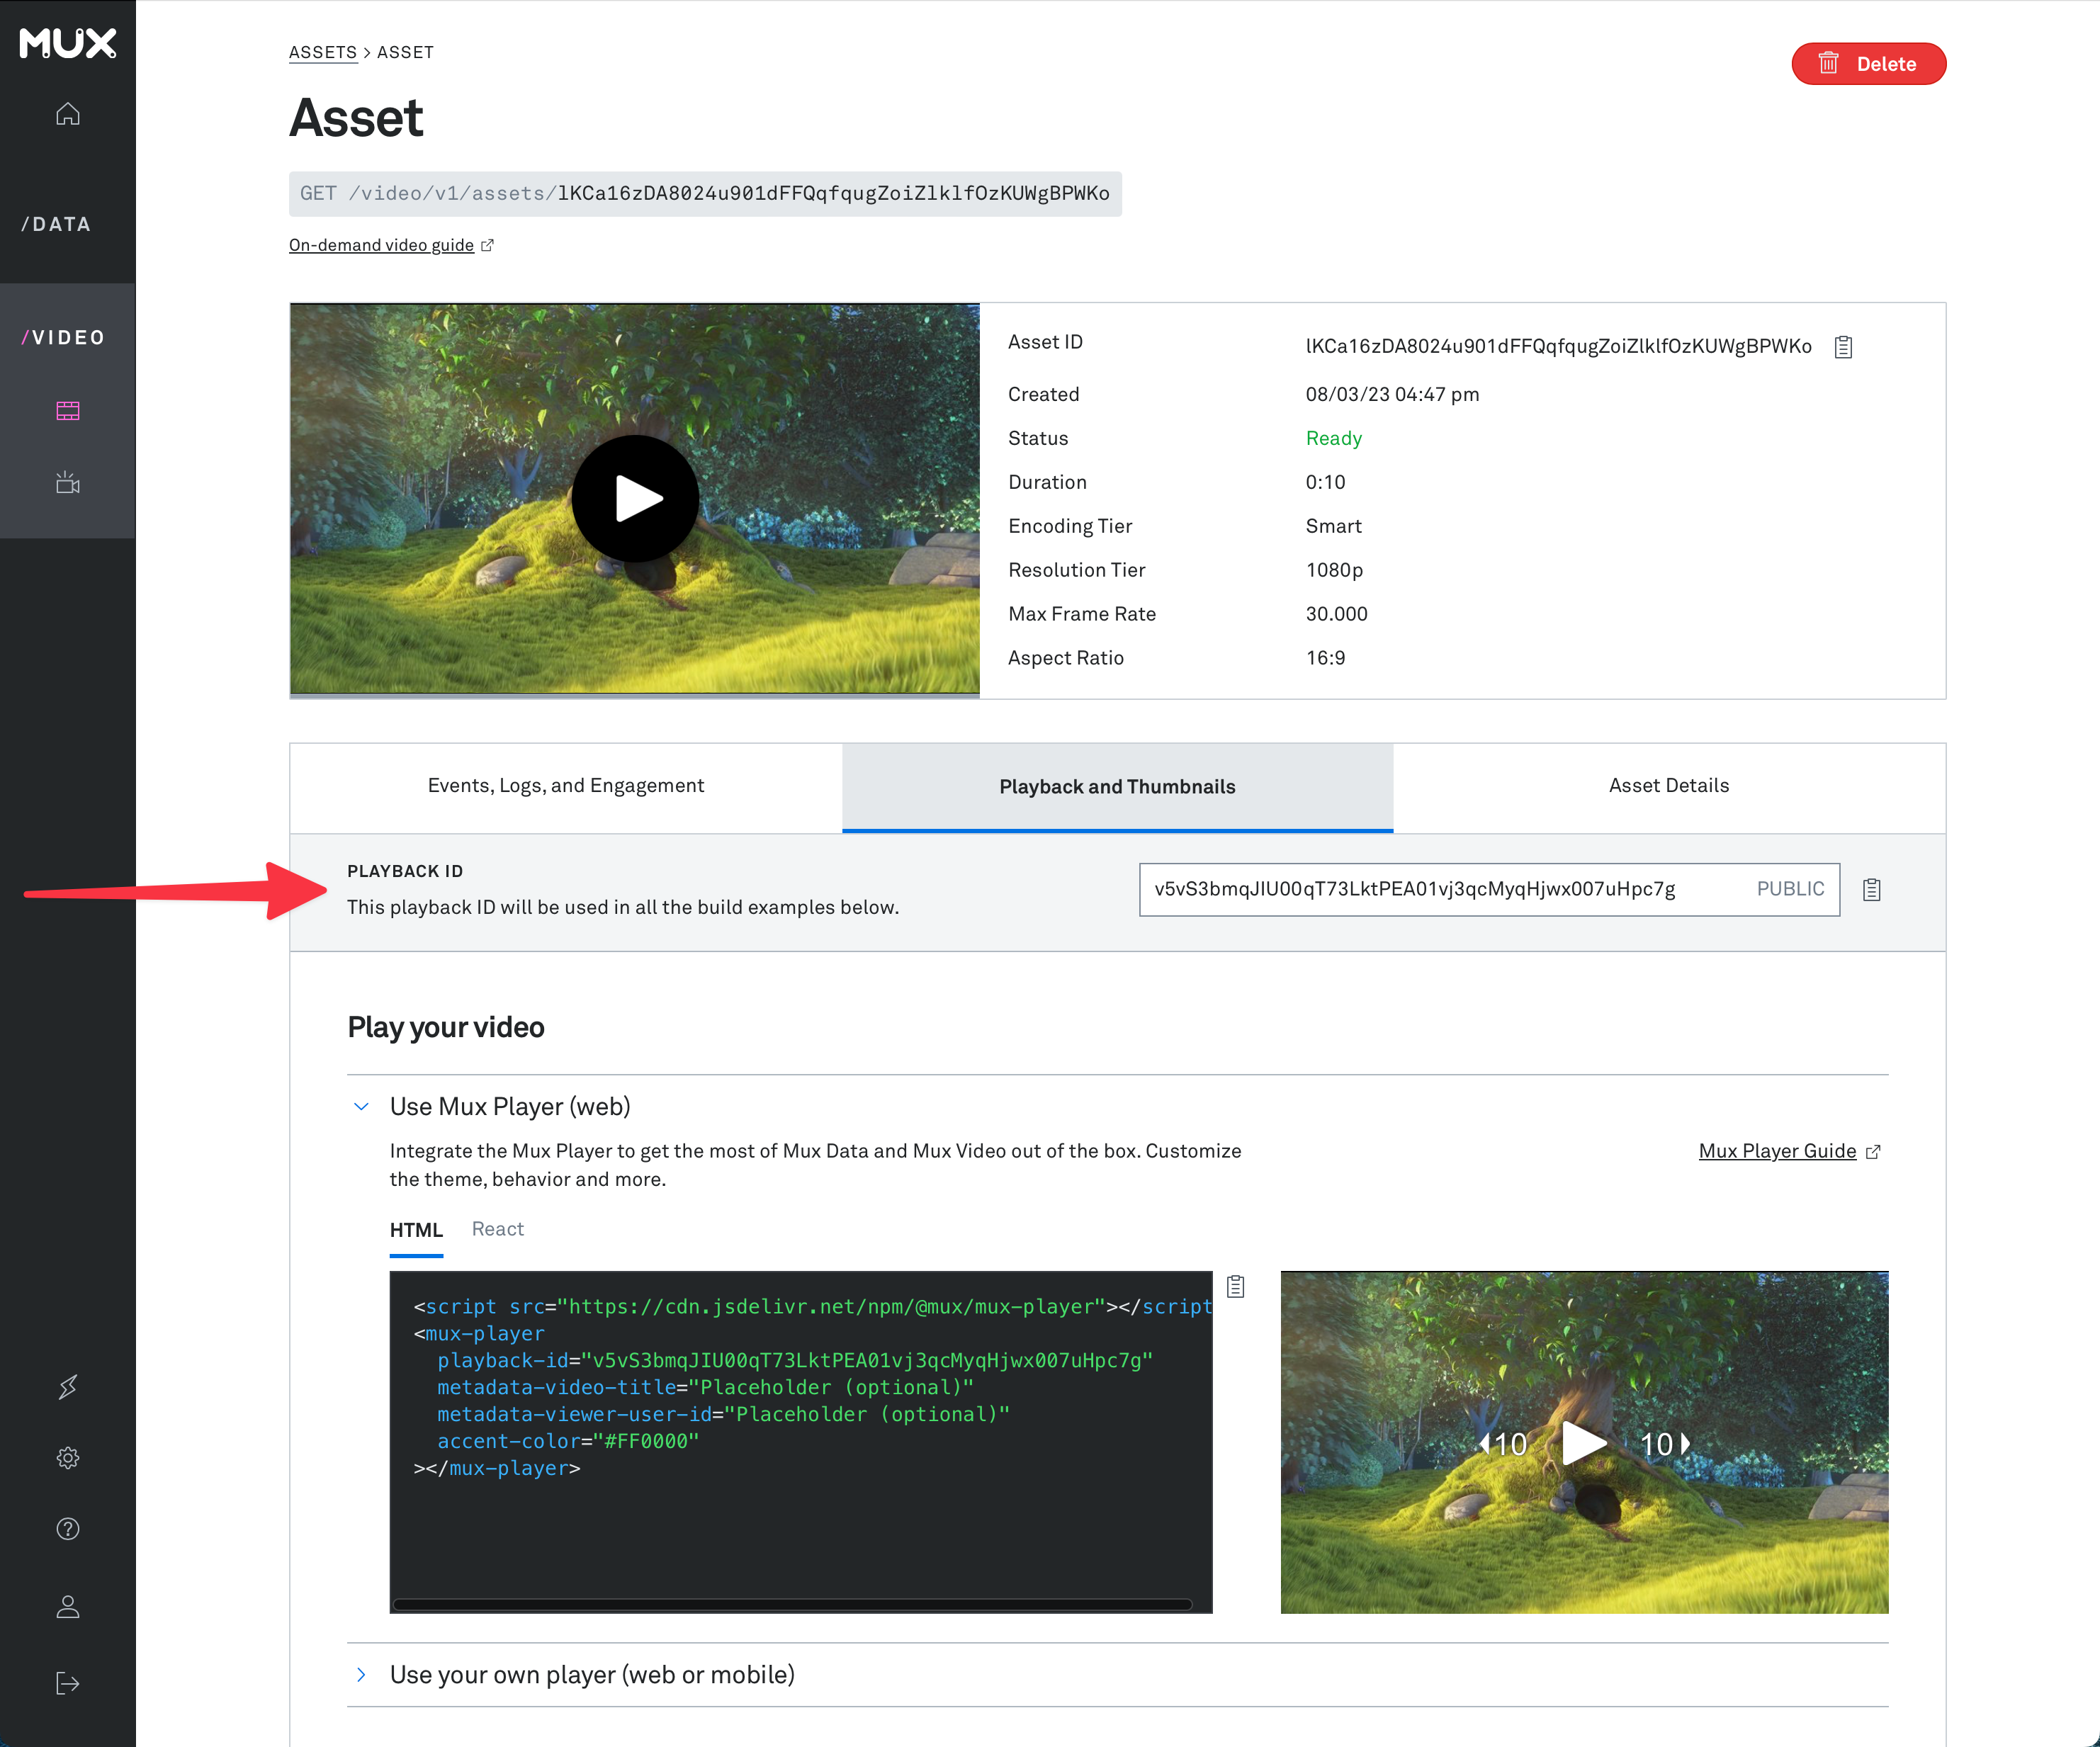
You'll then be able to see your new asset on your video assets page. When you click on the asset, you can find the asset's playback ID in the "Playback and Thumbnails" tab. This playback ID can be used in the playbackId prop of the Mux Player component.
You can read more about Mux Player, including how to customize its look and feel, over in the Mux Player guides.
If you're managing more videos, you might take a look at our CMS integrations.
Or, if you need more control over your video workflow, read on.
Use the API to build a video workflow
Want to build your own video workflow? You will first need to use the Direct Uploads API on the backend to create a Direct Upload.
$createAssetRequest = new MuxPhp\Models\CreateAssetRequest(["playback_policy" => [MuxPhp\Models\PlaybackPolicy::_PUBLIC]]);
    $createUploadRequest = new MuxPhp\Models\CreateUploadRequest(["new_asset_settings" => $createAssetRequest]);
    $upload = $uploadsApi->createDirectUpload($createUploadRequest);

print "Upload URL:" $upload->getData()->getUrl();
You'll use this upload ID in the allow users to upload to that URL with Mux Uploader:
<script
  src="https://cdn.jsdelivr.net/npm/@mux/mux-uploader"
></script>

<mux-uploader endpoint="{direct_upload_url}"></mux-uploader>
For more granular control over the upload UI you can use UpChunk instead of Mux Uploader.
Next, we'll listen for Mux webhooks. When we receive the notification that the video is ready, we'll add it to our database.
use App\Http\Controllers\WebhookController;

Route::post('webhook/endpoint', [WebhookController::class, 'handle']);// app/Http/Controllers/WebhookController.php
namespace App\Http\Controllers;
use Illuminate\Http\Request;
class WebhookController extends Controller
{
public function handle(Request $request)
{
// Process webhook payload
// Save asset ID, playback ID, to your database
return response()->json(['success' => true]);
}
}Finally, let's make a playback page. We retrieve the video from our database, and play it by passing its playbackId to Mux Player:
<mux-player
  playback-id="{{ $playbackId }}"
  metadata-video-title="{{ $title }}"
  metadata-viewer-user-id="{{ $userId }}"
  stream-type="on-demand"
></mux-player><?php
namespace App\Http\Controllers;
use Illuminate\Http\Request;
class PlaybackController extends Controller
{
public function show($videoId)
{
// Fetch the video from the database and set
// $playbackId
// $title
// Get user (replace with your actual authentication logic)
$userId = auth()->id();
return view('playback', [
'playbackId' => $playbackId,
'title' => $title,
'userId' => $userId,
]);
}
}And we've got upload and playback. Nice!
@MuxHQ was an absolute lifesaver for videos on a previous project. Thumbnails, truly instant play via livestreaming, resizing, whole bit. I’m often skeptical of third-party services but I never could’ve competed with the UX they let me deliver
WWW designer-developer for climate @watershed
We built an in-house MVP solution for video, but rather than spending our engineering team’s time navigating and maintaining video infrastructure, we turned to Mux. With Mux, video just works, which means we can focus on building the best product for Substack creators and trust that video is solved.
Co-founder and CTO
Mux is trusted by


No credit card required to start using Mux.