This post has been archived
A lot has changed since we wrote this post. Some of the information may be out of date, and some links may be broken.
We use Airtable a lot internally: project management, event organization, marketing initiatives, content calendars, the works. We’ve started dabbling with the Base APIs directly for use-cases where we wanted to show certain data to end users without needing to duplicate information in our project workflow to a separate CMS. Our language landing pages, for example, are all generated from our base where we keep track of each language’s progress.
So, we’ve got what’s essentially a database with a fancy interface built in. Adding ZEIT’s Now and Next.js make it trivial to build applications that interact with that database’s API…the only thing left to do is wire them all together to build our own personal video CMS.
A look at what we’re building
We want to build a small application that allows us to have a (relatively) pretty interface around showing off our videos to friends along with a little metadata, like a title and description. We also want to be able to upload new content, then handle the webhooks coming back from Mux so we can keep each video’s status in our Airtable base up to date without doing anything manually.
Let’s take a look at what the final experience will be for folks looking at our fantastic video content:
And the interface for adding new content:
If you want to see it yourself, the deployed version you see in the videos is live.
Technologies Used
Get your own copy running
Clone the example repo and mosey on into the newly cloned directory. Once we’re there we’ll install all the npm dependencies we need, then copy the .env.example file so we can start copying over our own configuration values.
$ git clone git@github.com:muxinc/examples.git
$ cd examples/now-airtable
$ yarn install
$ cp .env.example .env
Set up your Airtable base
First we need to have a table for our videos in a base. For things to work out of the box you’ll need the table to have exactly the fields from the template at a minimum, but additional fields/tables won’t affect anything.
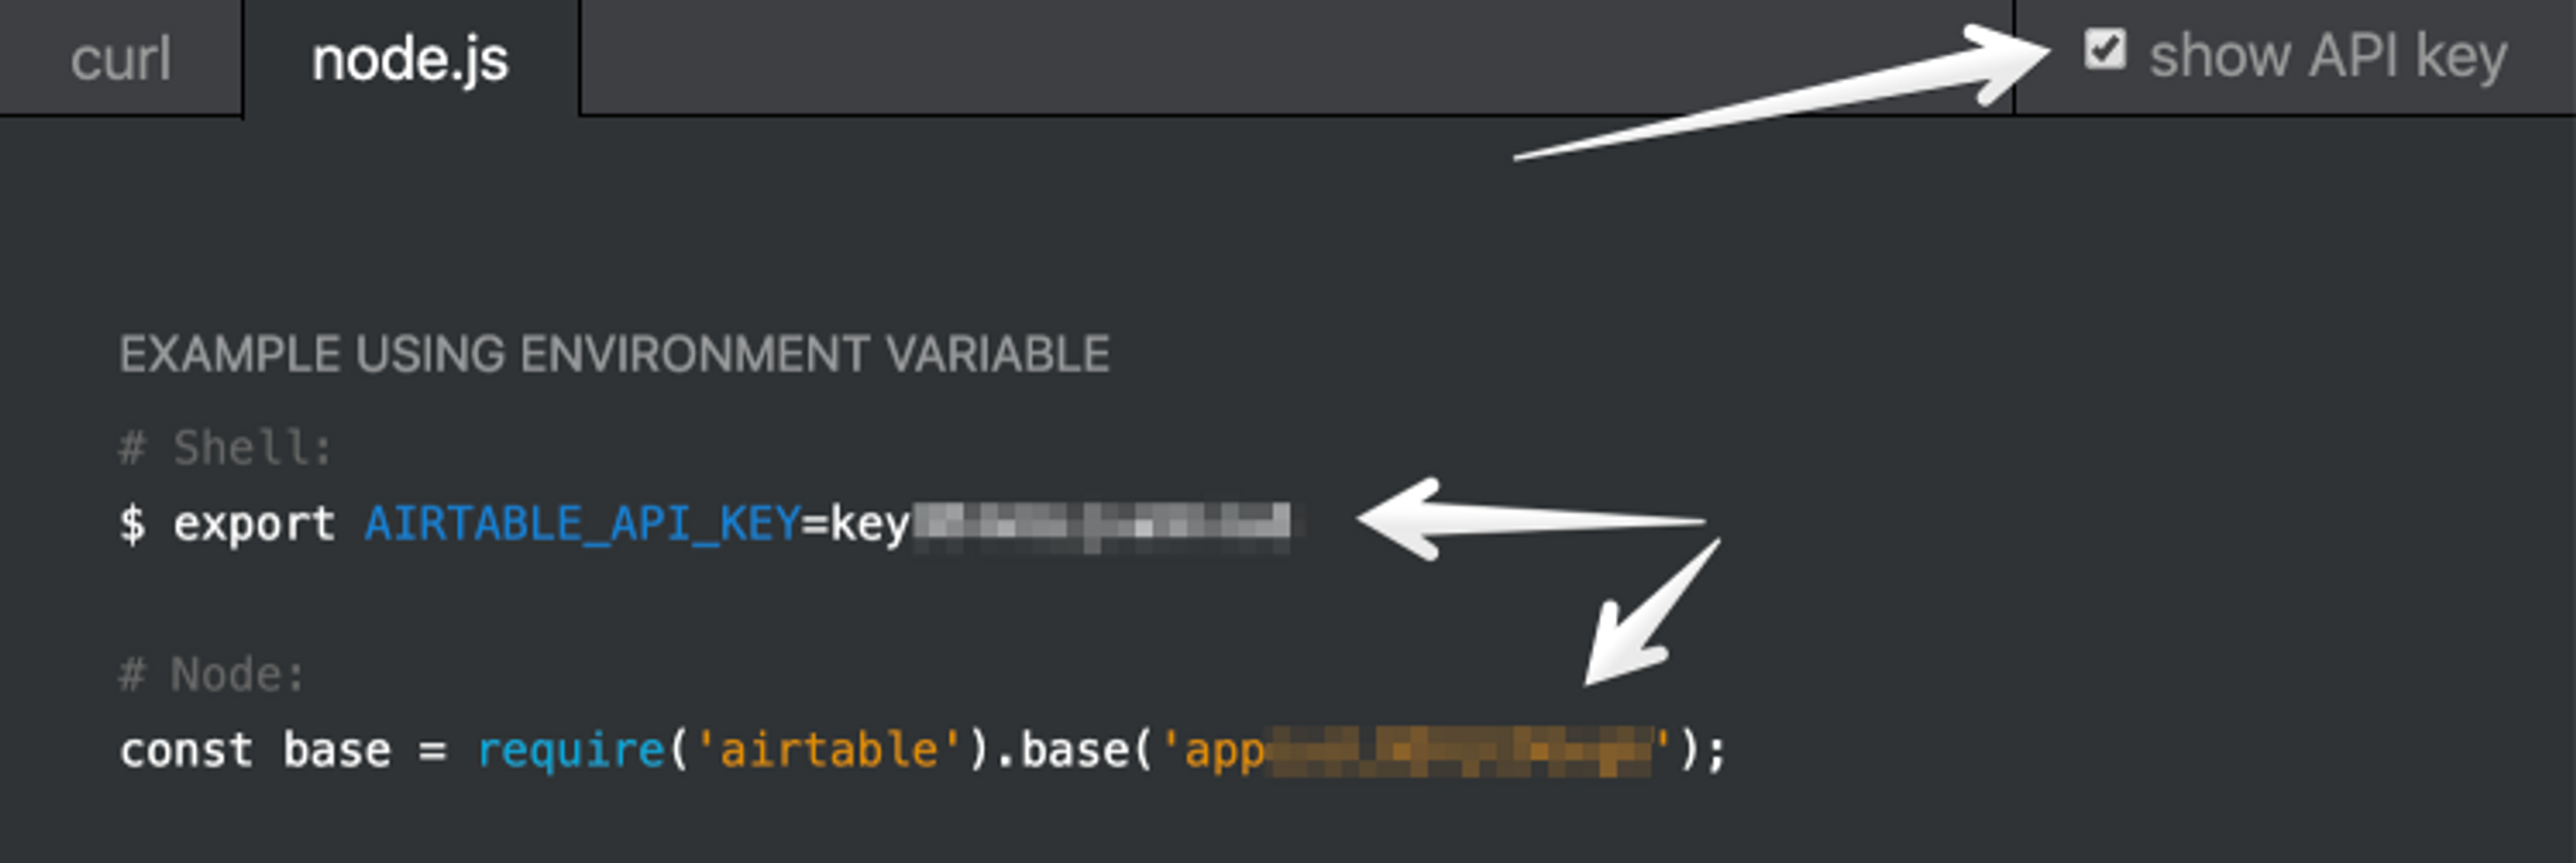
Now you need to go grab your Airtable API key and base ID for your newly created store. The Airtable documentation is any easy place to start.

Update the values in .env for AIRTABLE_API_KEY and AIRTABLE_BASE to match.
Grab a Mux Asset token
Go generate a new Mux Asset Token and update the MUX_TOKEN_ID and MUX_TOKEN_SECRET values in .env to what’s in downloaded .env file.
Set a password
We’ll use a simple basic auth strategy to keep anyone else from uploading videos. Set MANAGEMENT_PASSWORD to something only you’ll be able to guess. When you go to use the UI, you only need to specify that password in either the username or password field.
Make sure your Now CLI is configured
$ yarn global add now
$ now login
Decide on an alias, then set up a webhook in Mux
The last thing we want to do before deploying is update the alias/name for our new CMS in now.json, then go add that alias to Mux. This makes sure the webhook notifications for your created (or modified) assets are delivered to the right place when the time comes.
Deploy!
Everything should be set up and ready to go!
$ yarn deployThe deploy command will export all the values in our .env file, then run now to deploy everything to ZEIT Now and alias that new deployment to whatever you set the alias to be.
Optional: If you want to run the UI locally, add the URL provided from the step above to your .env file as BASE_URL.
Let’s talk about the code: The API
We used Now Lambdas with the @now/node builder to create our API endpoints that interact with the Airtable and Mux APIs. Our Next.js client will then hit these endpoints when creating our CMS’s interface. The lambdas to get and list videos use our basic Airtable wrapper to (you guessed it) get a single video or list all of them from the base. If you’ve used the Airtable API before, nothing in there should be too surprising.
Creating a video is where things start to get a little interesting. Because we want to use direct uploads and push content directly from our interface, we create our new asset in our app first, then use the passthrough field to include that local ID in any WebHook notifications we receive. Here’s what our video creation endpoint looks like:
const { json, send } = require('micro');
const { createVideo, updateVideo } = require('../utils/airtable');
const decorate = require('../utils/decorate');
const Mux = require('@mux/mux-node');

const { Video } = new Mux();

// `decorate` is a higher level function that wraps our callback to add
// things like basic auth.
module.exports = decorate(
  async (req, res) => {
    const params = await json(req);

    // Here we create our new video using our Airtable wrapper module.
    const videoParams = {
      title: params.title,
      description: params.description,
    };
    const video = await createVideo(videoParams);

    // Now that we have our video created internally, we can use that ID in
    // the `passthrough` field when we create a new asset.
    try {
      const upload = await Video.Uploads.create({
        cors_origin: req.headers.origin,
        new_asset_settings: {
          playback_policies: ['public'],
          passthrough: video.id, // <- Right here! This will come back in webhooks.
        },
      });

      // Now that we've successfully created our new direct upload on the Mux side
      // of things, let's update our internal asset to include details.
      const updatedVideo = await updateVideo(video.id, {
        status: 'waiting for upload',
        uploadId: upload.id,
        uploadUrl: upload.url,
      });

      // All that's left is to respond saying how successful we were.
      send(res, 201, updatedVideo);
    } catch (error) {
      console.error(error);
      send(res, 500, { error });
    }
  },
  { protected: true } // This just tells our `decorate` wrapper to use basic auth.
);
You can do this other ways, but this pattern is nice because it allows us to start with an object that lives in our world, then reference that in everything else we do. This is particularly helpful in the direct uploads world, since the initial ID that Mux returns is for a newly created upload object, which may or may not grow up to become an asset one day. If the client does upload a file and that file’s valid, suddenly we’re getting new webhook notifications for assets and we can use that nifty passthrough field to look it up without having to know anything else about the asset from a Mux perspective.
Let’s take a look at how we handle the webhooks:
const { json, send } = require('micro');
const { getVideo, updateVideo } = require('../utils/airtable');

module.exports = async (req, res) => {
  // We'll grab the request body again, this time grabbing the event
  // type and event data so we can easily use it.
  const { type: eventType, data: eventData } = await json(req);

  switch (eventType) {
    case 'video.asset.created': {
      // This means an Asset was successfully created! We'll get
      // the existing item from the DB first, then update it with the
      // new Asset details.
      const item = await getVideo(eventData.passthrough);
      // Just in case the events got here out of order, make sure the
      // local video state isn't already set to ready before blindly updating it!
      if (item.status !== 'ready') {
        await updateVideo(item.id, {
          status: 'processing',
        });
      }
      break;
    }
    case 'video.asset.ready': {
      // This means an Asset was successfully created! This is the final
      // state of an Asset in this stage of its lifecycle, so we don't need
      // to check anything first.
      await updateVideo(eventData.passthrough, {
        status: 'ready',
        assetId: eventData.id,
        playbackId: eventData.playback_ids[0].id,
      });
      break;
    }
    case 'video.upload.cancelled': {
      // This fires when you decide you want to cancel an upload, so you
      // may want to update your internal state to reflect that it's no longer
      // active.
      await updateVideo(eventData.passthrough, { status: 'cancelled' });
      break;
    }
    default:
      // Mux sends webhooks for *lots* of things, but we'll ignore those for now
      console.log('some other event!', eventType, eventData);
  }

  console.log('Mux Event Handled');
  // Now send back that ID and the upload URL so the client can use it!
  send(res, 200, 'Thanks for the webhook, Mux!');
};
Some things you may want to make note of here:
- We fetch our videos via the passthrough field.
- We don’t blindly update the video: you never know when you might get webhooks out of order, so make sure to double check that you haven’t handled a later stage first (i.e. check to make sure an asset isn’t already ready before setting its state to processing).
- We update our internal model with useful information as we receive it, such as asset and playback IDs.
Let’s talk about the code: UI
The UI code is intentionally simple. For the most part a page uses getInitialProps to go fetch data from the API, whether it’s server-side rendered or not. One gotcha here is that if you use something like isomorphic-unfetch, like we did, you’ll need to make sure to use the fully-qualified URL. To get around this, we made a simple helper that checks to see if we’re being rendered on the server or not. If we are, we use the full host (req.headers.host), otherwise we can just use relative paths.
For our Player component we’re just using a simple HTML5 player with HLS.js installed. The component only needs a playbackId passed in as a prop and it handles setting up the playback URL and a default poster.
mu
The Thumbnail component is similar, but it uses the provided playbackId to be able to create our nice list of videos in the index. When hovered, it swaps out the image source from https://image.mux.com/${playbackId}/thumbnail.jpg to https://image.mux.com/${playbackId}/animated.gif.
Additional details in Airtable
We only worry about the fields we know about for the UI, so a fun tidbit is you can otherwise use the Airtable base however you’d like! Add additional tags, have it work through a review process, create other tables in the base, etc, nothing outside of the main column names will affect this functionality.
Next Steps
This example application actually works really well for truly personal videos, but Airtable’s rate limits would be problematic if one of your videos went viral. To get around this, you could add the exportPathMap function to your next.config.js file. In that function you’d be able to request each video and create a static route for that asset, then generate static HTML so you only need to hit Airtable to create new assets.
Have fun!
We’re always looking for helpful, fun things to build to show off Mux 💅. If there’s something specific you want to see, drop us a line!


