I’ll admit it: I’m a skimmer. I’ve never fully read that 400-page book you recommended to me, nor can I bring myself to sit through most Martin Scorsese films. You really have to captivate me to get me to buy into the whole piece of content. Otherwise, I’m more likely to give it a quick glance, tune in to the best parts, and move along.
So, naturally, the video heatmap overlay is one of my favorite web-based video player innovations. At a glance, you can see the most watched parts of a video before watching even a second of playback.
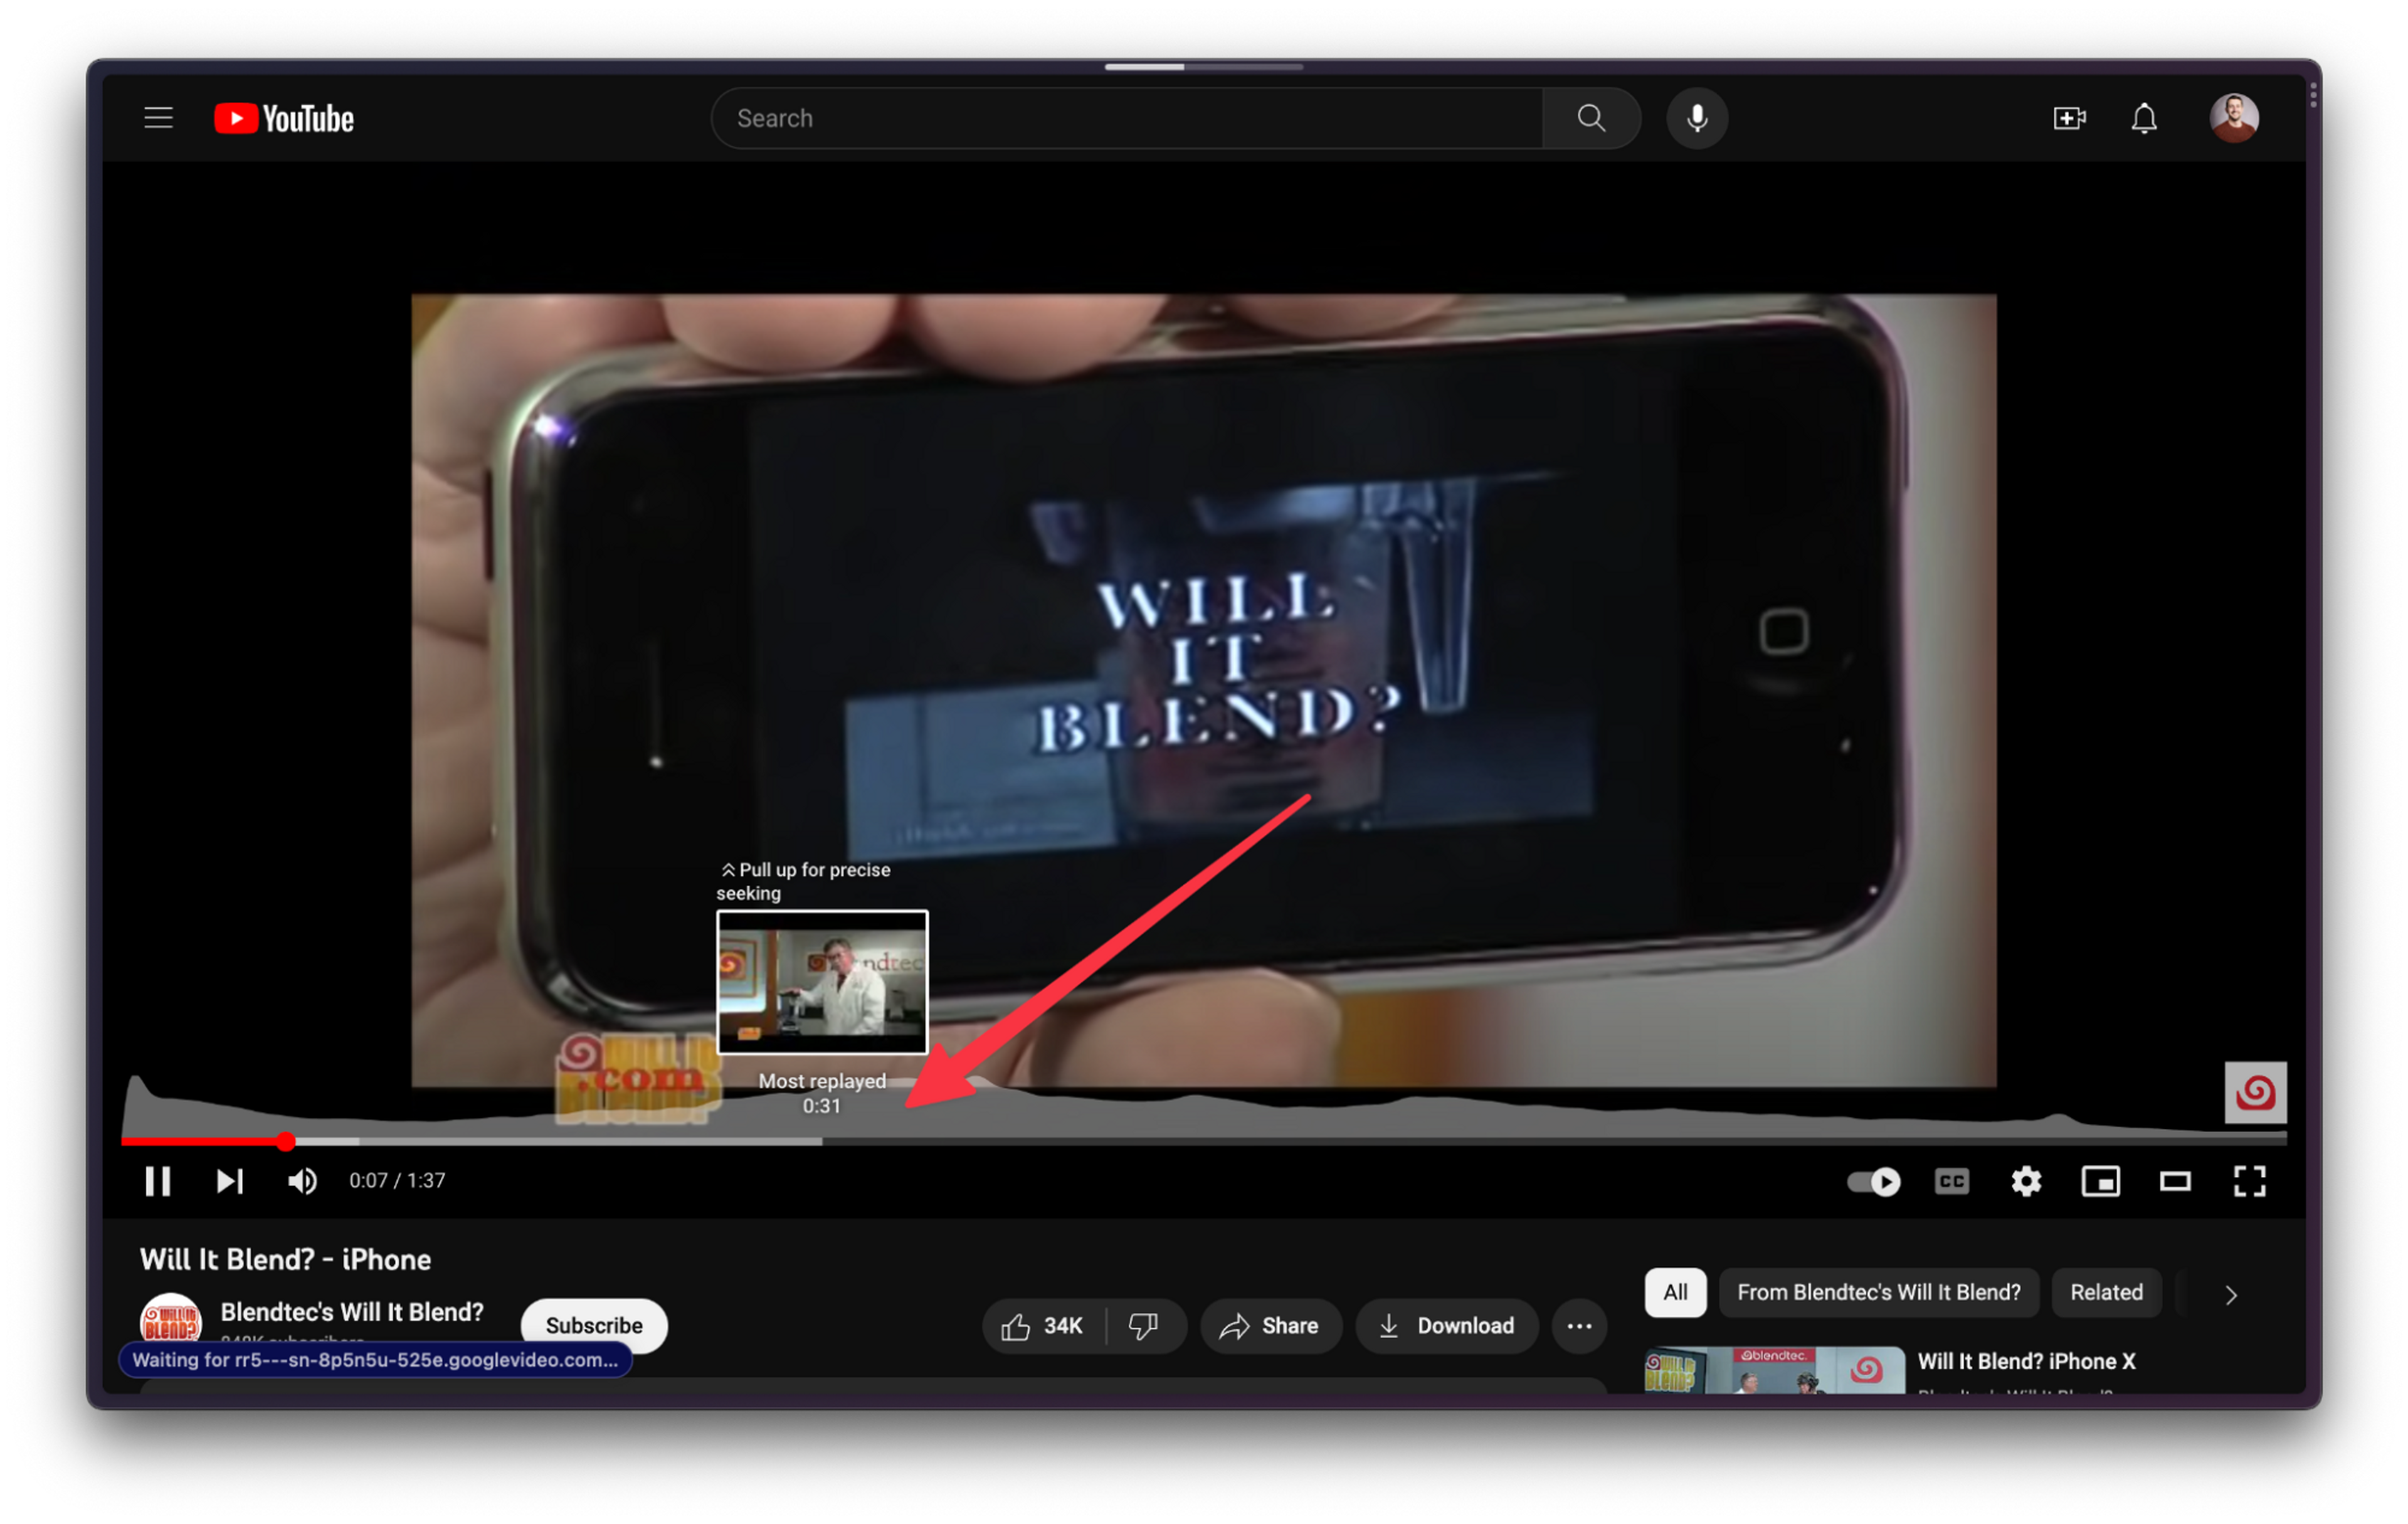
This is super handy for those times when you’re trying to show someone that one funny part of a video or find the point in the cooking video where they stop talking and start sharing the actual recipe. Honestly, I’ve probably reclaimed hours of my life with this little feature.
If you’re offering content that falls on the longer side (or simply want to offer some nice features for your attention-limited audience), you might consider implementing something similar in your application’s video playback. In this article, we’ll go over one way you can set up viewer playback tracking and generate a video heatmap to display in a React app using mux-player-react and a little bit of custom code.
If you, too, are a skimmer, feel free to explore the example code and demo in the CodeSandbox.
How to track video playback progression
Let’s think through what we need to achieve video tracking at a high level. The first step is to track the history of each second of the video so we know which have been watched and which haven't. We can store this history in application state as the video playback progresses.
Then, when the viewer finishes watching the video, we’ll send that data off to the server to be recorded in a database. Once it’s recorded, we can combine the records of several unique viewing sessions to tally up our final results.
In future viewing sessions, we’ll pull this tally back into the application for rendering in an area chart.

To accomplish all of this, let’s create a custom React hook that we can use with our video player. We’ll call this hook usePlaybackVector, and it will accept only one argument: the video DOM element that we’ll be tracking.
const usePlaybackVector = (videoEl) => {
}
The first piece of information we’ll need is the length of the video. We can get this duration by writing a function that uses the video element’s seekable property to fetch the time range of the video runtime in seconds.
Once we have the duration, we’ll fill a vector tracking array with a zero for each second in the video, indicating that the individual second has not been viewed yet.
import { useState, useCallback } from "react";

const usePlaybackVector = (videoEl) => {
  const [playbackVector, setPlaybackVector] = useState([]);

  /**
   *  Slice up the duration of the video so that
      each second of playback can be accounted for individually
   */
  const determinePlaybackVector = useCallback(() => {
    if (!player) return;
    // `player.seekable` returns a time range containing
    // the start and the end of what is seekable, use `.duration` as fallback
    const timeRange = player.seekable;
    if (timeRange.length === 0) return;
    const start = timeRange.start(0);
    const end = Math.ceil(timeRange.end(0));

    // Zero fill the playback vector to the length of the current video duration
    const length = Number.isInteger(end) && Number.isInteger(start) ? end - start : Math.ceil(player.duration);
    const vector = new Array(length).fill(0)

    setPlaybackVector(vector);
  }, [player]);
}Monitoring and updating the playback vector
Now that we've determined the length of the video and initialized our playback vector with zeros, we’ll want to continuously update this vector while the video is being watched.
/**
 * Storing value in a useState would change too frequently,
 * causing a re-render of the callbacks that depend on it.
 *
 * By placing the updated value inside of a ref instead of state
 * on every change, we're able to access the mutatable ref within
 * the callback without having to replace/re-render the callback.
 *
 * Read more: https://reactjs.org/docs/hooks-faq.html#how-to-read-an-often-changing-value-from-usecallback
 */

const lastRecordedSecondRef = useRef(0);

const updatePlaybackVector = useCallback(async () => {
  if (player.paused) return;  // No action required if the video is paused

  const currentSecond = Math.floor(player.currentTime);
  console.log(currentSecond);

  setPlaybackVector((currentPlaybackVector) => {
    const newPlaybackVector = [...currentPlaybackVector];
    if (currentPlaybackVector[currentSecond] === 0) {
      newPlaybackVector[currentSecond] = 1;
    } else if (lastRecordedSecondRef.current !== currentSecond) {
      newPlaybackVector[currentSecond] += 1;
    }

    return newPlaybackVector;
  });

  // Update the lastRecordedSecond value
  lastRecordedSecondRef.current = currentSecond;
}, [player]);
Here, the updatePlaybackVector function ensures that we only update the playback vector when the video is playing. If a specific second is being viewed for the first time, we mark it as viewed by setting its corresponding index to 1. If the second was previously viewed, we increment its count.
To ensure this function runs at the right times, let’s attach it to the timeupdate event of the video player.
useEffect(() => {
  if (!player) return;
  player.addEventListener("timeupdate", updatePlaybackVector);
  return () => player.removeEventListener("timeupdate", updatePlaybackVector);
}, [player, updatePlaybackVector]);Recording the playback vector
Once the viewer finishes watching or when certain events occur (e.g., closing the page or loading a different video into the player), we need to record the playback vector to persistent storage. This will capture the viewing pattern for the playback session.
const recordPlaybackVector = useCallback(async ({ type }) => {
  if (playbackVector.length > 0) {
    // Implement logic to record the playbackVector on your server here
  }

  // If the video source changes, reset the playback vector
  if (type === "emptied" && playbackVector.length > 0) {
    setPlaybackVector([]);
  }
}, []);
To make sure this recording happens reliably, we can bind recordPlaybackVector to various events:
useEffect(() => {
if (!player) return;
window.addEventListener("unload", recordPlaybackVector, false);
player.addEventListener("emptied", recordPlaybackVector);
player.addEventListener("loadstart", recordPlaybackVector);
// More events can be added if needed
return () => {
window.removeEventListener("unload", recordPlaybackVector);
player.removeEventListener("emptied", recordPlaybackVector);
player.removeEventListener("loadstart", recordPlaybackVector);
};
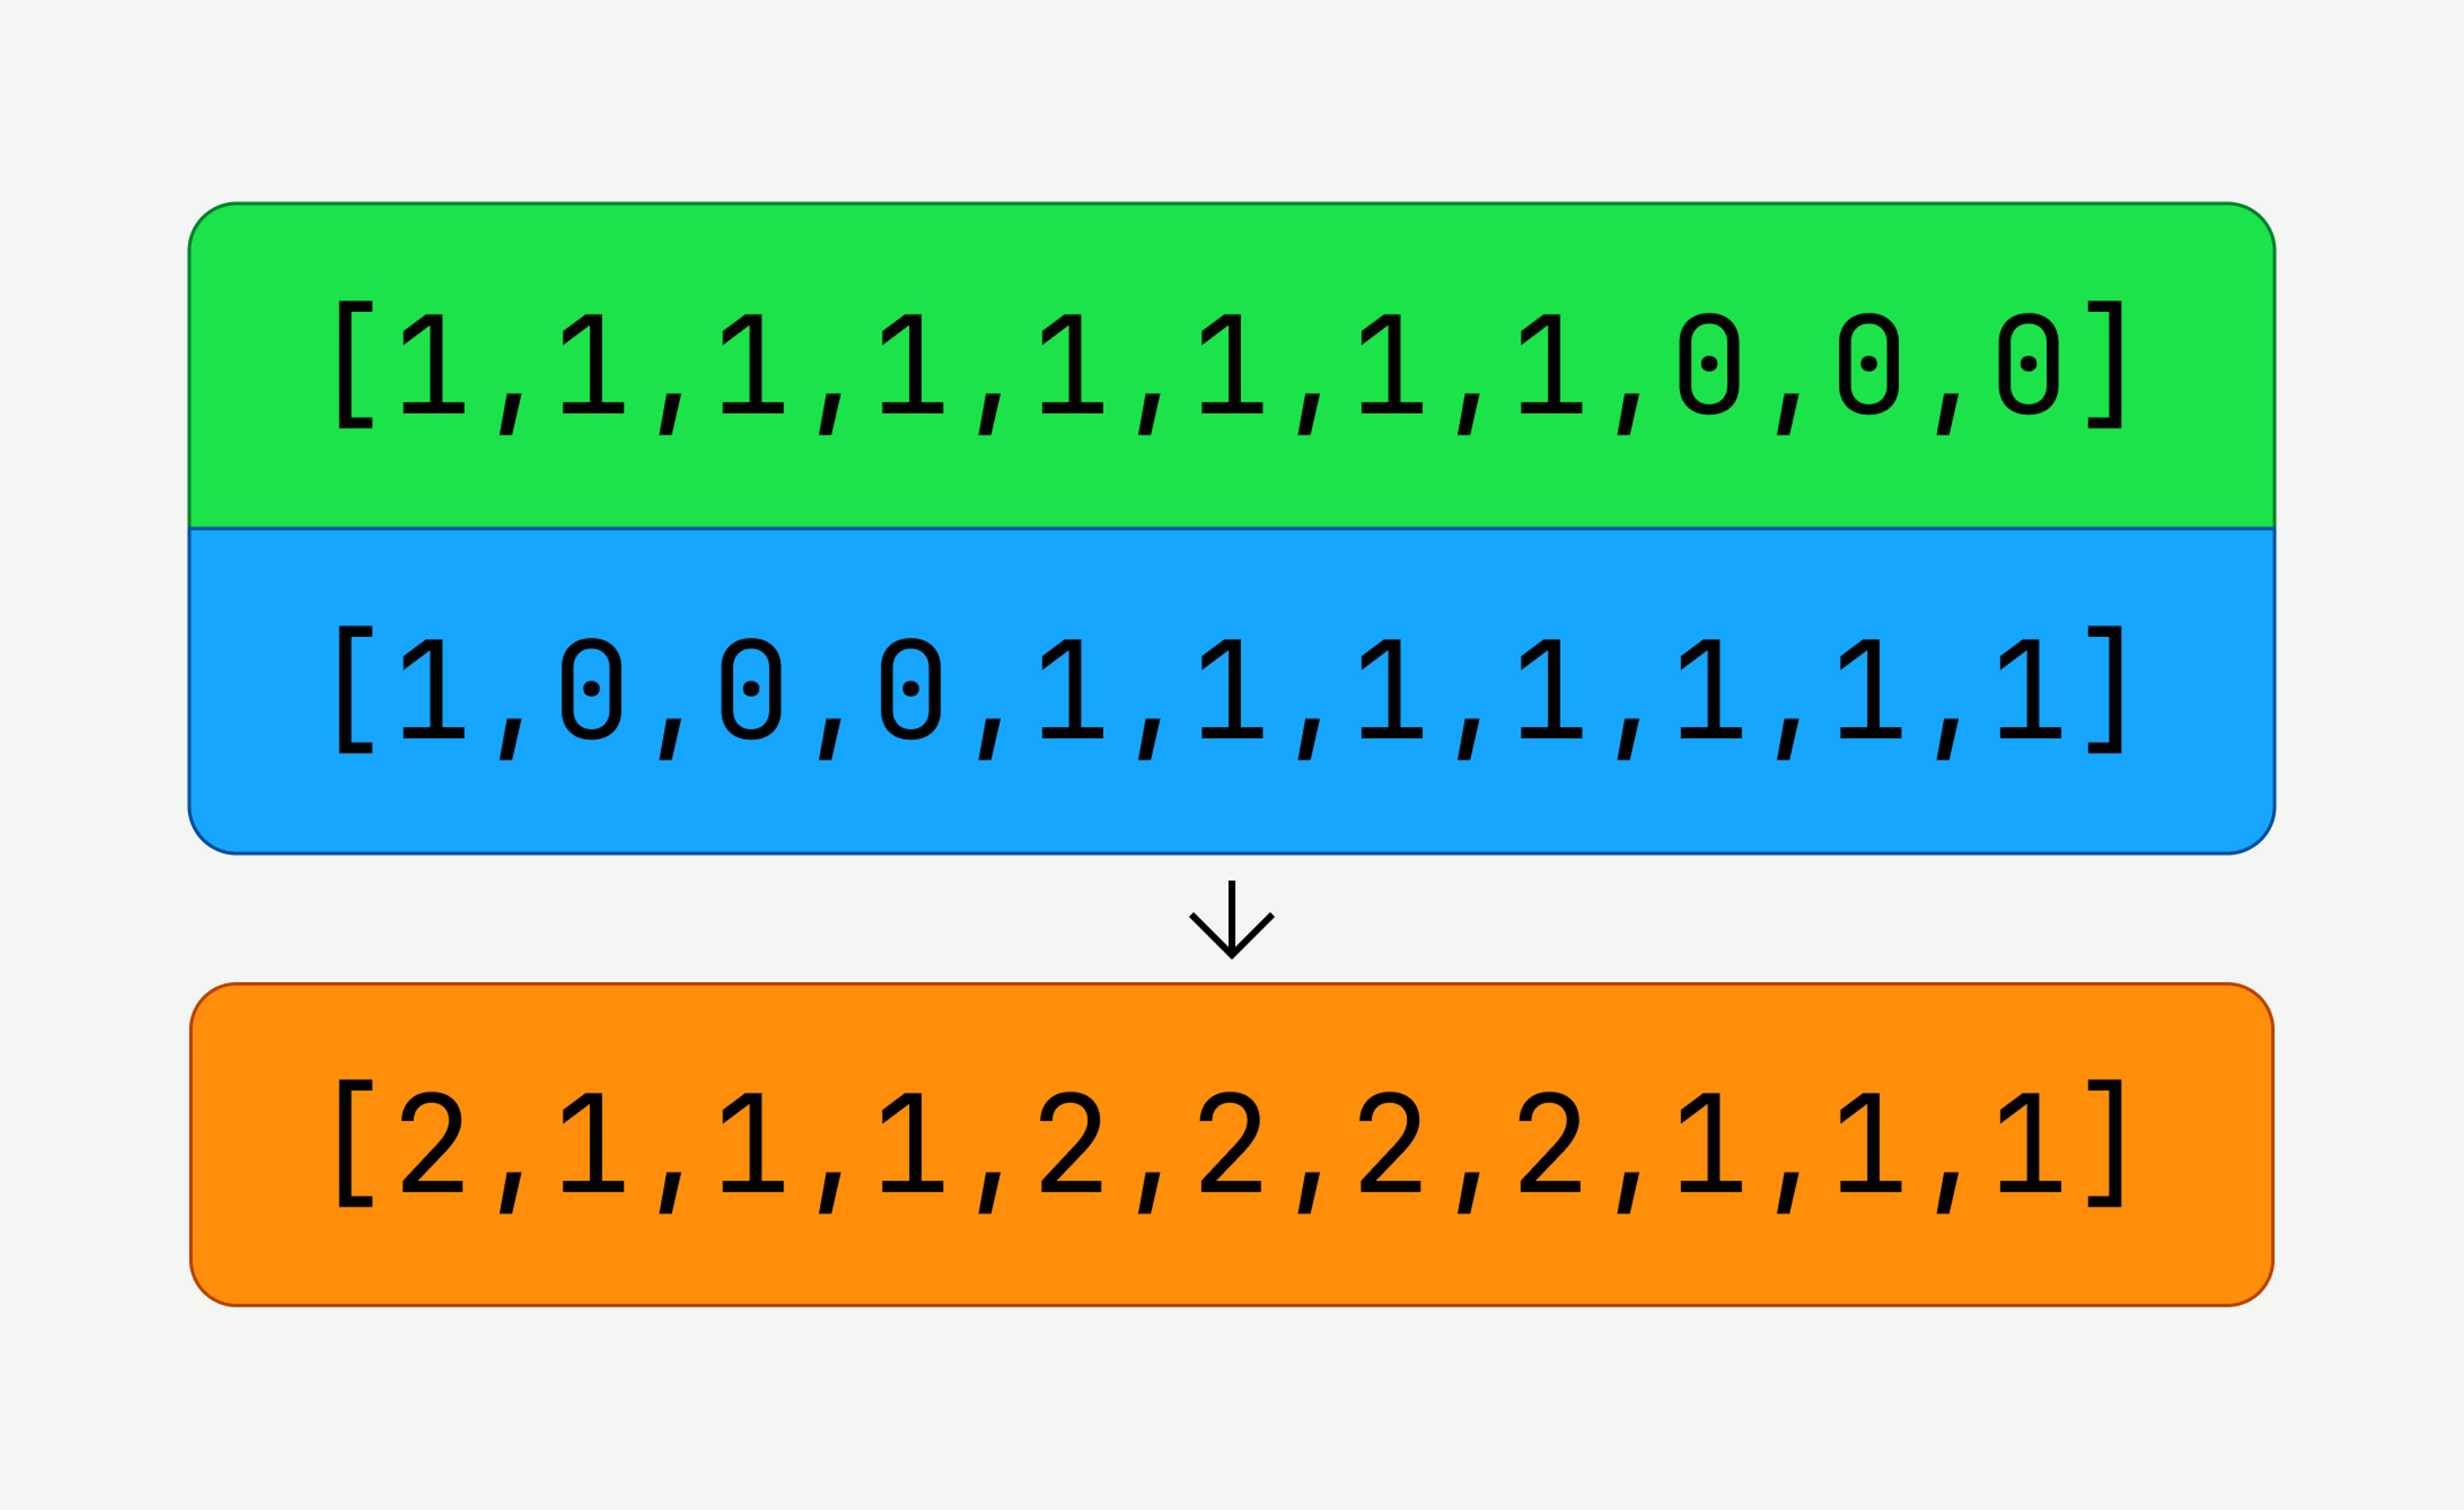
}, [player, recordPlaybackVector]);At the end of all this, our hook will return the current playbackVector, which represents the viewing pattern for the video. By combining this vector along with any other viewing session vectors you have stored for a particular video, you can create heatmaps, show popular segments, and analyze user engagement throughout an individual viewing session.
Here’s the final tracker code that we end up with:
import { useState, useEffect, useCallback, useRef } from "react";

const usePlaybackVector = (player) => {
  const [playbackVector, setPlaybackVector] = useState([]);

  /**
  * Storing value in a useState would change too frequently, causing a re-render of the callbacks that depend on it.
  * By placing the updated value inside of a ref instead of state on every change, we're able to access
  * the mutable ref within the callback without having to replace/re-render the callback
  *
  * Read more: https://reactjs.org/docs/hooks-faq.html#how-to-read-an-often-changing-value-from-usecallback
  */
  const lastRecordedSecondRef = useRef(0);

  /**
  * Slice up the duration of the video so that
  each second of playback can be accounted for individually

  We can then send this to a tracker when either the video changes or
  on the window.unload function
  */
  const determinePlaybackVector = useCallback(() => {
    if (!player) return;
    // `player.seekable` returns a time range containing the start and the end of what is seekable, use `.duration` as fallback
    const timeRange = player.seekable;
    if (timeRange.length === 0) return;
    const start = timeRange.start(0);
    const end = Math.ceil(timeRange.end(0));

    // Zero fill the playback vector to the length of the current video duration
    const length = Number.isInteger(end) && Number.isInteger(start) ? end - start : Math.ceil(player.duration);
    const vector = new Array(length).fill(0)

    setPlaybackVector(vector);
  }, [player]);

  useEffect(() => {
    if (!player) return;
    player.addEventListener("loadedmetadata", determinePlaybackVector);
    return () =>
      player.removeEventListener("loadedmetadata", determinePlaybackVector);
  }, [player, determinePlaybackVector]);

  /**
  * Update playback vector on time update
  */
  const updatePlaybackVector = useCallback(async () => {
    // make sure video is playing (check paused state) before marking second as watched
    if (player.paused) return;
    const lastRecordedSecond = lastRecordedSecondRef.current; // Read lastRecordedSecond state from the ref
    const currentSecond = Math.floor(player.currentTime);

    setPlaybackVector((currentPlaybackVector) => {
      // Make a shallow copy of the currentPlaybackVector
      const newPlaybackVector = [...currentPlaybackVector];

      // If first time watching this second, set it to 1
      if (currentPlaybackVector[currentSecond] === 0) {
        newPlaybackVector[currentSecond] = 1;
      }

      // If already watched this second and it's not the last
      // thing we've recorded, increment view for this second.
      if (
        currentPlaybackVector[currentSecond] > 0 &&
        lastRecordedSecond !== currentSecond
      ) {
        newPlaybackVector[currentSecond] =
          currentPlaybackVector[currentSecond] + 1;
      }

      return newPlaybackVector;
    });

    setLastRecordedSecond(currentSecond);
  }, [player]);

  useEffect(() => {
    if (!player) return;
    player.addEventListener("timeupdate", updatePlaybackVector);
    return () => player.removeEventListener("timeupdate", updatePlaybackVector);
  }, [player, updatePlaybackVector]);

  /**
  * Record playback vector
  */
  const recordPlaybackVector = useCallback(async ({ type }) => {
    if (playbackVector.length > 0) {
      // record the value stored in playbackVector on the server
    }

    // Reset the playback vector on emptied
    if (type === "emptied" && playbackVector.length > 0) {
      setPlaybackVector([]);
    }
  }, []);

  /**
  * Bind events which trigger recordPlaybackVector
  */
  useEffect(() => {
    if (!player) return;

    // Send beacon when window closes
    window.addEventListener("unload", recordPlaybackVector, false);

    // track source and playback id changes manually
    // if the source changes, commit the state of the viewing session
    player.addEventListener("emptied", recordPlaybackVector);
    player.addEventListener("loadstart", recordPlaybackVector);

    // you might need to double check that the stream type `streamtypechange` is streamType: `on-demand`

    return () => {
      window.removeEventListener("unload", recordPlaybackVector);
      player.removeEventListener("emptied", recordPlaybackVector);
      player.removeEventListener("loadstart", recordPlaybackVector);
    };
  }, [player, recordPlaybackVector]);

  return playbackVector;
};

export default usePlaybackVector;
Nice! Now we need a video to actually track. We can create a new component at App.jsx, import the hook, and pass it a reference to a video player within our application. Naturally, we’ll use Mux Player to play our Mux video back with ease:
import "./styles.css";
import { useState } from "react";
import MuxPlayer from "@mux/mux-player-react";
import usePlaybackVector from "../hooks/usePlaybackVector";

export default function App() {
  const [videoEl, setVideoEl] = useState(null);
  const pv = usePlaybackVector(videoEl);

  return (
    <div className="App">
      <MuxPlayer
        streamType="on-demand"
        ref={(muxPlayerEl) => {
          // Set the node in state so the usePlaybackVector will re-render
          setVideoEl(muxPlayerEl.media.nativeEl);
        }}
        playbackId="EcHgOK9coz5K4rjSwOkoE7Y7O01201YMIC200RI6lNxnhs"
      />
    </div>
  );
}Display a viewing heatmap in an area chart
The hard part is done. We have the viewing session data, so now all that’s left is to use a charting library to visualize it.
For this example, we’ll use Recharts since their AreaChart component is about as simple as it gets. You can add it to your project by typing npm i recharts into your CLI. Next, we’ll create a new Heatmap.jsx component that we can use to contain the code responsible for rendering the area chart. Here’s what that code looks like:
import React from "react";
import { AreaChart, Area, ResponsiveContainer } from "recharts";

export default function Heatmap({ pv }) {
  // Massage the data into the expected format for Recharts
  const data = pv.map((val, i) => ({ name: i, views: val }));
  return (
    <div className="h-12 mb-4">
      <ResponsiveContainer width="100%" height="100%">
        <AreaChart
          width={500}
          height={400}
          data={data}
          margin={{
            top: 0,
            right: 0,
            left: 0,
            bottom: 0
          }}
        >
          <defs>
            <linearGradient id="colorUv" x1="0" y1="0" x2="0" y2="1">
              <stop offset="5%" stopColor="#8884d8" stopOpacity={0.8} />
              <stop offset="95%" stopColor="#8884d8" stopOpacity={0} />
            </linearGradient>
          </defs>
          <Area
            type="monotone"
            dataKey="views"
            stroke="#8884d8"
            fillOpacity={1}
            fill="url(#colorUv)"
          />
        </AreaChart>
      </ResponsiveContainer>
    </div>
  );
}
For simplicity, we’re only passing the playback vector that’s currently stored in memory for the current viewing session to the heatmap. In a production application, you’d pull the aggregate stats from your server in the expected format and then pass them along to your Heatmap component.
We’ll also add the Heatmap component to our root application so that it will display underneath the video player:
import "./styles.css";
import { useState } from "react";
import MuxPlayer from "@mux/mux-player-react";
import usePlaybackVector from "../hooks/usePlaybackVector";
import Heatmap from "./Heatmap";

export default function App() {
  const [videoEl, setVideoEl] = useState(null);
  const pv = usePlaybackVector(videoEl);

  return (
    <div className="App">
      <MuxPlayer
        streamType="on-demand"
        ref={(muxPlayerEl) => {
          setVideoEl(muxPlayerEl.media.nativeEl);
        }}
        playbackId="EcHgOK9coz5K4rjSwOkoE7Y7O01201YMIC200RI6lNxnhs"
      />

     {/* For simplicity, we’re only passing the playback vector that’s
      currently stored in memory for the current viewing session
      to the heatmap.

      In a production application, you’d pull the aggregate stats
      from your server in the expected format and then
      pass them along to your Heatmap component. */}
      <Heatmap pv={pv} />
    </div>
  );
}
Give the video a play and watch as your heatmap chart populates with your viewer stats in real time.
Other ways to use your video tracker
This is a great and common use case for visualizing playback stats, but don’t limit yourself to this type of implementation. You now have the data to build other interesting features! Here are a few other million-dollar ideas:
- Video percentage completion: Only enable certain actions in your application once a certain percentage of your video has been viewed.
- Individual heatmap displays: Keep individual viewer session data and provide detailed playback insights into every video view.
- Transcript content analysis: Combine your viewing data with your timed transcript to understand which parts of your video script align with increased viewership.
Leveraging your viewing data can give you greater insights into your content performance while also making the application experience better for your end users. If you like a challenge, see if you can come up with other ways to use this data (and, if you do, let us know.)