The video element is a thing of beauty. You toss it in a page with a compatible source, and it Just Works™. Where that beauty crumbles like dust through our fingers is when you need to interact with the content or modify it in any way.
Enter the Canvas API! At a high level, the Canvas API gives developers a way to draw graphics in the DOM via the <canvas> element. A really common use case is image or photo manipulation, so it stands to reason that it would also work well for processing a bunch of sequential images, aka video. Let's walk through a few examples, ranging from the simplest way we can interact with video + canvas, to a few more interesting use cases.
Boilerplate
We do a couple of things for consistency in each of these examples. The first is that we use Mux playback IDs for each video. player.js is just a little utility that grabs every video element on a page with a data-playback-id attribute and initializes HLS.js on each one.
The second thing is that we have a little Processor class that we'll use for each demo. There's nothing special going on there, we just wanted each demo file to be self-contained but also similar enough between the simple to advanced examples that we can easily compare the differences between them as we progress.
Copying video: Rendering from a video element into canvas.
Note: These CodeSandbox demos may not work on Safari. ¯\_(ツ)_/¯
In this example, all we're doing is rendering the output of a video element into a canvas element. We have a bare bones HTML file with a video element and a canvas element (we'll basically use this exact same file for each example). When we create a new instance of our Processor class, we grab the video and canvas elements, then get a 2D context from our canvas. We then kick off the party in our constructor by setting up a listener so we can work our magic when the video element starts playing.
When the play event fires, we start calling our updateCanvas method. In this case we're just going to call drawImage on our context and tell it to draw exactly what's in the video element. Immediately when that's done we use requestAnimationFrame to call that function again as fast as it can.
"Why not just use setTimeout instead of requestAnimationFrame?" you might be asking yourself. We use requestAnimationFrame instead of a timer here to avoid dropping frames or shearing. Unlike good ol' setTimeout, requestAnimationFrame is synced with the display hardware's refresh rate so you don't have to play any frame/refresh rate guessing games.
Let's do something with the image now!
This example starts off nearly identical to our previous example. However, instead of just mirroring whatever's happening in the video element, here we're going to manipulate the image before painting it to the context.
After we draw the image as we did before, we can get that image data back out of that context as an array of RGBA values for each pixel. This is really exciting, because it means we can iterate over each pixel and do whatever we'd like, which in this case is going to be turning our beautiful color video into a grayscale version.
We ended up just going with the approach the Mozilla team describes and setting each RGB valuer to the average of all 3 of them. We then update those values in the image data array and paint the updated version to the context.
A quasi-practical example: analyzing and using details of the video
First, a story of Phil’s pain and suffering. He’s been helping organize Demuxed since it started in 2015. This year among other things, he’s been working on the Demuxed 2019 website, which has a large animation at the top of the page that’s intended to blend perfectly with its background. The animation can be done using JavaScript and SVGs, but the file sizes are huge and it completely locks up a core on a MacBook Pro. The conference is video-focused, so we'll do the reasonable thing and use a nicely encoded video.

He had put the video up into the hero and noticed that the background color of the video didn't quite match the background color specified in CSS. No big deal, he did what any sensible dev would do and pulled out an eyedropper tool, grabbed the hex value in the video, and updated the background color to be the same.

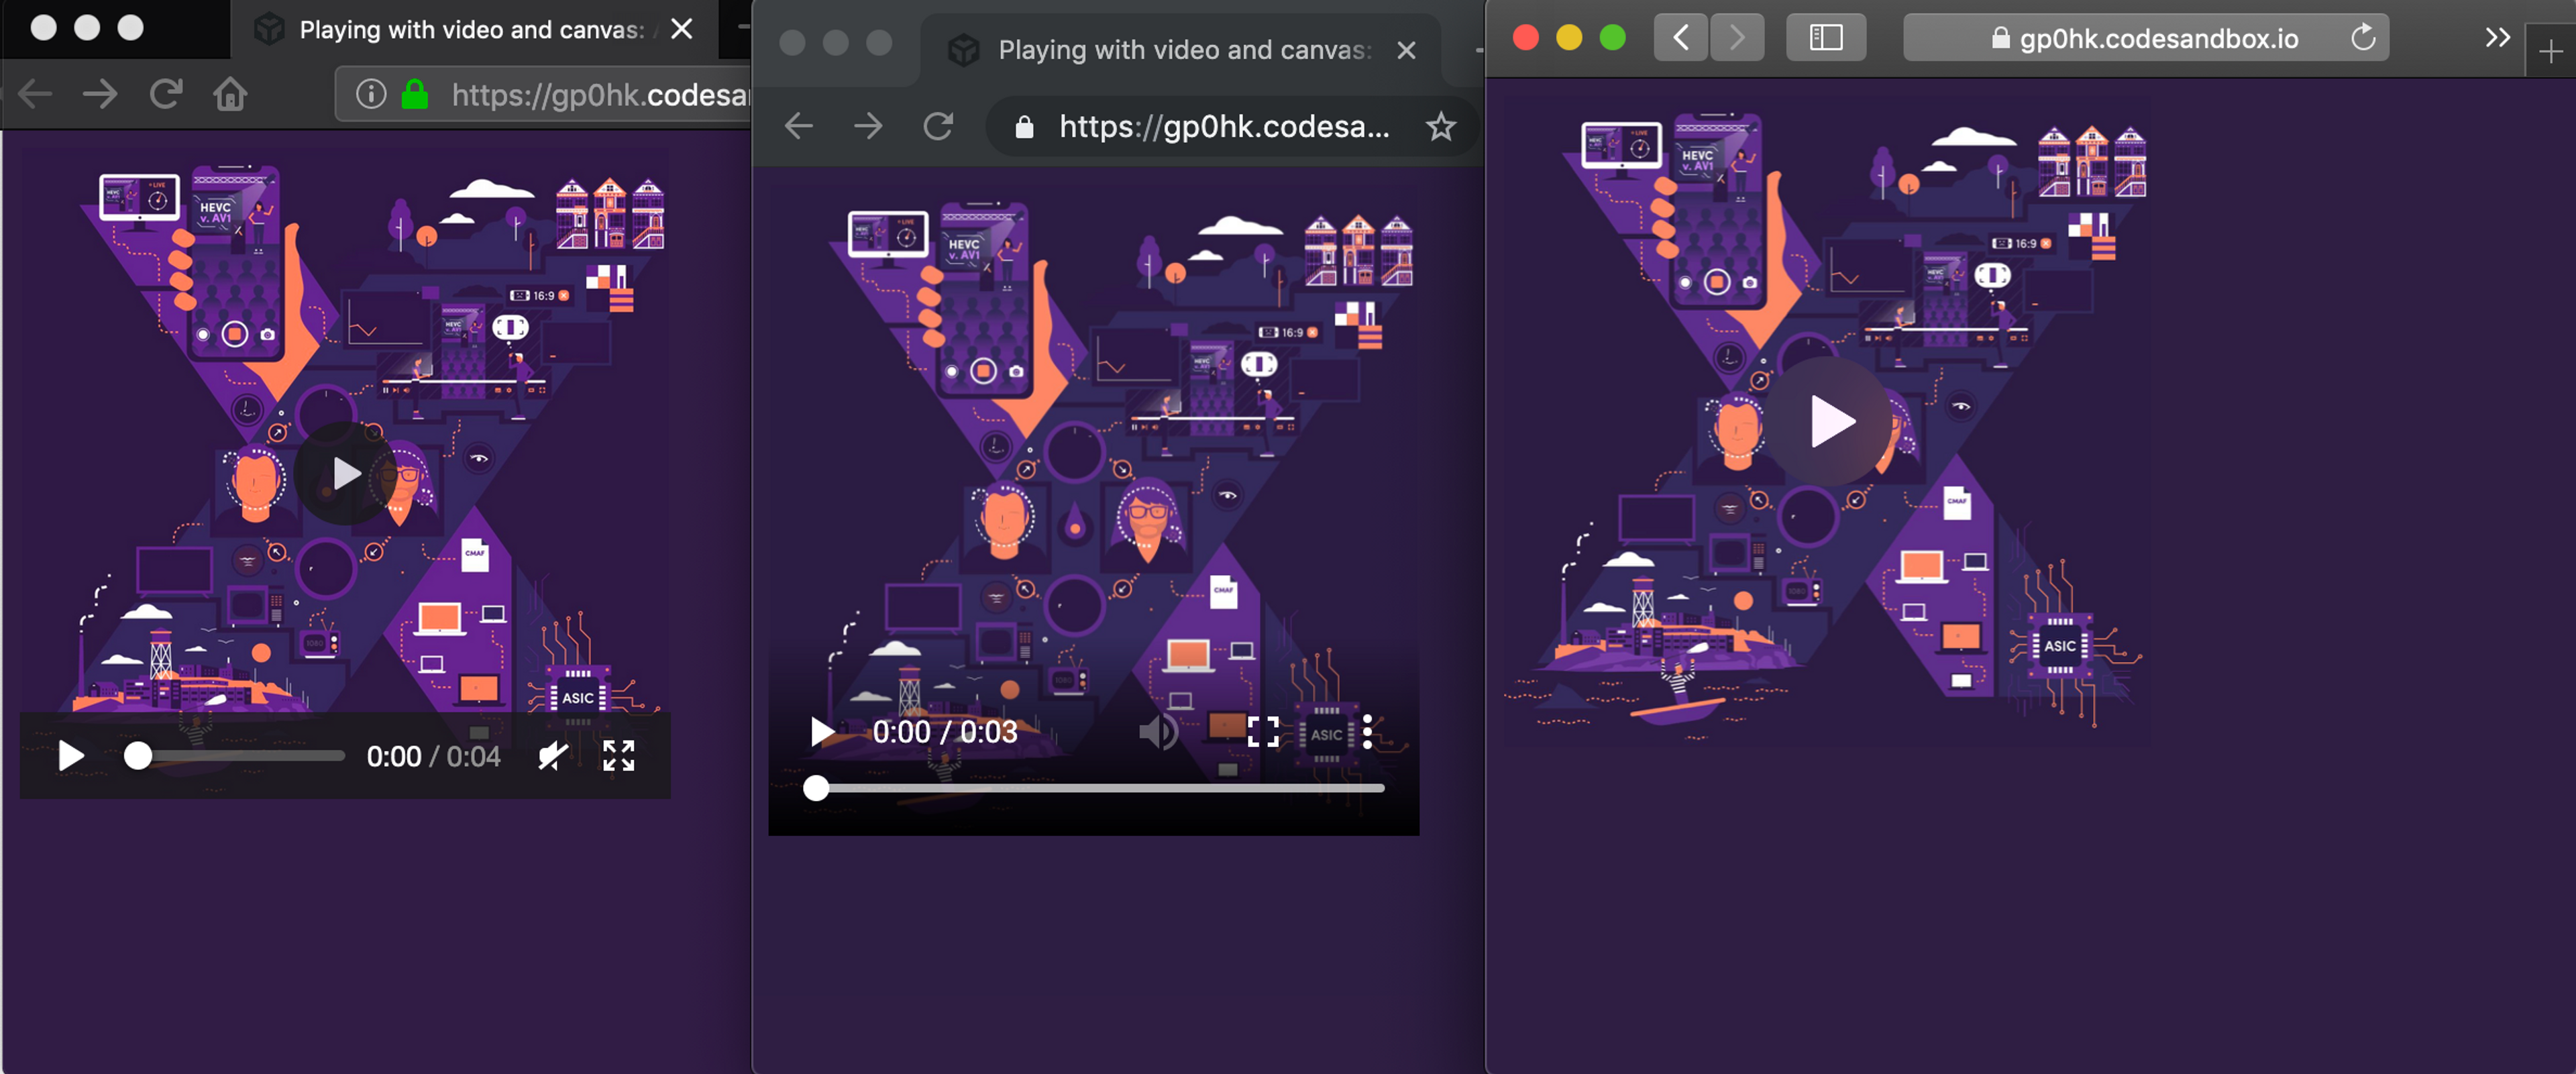
When he opened it in different browsers/devices, he realized we were dealing with a color space issue. Different browsers/hardware handle the color spaces differently when decoding the video, so there's essentially no way to reliably match a hex value across different decoders like we were trying to do.

If you look carefully you'll see tiny differences in the purple backgrounds. Demuxed images used with permission.
To solve this issue, this example gives up and just does our initial fix in every browser. We do as we've done before and draw the frame of video to our canvas, then we just grab one single pixel on the edge. As the browser renders the image into canvas, it does the work for us to convert the colors into the correct color space, allowing us to just grab one of the RGBA values on the edge and set the body background color to be the same!
Ok now sprinkle some machine learning on it
In the world of buzzwords, two letters still reign supreme: ML. What's a technical blog post that doesn't sprinkle some machine learning on whatever the problem at hand may be? More importantly, I have no idea what I’m doing on this front. We do cool stuff with ML at Mux. I am not the one that does cool stuff with ML at Mux.
We're going to take our last example a little further and tie some of these concepts together: we'll use Tensorflow's object detection model to find objects in each frame and classify them, then we'll draw the frame in our canvas with boxes and labels associated with them. Spoiler alert, according to this classifier everything we thought we knew about what objects were in Big Buck Bunny was wrong.
This is where I should reiterate that I'm not a data scientist and this is the first time I've personally ever played with Tensorflow. The fun part here is doing some real time analysis and then modifying the frame!
“That’s great!” I hear you shouting, “Big Buck Bunny is great and everything, but does it actually work in the real world?”. We sent Phil out on a walk with his new dog and his camera to give it a try, let’s see how it turned out…
Well, the good news is that the majority of the time, it appears Phil has indeed adopted a dog. That 1% of frames where it’s a horse though? Well, we never claimed to be perfect!
What else can we do with this?
Whatever you can think of! You can use a similar approach to apply a chroma key filter and build your own green screen, or build out your own graphics and overlays. If you're doing something interesting using HTML5 video and canvas, we'd love to hear about it.


