Integrate with Contentful
The Mux Contentful app connects Contentful with your Mux account so that Mux can handle uploading and streaming of all videos.
This is a detailed guide for integrating the Contentful Mux app. To read more about the Mux app and why you may want to use it to power videos in your CMS, read the announcement blog post on Contentful's blog.
1. Enter Mux credentials
Create an access token in your Mux account - you will need both the access token ID and the access token secret in the Contentful application. The access token should have Read and Write permissions for Mux Video, and also Read for Mux Data.

2. Install App
In the Contentful dashboard click “Apps > Manage Apps” in the top navigation bar. Scroll down and find the Mux app, click it to start the installation flow.
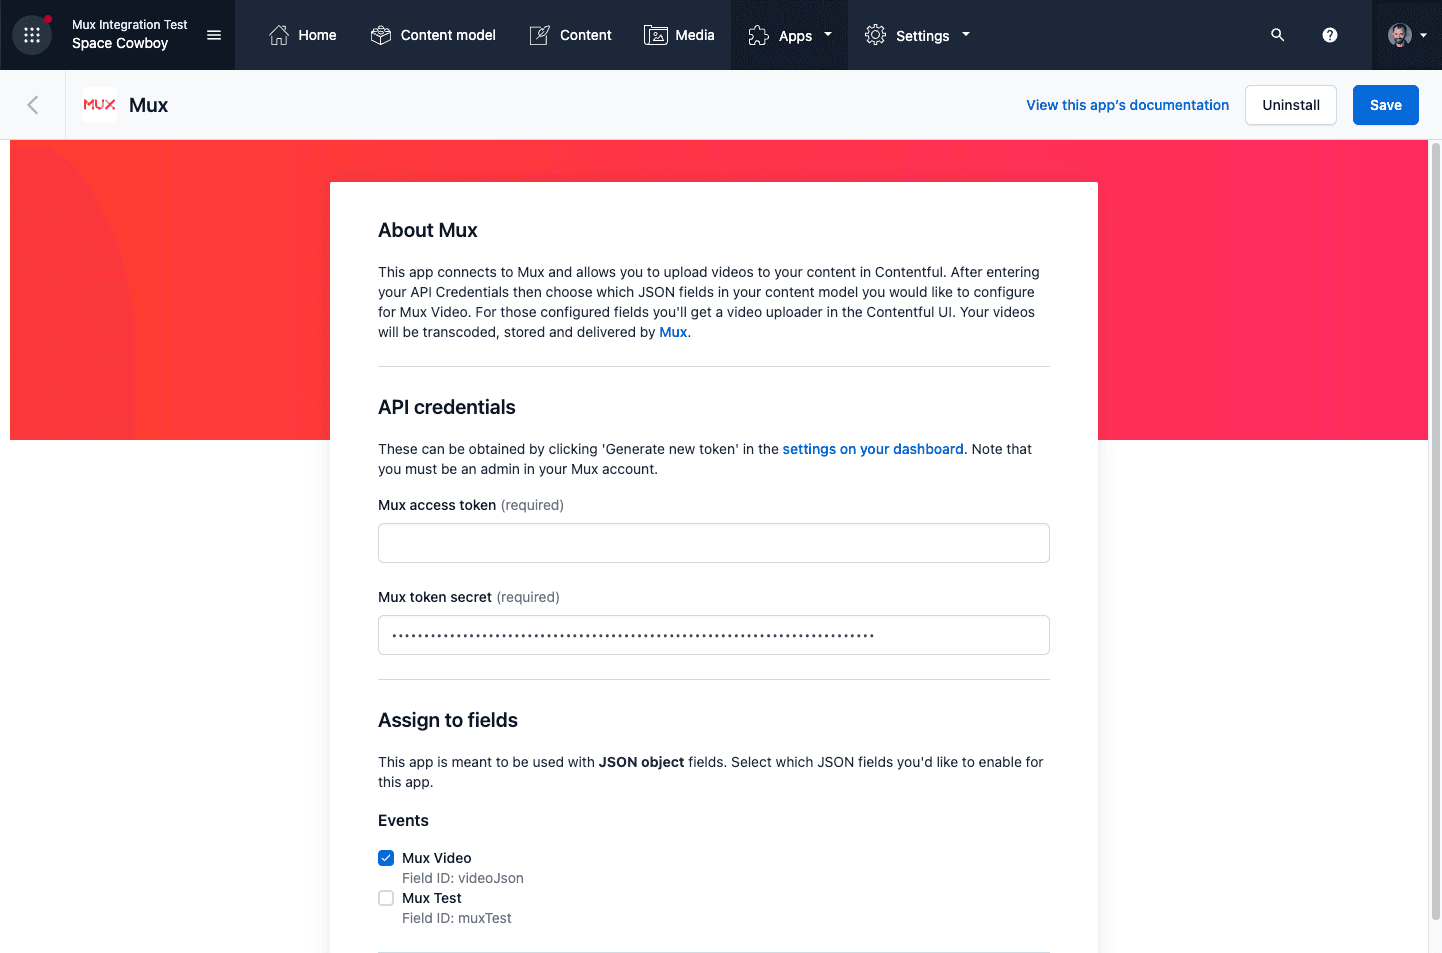
Next you will see the configuration screen. You can come back to this screen after the app is installed to update the app configuration. Enter your Mux access token and Mux token secret. These are the same credentials you would use to make API requests yourself.
Assign Mux to JSON fields from your content model. In this example I am assigning Mux to take over the “Video Upload” field in my Blog post model. If you add new JSON fields later you can always come back to this configuration screen and assign Mux to the new fields.
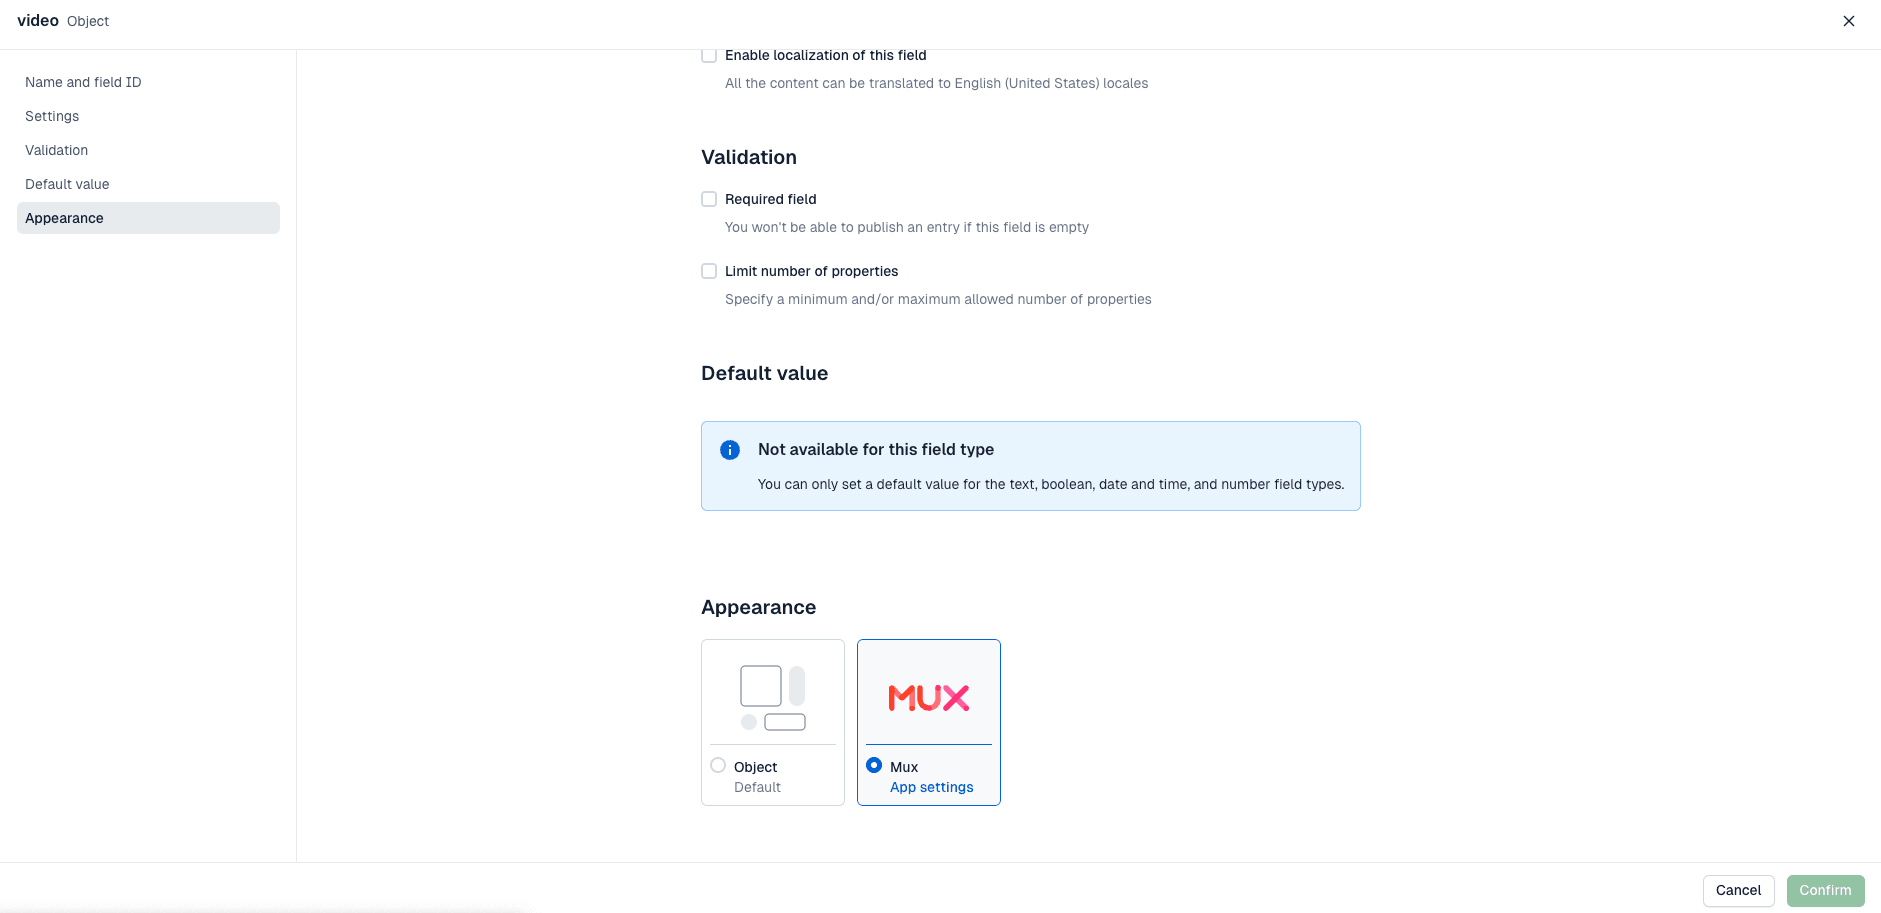
You can also assign Mux fields from the configuration of a particular Content model if you create a JSON Object type field and then edit its appearance as follows:
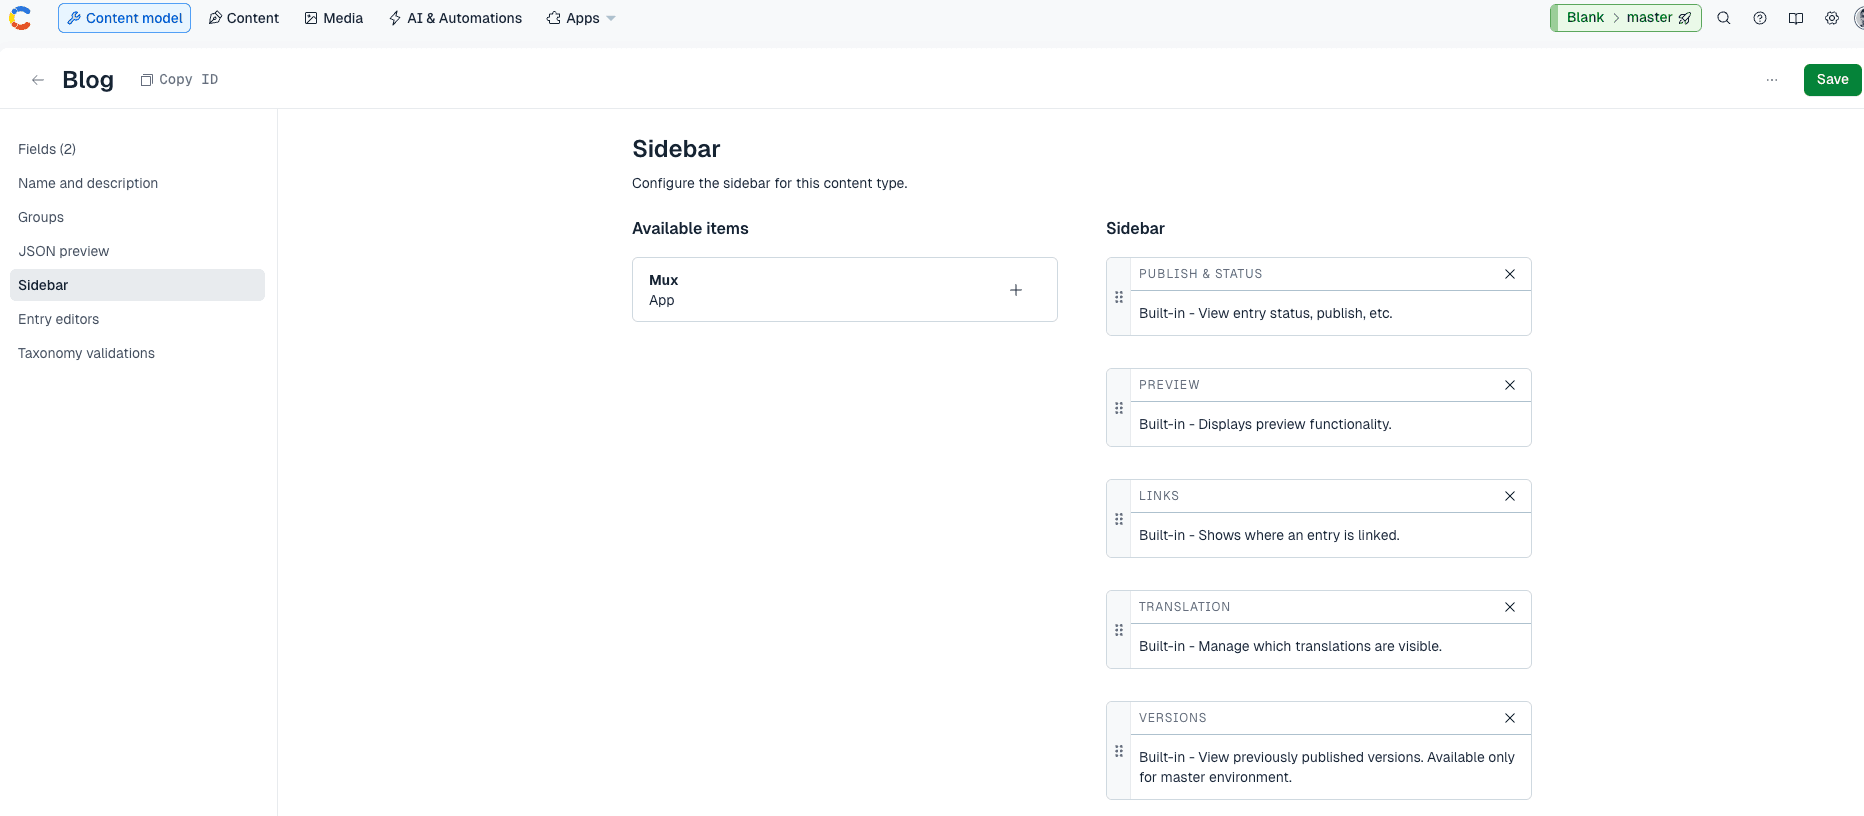
2.1. Assign Mux Sidebar to a Content model
Once the plugin is installed and your Content Models are configured, you can add the Mux sidebar by clicking the plus sign and placing it wherever you want. Then click save. This sidebar is used to visualize pending changes with the publication of the Entry in Contentful. This is explained in more detail in the Features and Important Notes section.
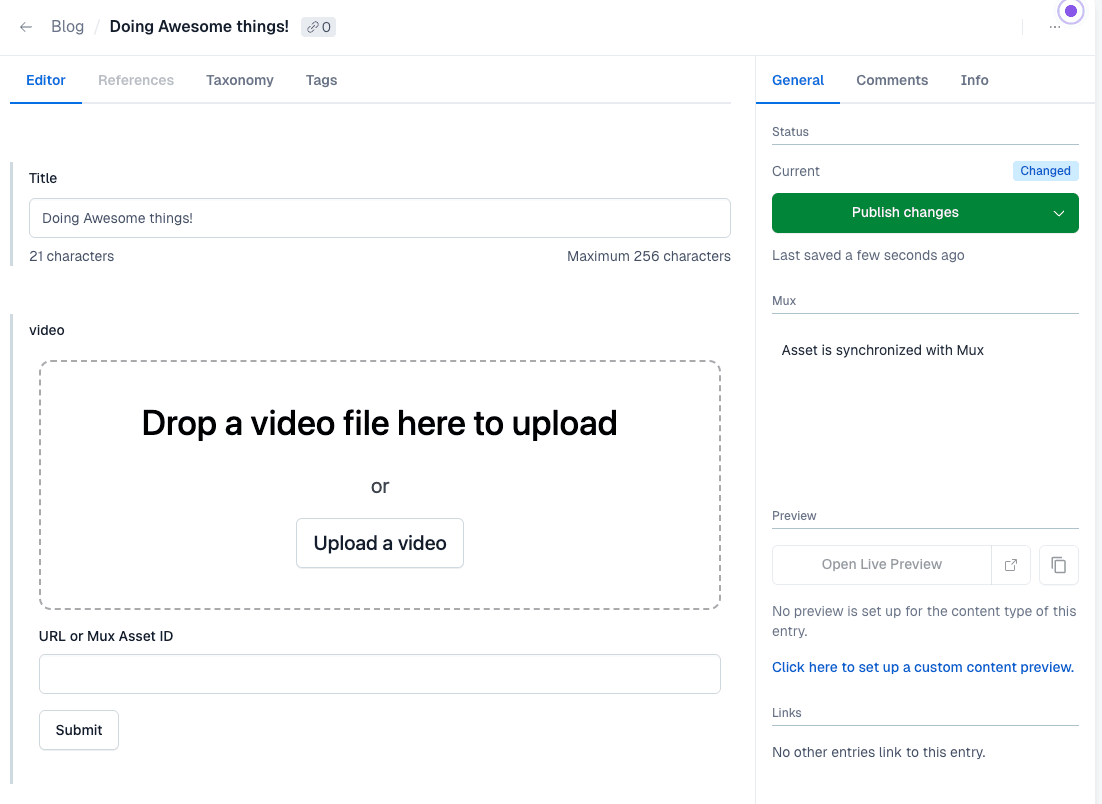
3. Upload video
Create a new entry for your content model. You should see a drag and drop zone and file picker to select an audio or video file:
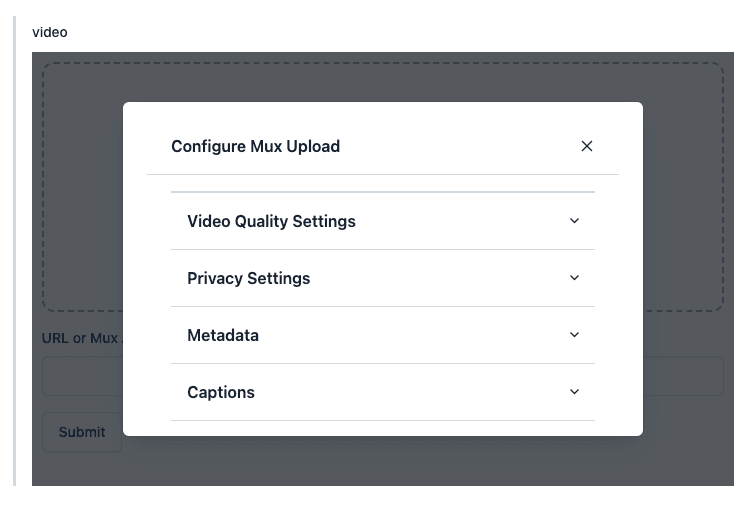
Select a video file and a modal will appear with expandable configuration options that you can click to expand and configure the video before it's uploaded. The configuration options available are:
-
Video Quality Settings: Allows you to define the video quality. More information: Use different video quality levels
-
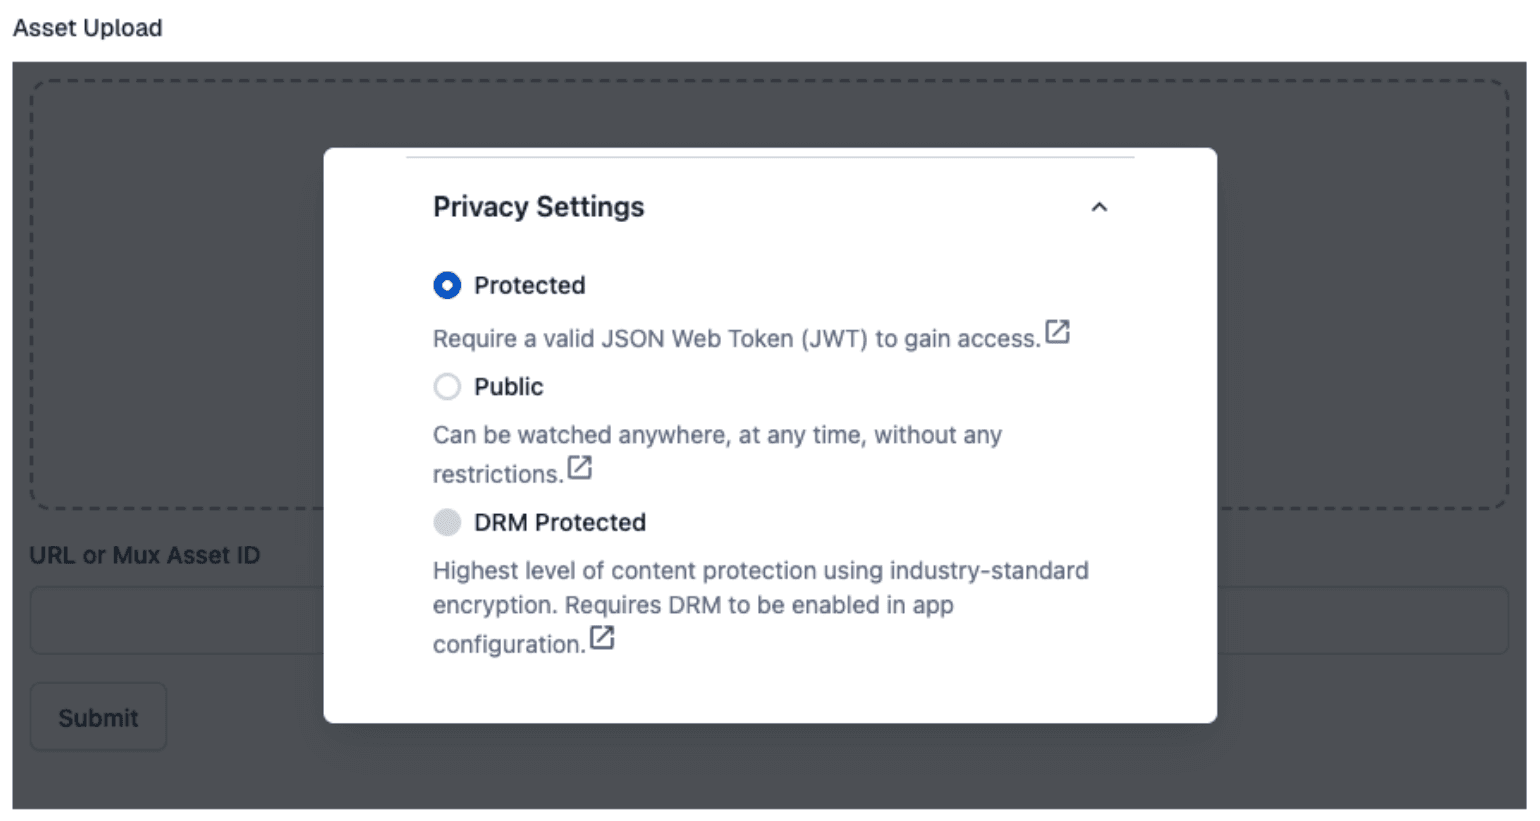
Privacy Settings: Allows you to define the video visibility between public or protected. More information: Secure video playback
-
Metadata: Allows you to add the title in the video metadata. This is also useful for having the title defined in the Mux Dashboard. More information: Add metadata to your videos
-
Captions: Allows you to add captions to your videos, both custom and auto-generated captions.
- To generate auto-generated captions, you need to specify the video language and it will automatically generate captions.
- For custom captions, you need to specify the URL where the captions are located and the caption language.
More information in Captions and Subtitles section.
- MP4 Generation: Allows you to generate static renditions for your videos, both audio-only and audio with video. More information: Enable static MP4 renditions
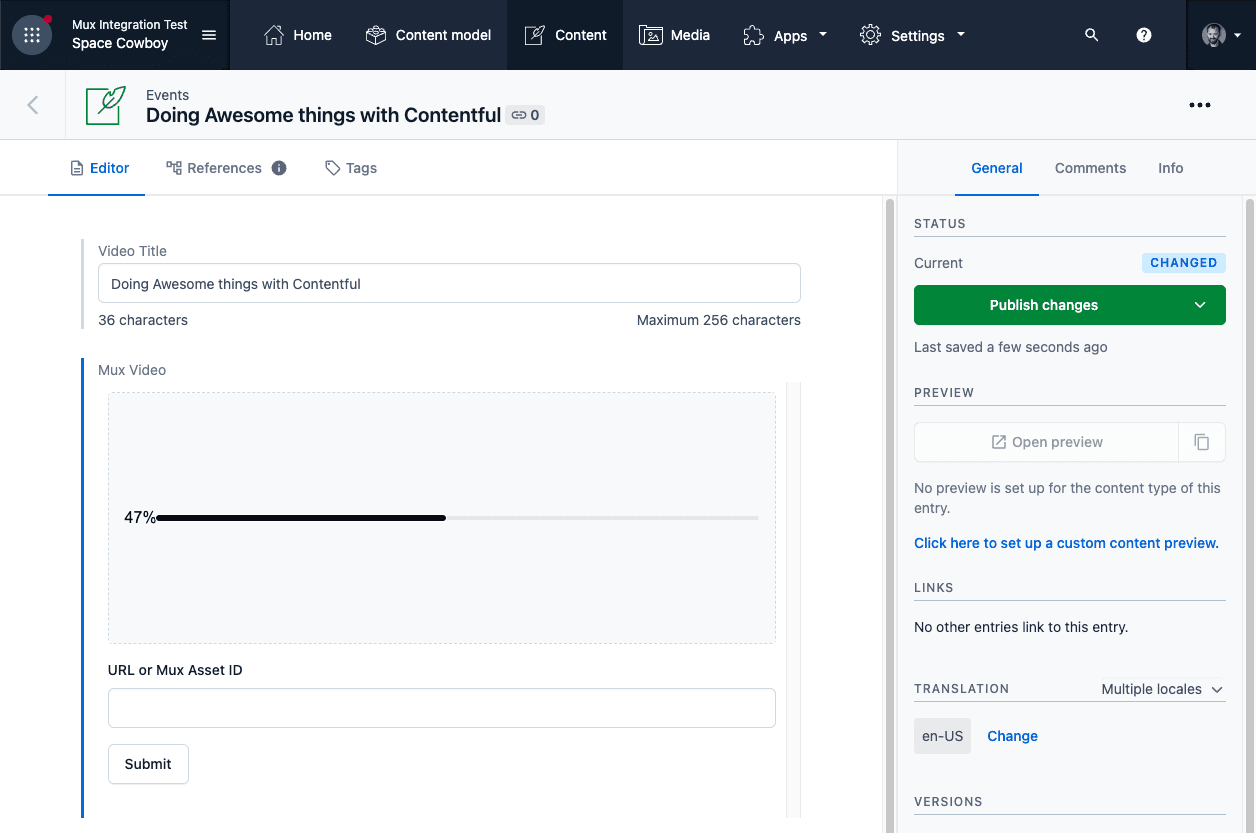
After configuring these options, click on the upload button and wait for the file to upload to Mux. The amount of time this takes will depend on your network upload speed and the size of the file. Don't close the tab until the upload is complete.
Additionally, entering a Mux Asset ID from an existing video in Mux, or a URL to an audio or video file will also work in the input field.
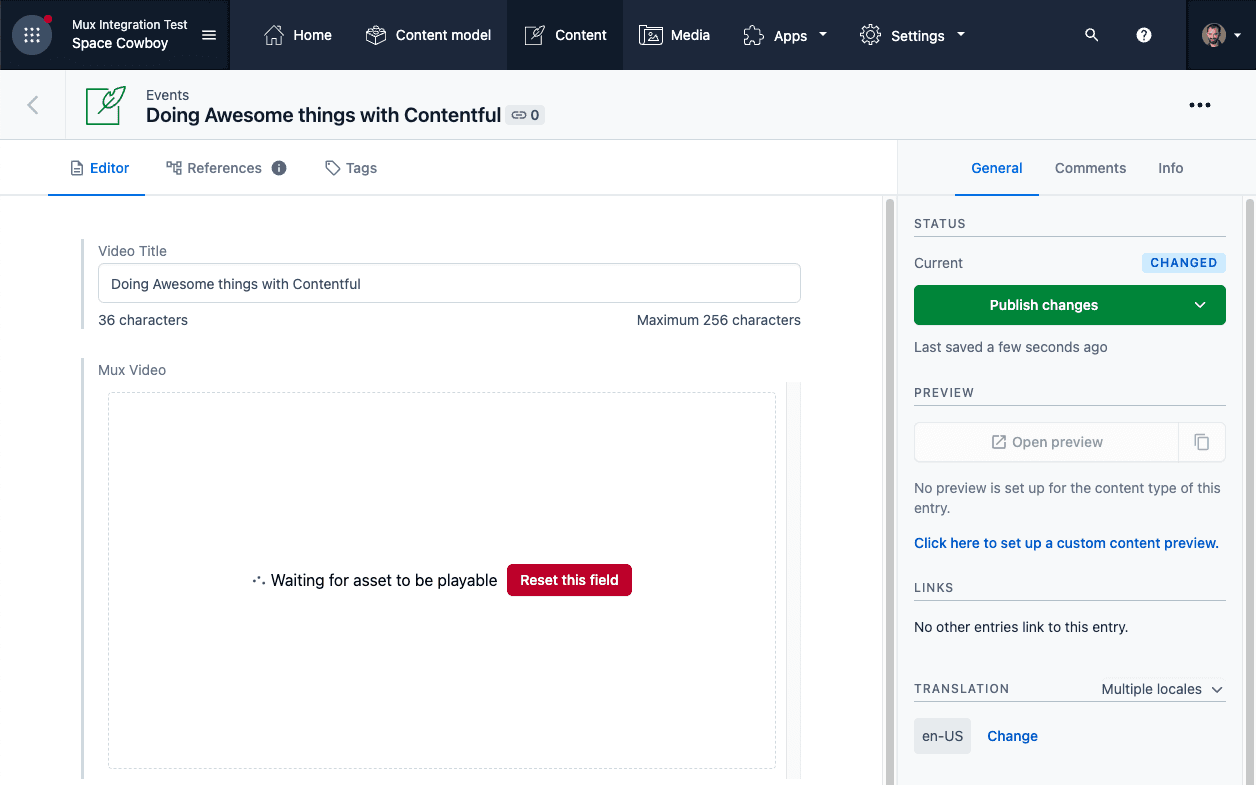
After the upload is complete you will see a message that says "Waiting for asset to be playable" while Mux is processing your video. For normal video files it should only take a minute or so, however longer files, or files that need more processing, may take longer.
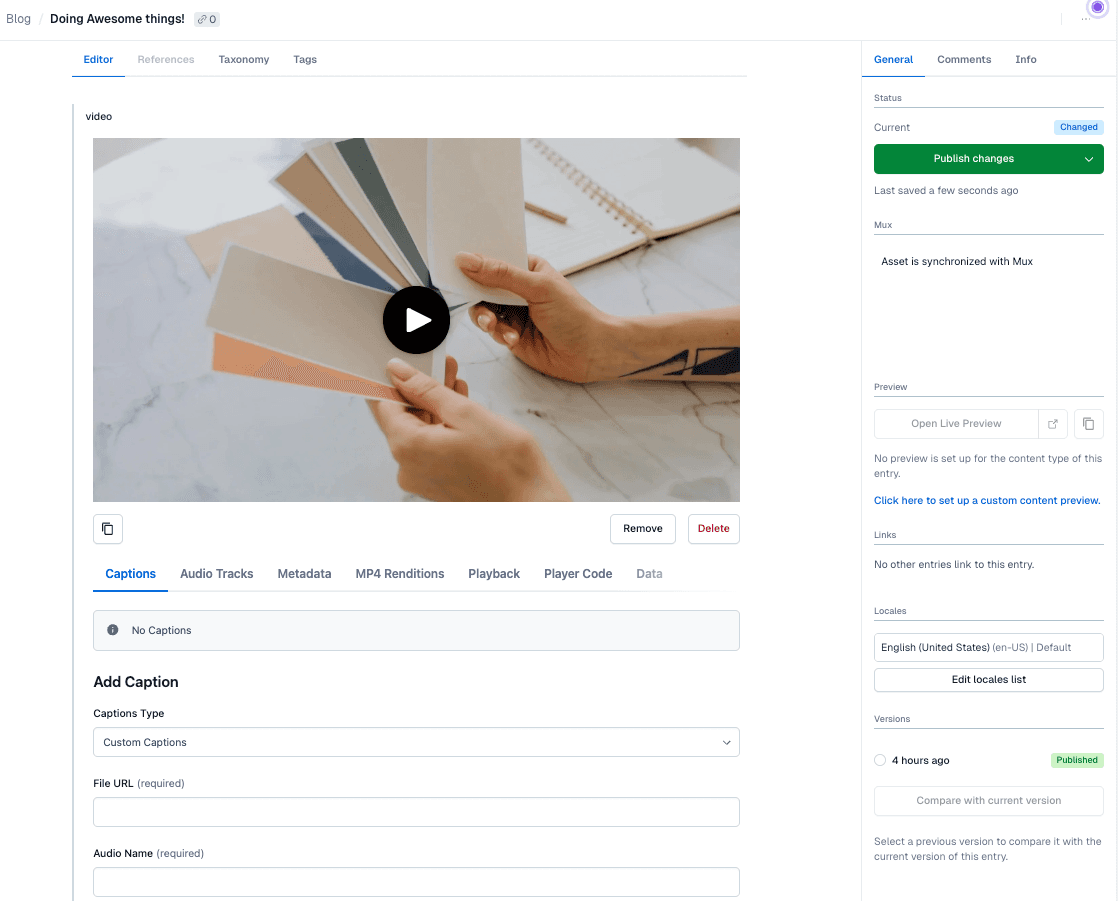
Your video is now playable via Mux. You will see a player with your video in the Contentful UI.
4. Playback
When you query your Mux video through the Contentful API you will get back a JSON object that looks something like this that is viewable in the Data tab:
{
  "version": 3,
  "uploadId": "some-upload-id",
  "assetId": "some-asset-id",
  "playbackId": "YOUR_PLAYBACK_ID",
  "ready": true,
  "ratio": "16:9",
  "max_stored_resolution": "HD",
  "max_stored_frame_rate": 29.928,
  "duration": 23.857167,
  "audioOnly": false,
  "created_at": 1664219467,
  "audioTracks": [
    {
      "type": "audio",
      "primary": true,
      "max_channels": 2,
      "max_channel_layout": "stereo",
      "id": "some-audio-track-id",
      "duration": 10.026667
    }
  ],
  "meta": {
    "title": "some-video-title",
    "external_id": "some-external-id"
  }
}
You will need to pull out the playbackId property and construct a URL like this. You will use this URL with a player that supports HLS:
https://stream.mux.com/{YOUR_PLAYBACK_ID}.m3u8View Mux's Playback docs for more information about players.
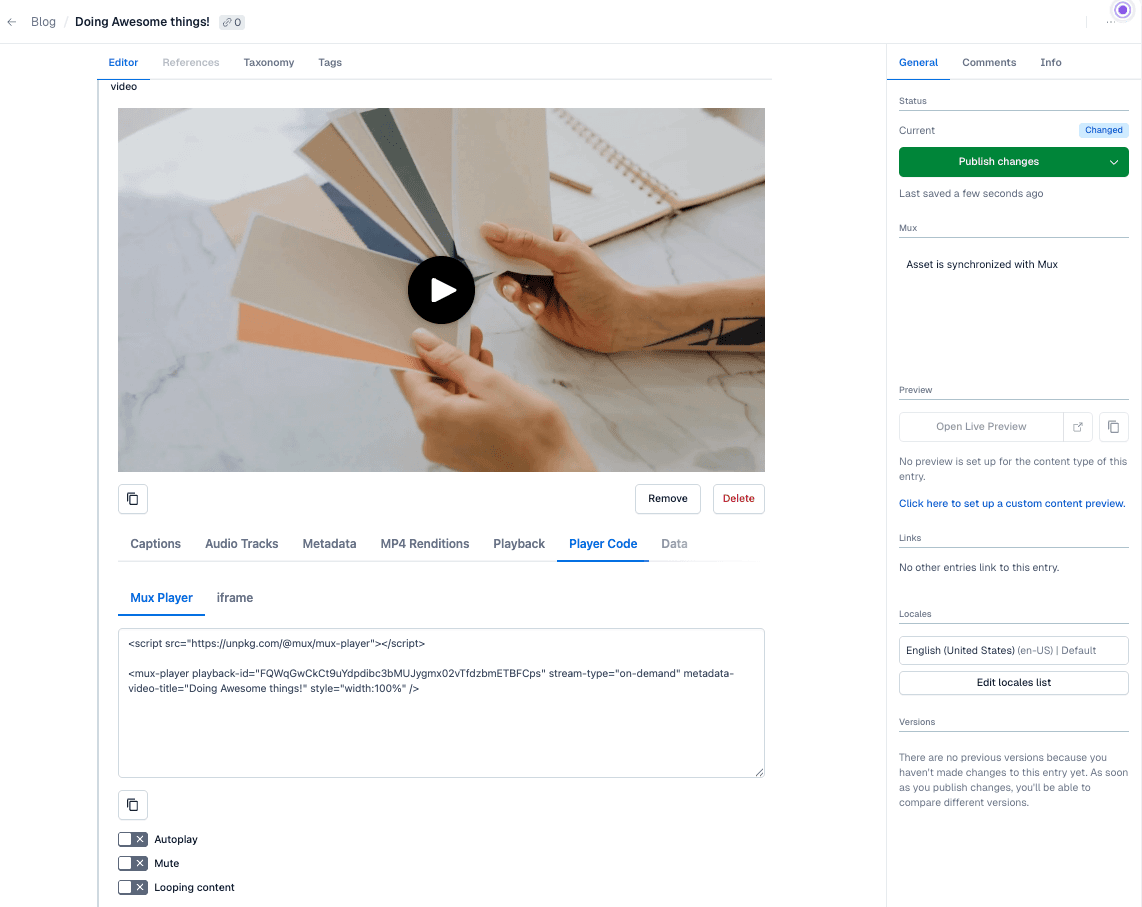
Using Mux Player
We made it easy to playback video using Mux Player by including the same code used to play the video in the Contentful dashboard. Simply head to the Player Code tab, click the copy button, and paste this into a website for quicker testing and development. You can also add optional parameters to the example code such as autoplay, mute, and loop by clicking the corresponding checkboxes. This will update the example code for you to use.
Additionally, there's an option to get iframe example code for embedding the video, providing an alternative integration method.
5. Captions and Subtitles
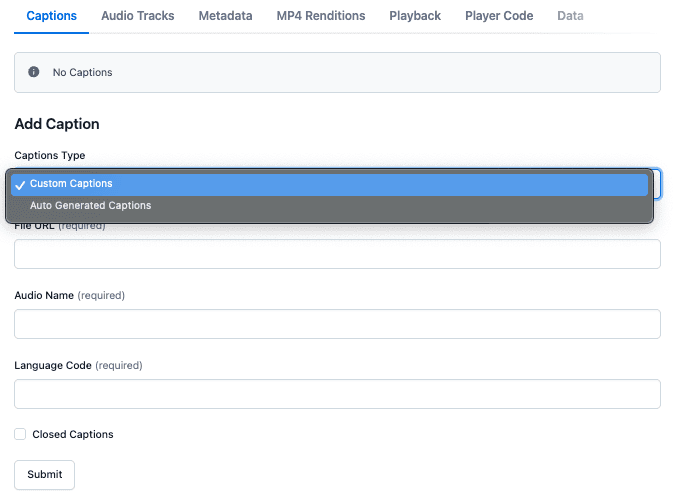
Captions can be added before uploading an asset (see the Upload video section) and after uploading in the Captions tab. There are two ways to add captions: auto-generated and custom captions, and they can be used together if desired.
You must select the type of captions to upload from the dropdown menu.
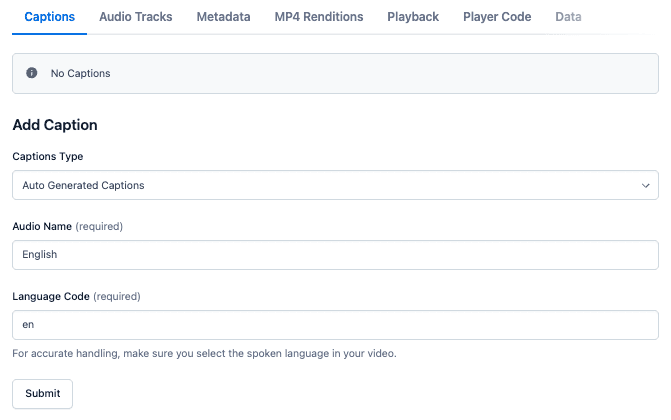
Auto-Generated Captions
For auto-generated captions, you need to select the Language Code. This is automatically populated based on the Audio Name you select. It's important to select the same language as the spoken audio in the video so that captions are generated correctly.
The Audio Name is what will appear in the player when selecting the caption. You can use any name you want.
Custom Captions
Custom captions and subtitles can come from any publicly available URL. Add the URL to the vtt or srt caption file, selecting the caption name and to mark as closed captions.
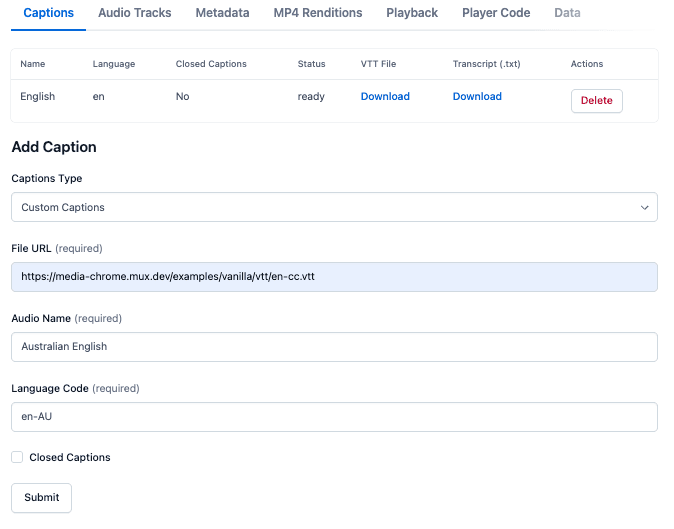
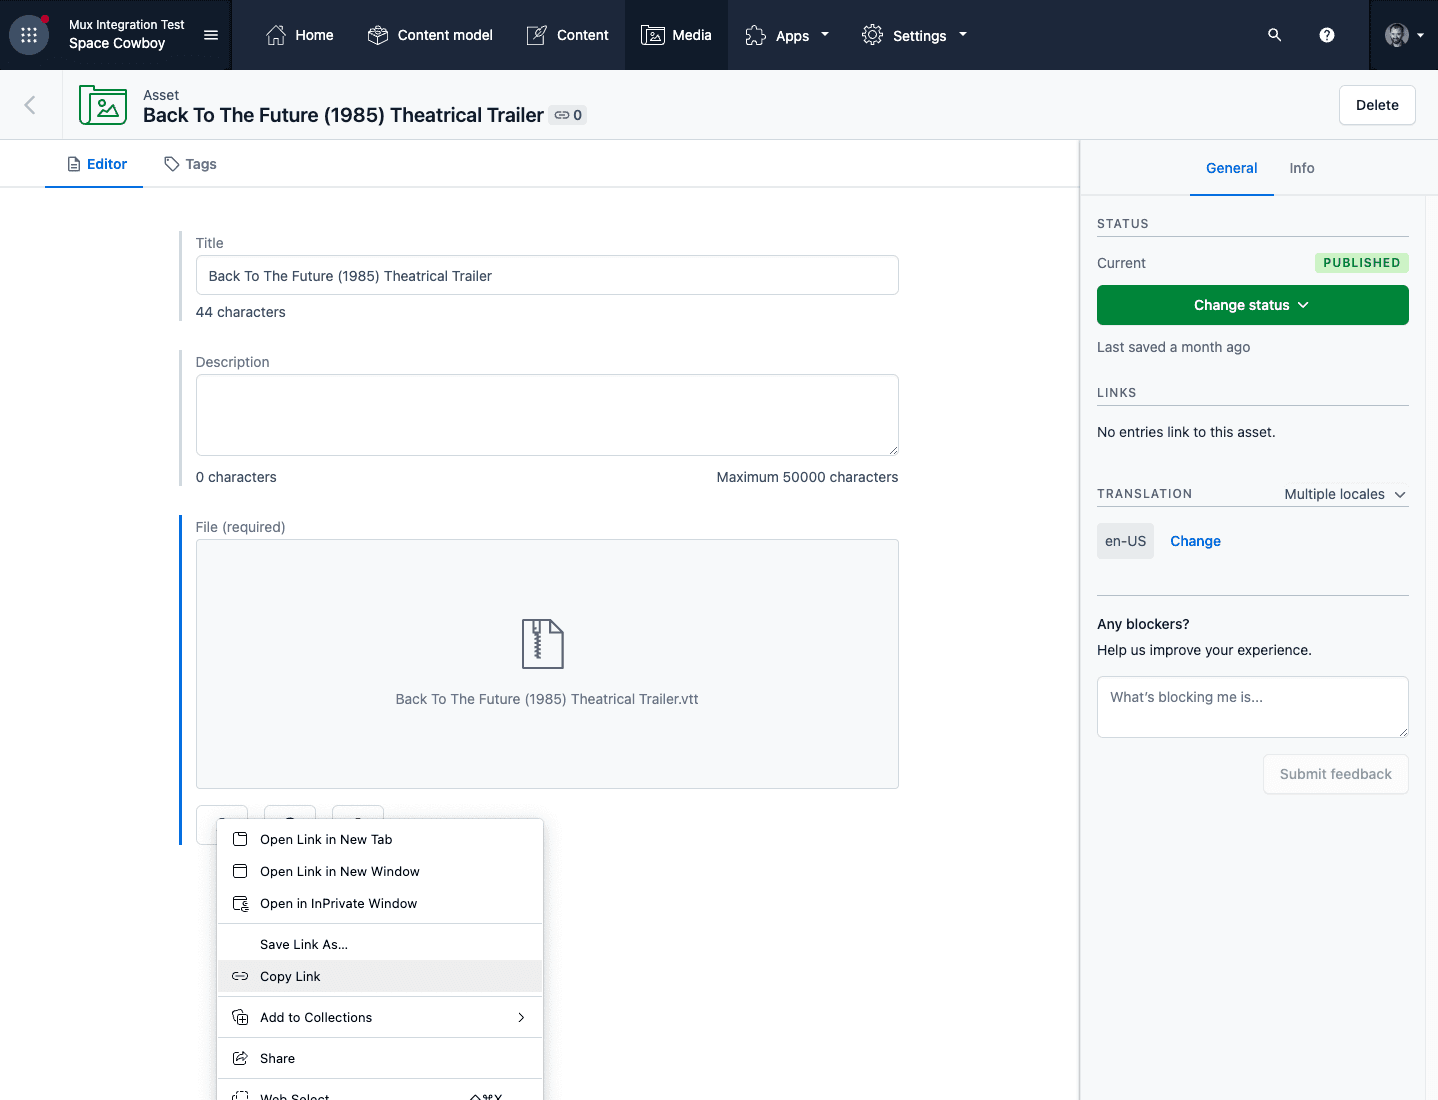
One way to upload captions is to use the Contentful Media Manager. After uploading the file to the Manager, right click on the download button and select copy link then paste this link into the URL field.
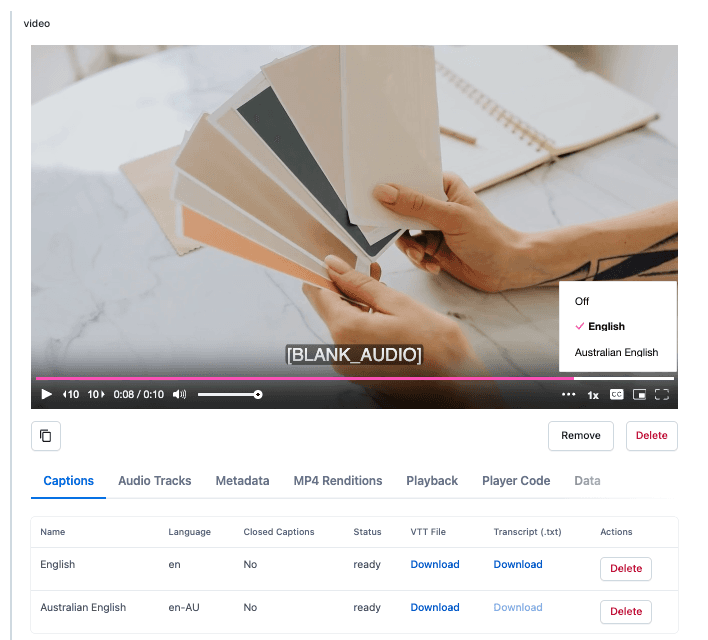
Managing Captions
Caption files can be added or deleted, and files can be downloaded for further editing. The stored JSON object will also reflect additional caption files. Existing captions will be displayed after clicking the Resync button under the Data tab or when entering to the entry. Deleting a caption will appear in the Mux sidebar and require publishing to take effect in Mux.
6. Audio Tracks
You can add new audio tracks to an existing asset in the Audio Tracks section. This is useful for providing multiple language audio tracks or alternative audio content for your videos.
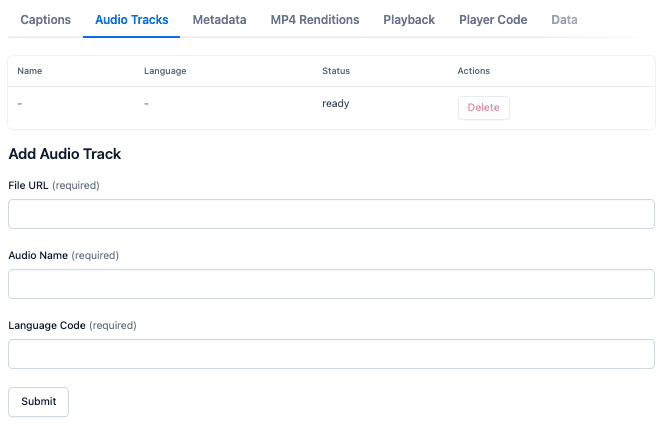
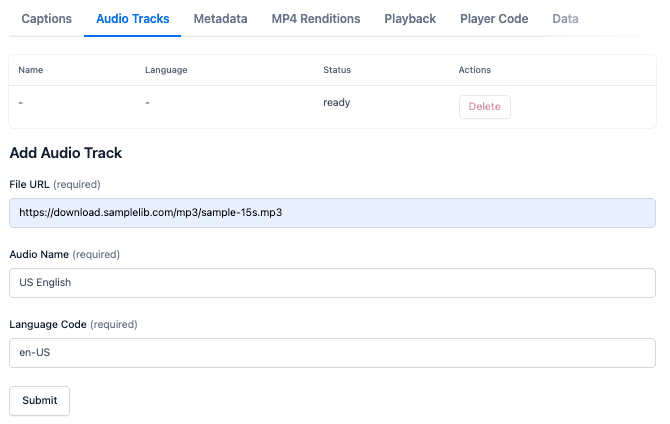
Adding Audio Tracks
To upload a new audio track, you need to provide a public URL of an audio file. One way to obtain this is by using the Contentful Media Manager, in the same way as described in the Captions section.
You need to specify the Language Code, which is automatically populated when you indicate the Audio Name. The Audio Name can contain any text and is what will be displayed in the player when users want to select from the available audio tracks.
Managing Audio Tracks
Audio tracks can be added or deleted, and the stored JSON object will reflect the additional audio tracks. Deleting an audio track will appear in the Mux sidebar and require publishing to take effect in Mux.

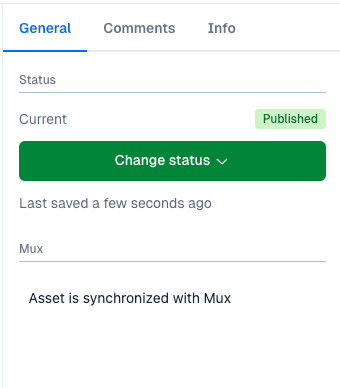
7. Mux Sidebar
The Mux sidebar provides a visual interface to track the synchronization status between your Contentful entries and Mux assets. This sidebar displays:
- Pending actions that need to be synchronized with Mux
- Any changes that require publishing to take effect in Mux
8. Publishing Requirements and Breaking Changes
As part of the version 2.0 plugin release, changes were made to maintain data integrity and consistency between what is published in Contentful and what is stored in Mux. For example, to change a video from public to protected, its playback ID must be regenerated, and if that video is published in Contentful, the new playback ID couldn't be obtained previously.
To solve this, some actions that we consider "breaking changes" will not be executed in Mux until the user clicks "Publish" on the pending changes.
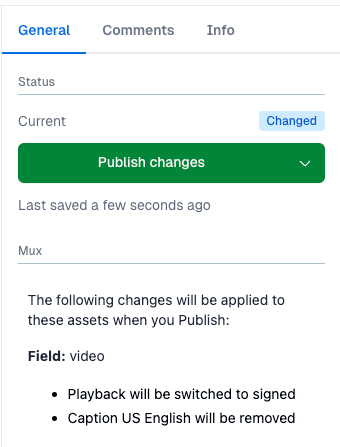
Breaking Changes That Require Publishing
The following changes will appear as pending in the Mux sidebar and will only be applied to Mux when you click "Publish changes" in Contentful:
- Delete Video - Removing a video asset
- Delete Captions - Removing caption/subtitle files
- Delete Audio - Removing audio tracks
- Change Metadata Title - Modifying the title in the metadata section
- Delete MP4 Renditions - Removing static MP4 files
- Change Video Visibility - Switching between public/protected settings

Publishing Workflow
For example, if you want to change the visibility of an existing video, this will be a pending change that appears in the sidebar and the change will be made in Mux when you click "Publish changes" in Contentful.
The same happens with actions like deletions - if you want to delete a caption, it will appear marked for deletion but will only be removed when you publish. You can also undo deletions to prevent them from being deleted when you publish.
Explore advanced options
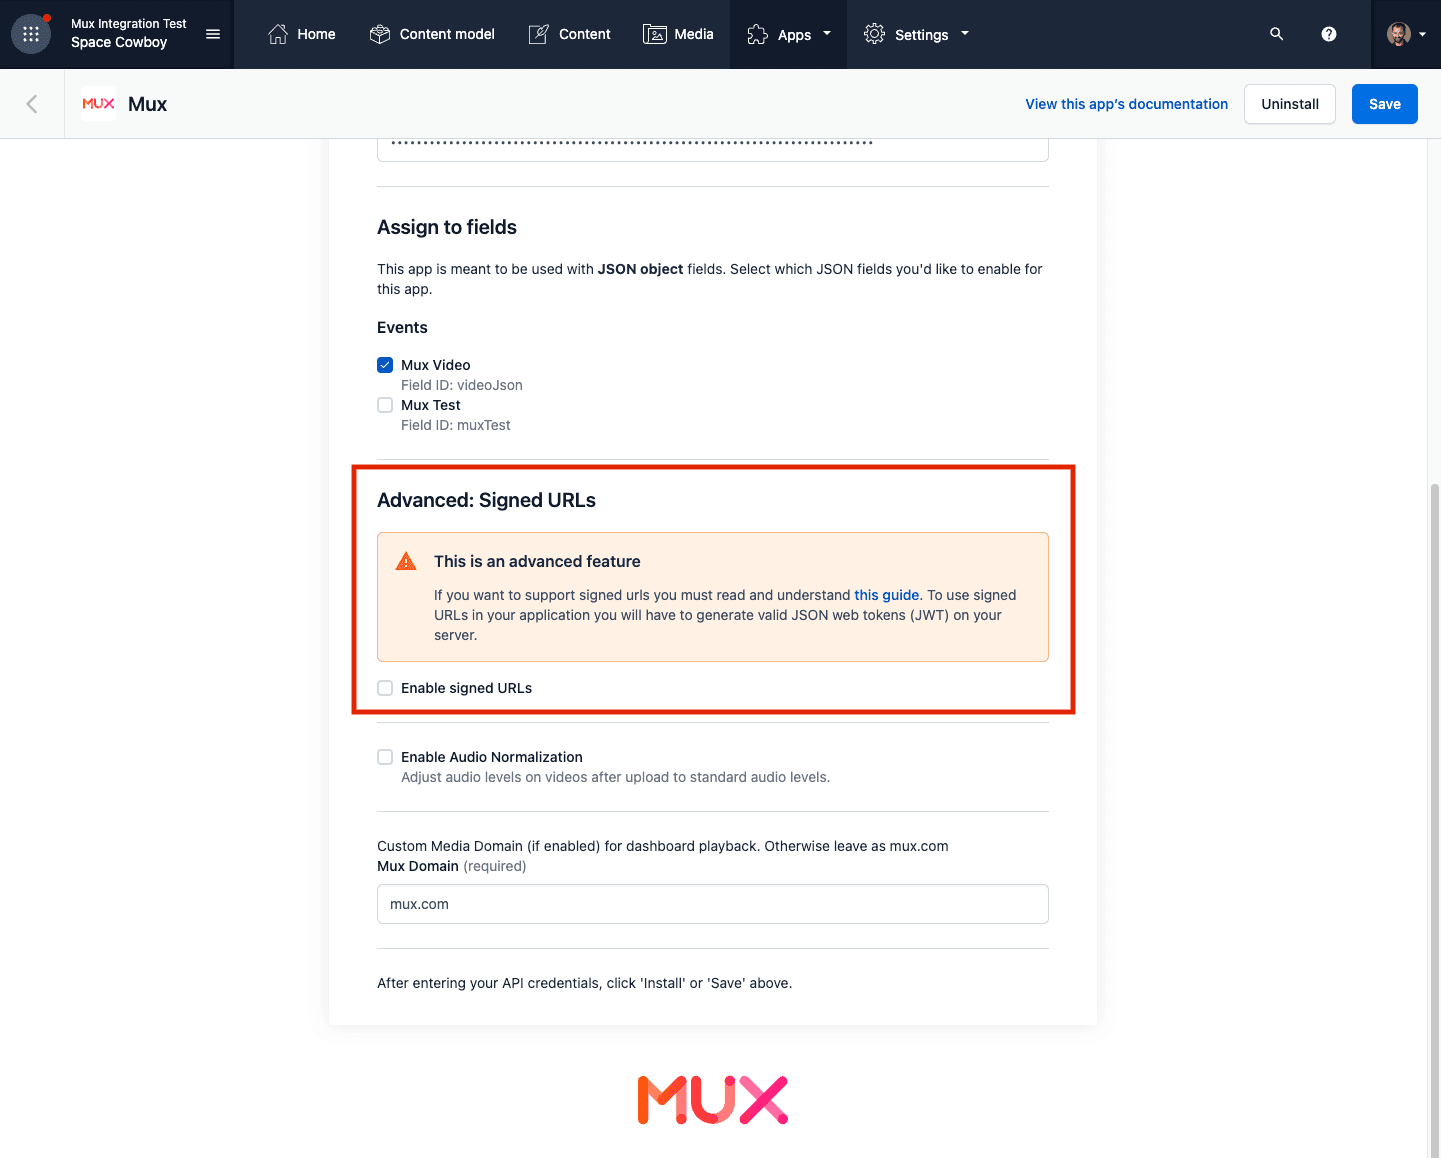
Advanced: Signed URLs
Warning! Requires generating JWT on your server
Enabling signed URLs in Contentful will require you to generate your own signing tokens on your application server. This involves creating a signing key and using that to generate JSON web tokens when you want to access your videos and thumbnails outside of Contentful.
By default, all assets uploaded to Mux through Contentful will be created with a single playback policy of "public". This means that your videos and thumbnails are accessible with https://stream.mux.com/{PLAYBACK_ID}.m3u8 and https://image.mux.com/{PLAYBACK_ID}/thumbnail.jpg.
If you want more control over controlling the playback and thumbnail access, you can enable this feature on the Contentful configuration page:
When you enable this feature, the following things will happen:
- The Mux App in Contentful will use the Mux API to create a URL signing key and save this with your Contentful configuration.
- When uploading an asset, you can select "Protected" in the Privacy Settings section of the configuration modal. If you select this option, the asset will be created with
playback_policy: "signed"(instead of"public"). - The signing key from Step 1 will be used by the Mux App to preview content inside the Contentful UI.
- When you access your content in your own application, outside of Contentful, the Mux asset will no longer have the key
playbackId, it will now be calledsignedPlaybackId.
{
  "uploadId": "some-upload-id",
  "assetId": "some-asset-id",
  "signedPlaybackId": "YOUR_SIGNED_PLAYBACK_ID",
  "ready": true,
  "ratio": "16:9"
}- You should use the value from
signedPlaybackIdto create URLs for playback and for thumbnail generation.
- Playback
https://stream.mux.com/{SIGNED_PLAYBACK_ID}.m3u8?token={TOKEN} - Thumbnails
https://image.mux.com/{SIGNED_PLAYBACK_ID}/thumbnail.jpg?token={TOKEN}
- The
TOKENparameter for the above URLs is something you create on your server according to Step 2 in Security: Signed URLs.
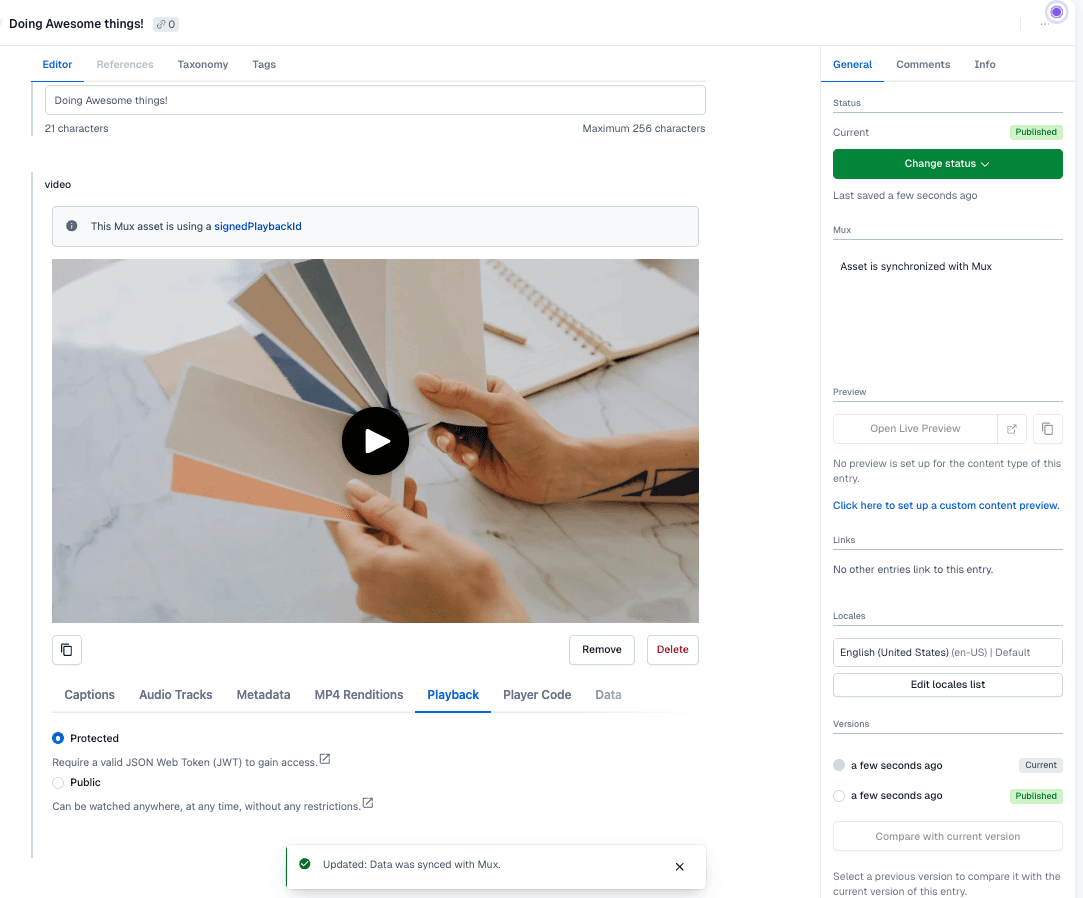
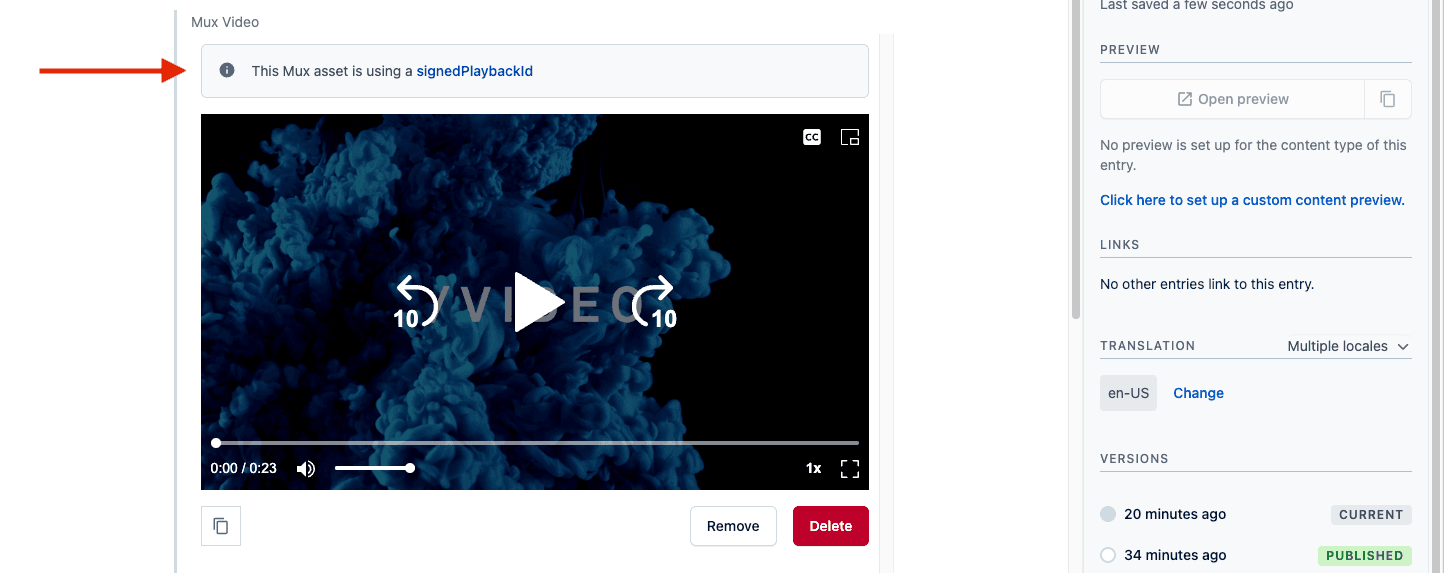
Note that in the Contentful UI when an asset is using a signed URL you will see this notice.
Public and signed playback IDs can be toggled per-entry under the Data tab. Each time the IDs are toggled, the old playback ID is deleted, and a new ID is created in its place.
Advanced: DRM
DRM (Digital Rights Management) provides the highest level of content protection using industry-standard encryption. To use DRM, you must first request access. Once approved, you'll receive a DRM Configuration ID.
Enabling DRM in Contentful
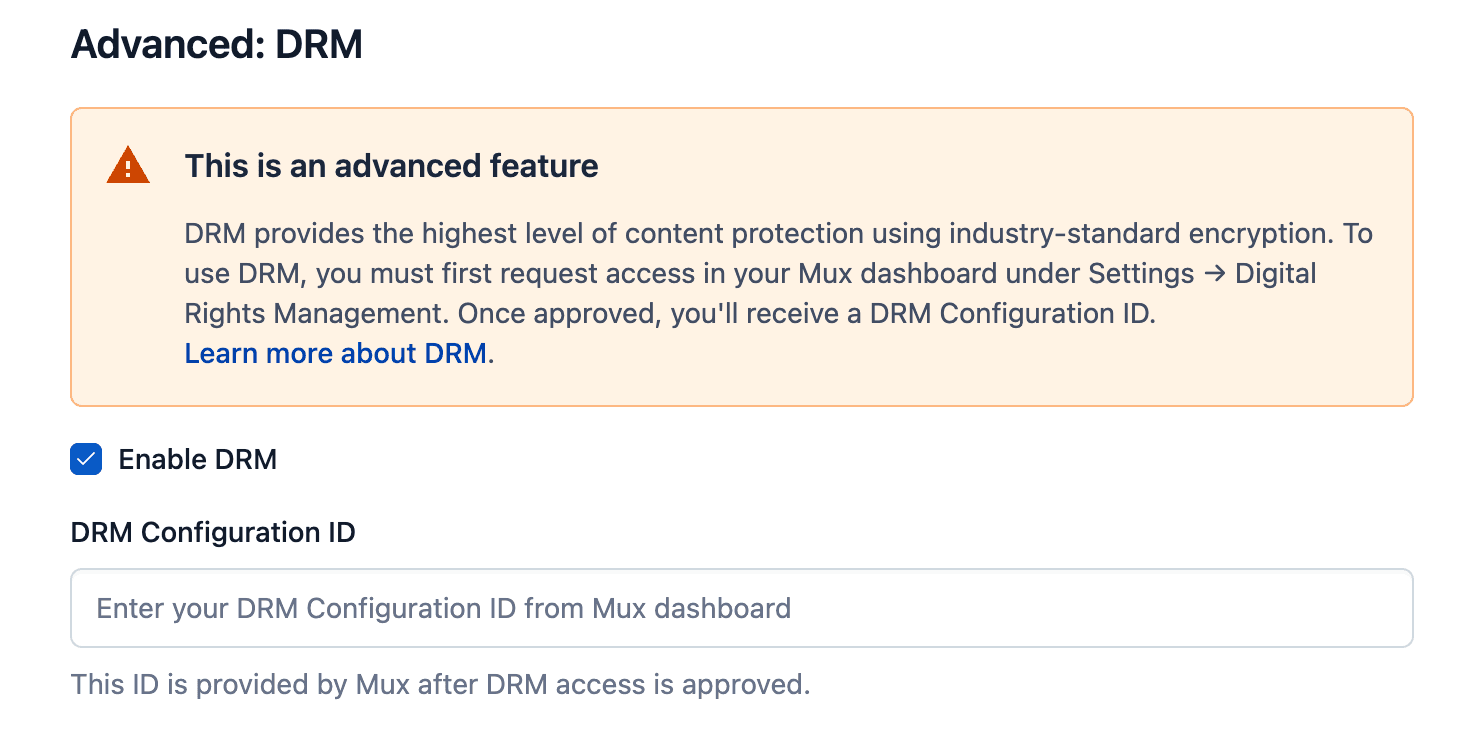
To enable DRM support, go to the Contentful Mux app configuration screen. You will see a new "Advanced: DRM" section where you can:
- Enable or disable DRM support by checking the Enable DRM checkbox
- Enter your DRM Configuration ID provided by Mux after your DRM access is approved
This configuration is stored alongside your other installation parameters and applies to all videos uploaded through this Contentful space.
Uploading DRM-protected videos
Once DRM is enabled and configured, a new "DRM Protected" option will appear in the Privacy Settings section when uploading or editing a video asset.
- The DRM option is only available when both DRM is enabled and a valid DRM Configuration ID is present
- If DRM is enabled but no Configuration ID is set, the option will appear disabled with contextual help text
- When DRM is enabled and configured, DRM Protected is selected by default (users can change it to Public or Protected if needed)
Note: DRM is only available for video assets. If you attempt to upload an audio-only file with DRM selected, the app will display a warning indicating that DRM is not supported for audio files. Use the Protected option for secure playback of audio content.
Viewing DRM-protected videos
To view DRM-protected videos in Contentful, you must also have Signed URLs enabled in the app configuration. If Signed URLs are not enabled, you will see an error message when trying to view DRM content. See Advanced: Signed URLs for setup instructions.
Due to browser iframe security restrictions, DRM-protected videos cannot be played directly within the Contentful preview. When viewing a DRM-protected asset, you will see a notice explaining this limitation.
The app provides an "Open in external player" link that opens the video in a standalone browser tab where DRM playback is permitted. This external player uses a Blob URL to load the player with the required DRM tokens.

Note: DRM playback incurs additional costs. See the DRM pricing section for details.
Using DRM-protected videos in your application
When you query a DRM-protected video through the Contentful API, the JSON object will include DRM-related information. The generated player code in the Player Code tab will automatically include the necessary DRM tokens (playback, thumbnail, storyboard, and drm tokens), so you can copy and paste it directly into your application.
For more detailed information about implementing DRM playback, including token generation and player configuration, see the DRM guide.
Note about version 2.0 release
During the month of August 2025, version 2.0 of the plugin was released. No action is required as the plugin updates automatically.
There are no changes to the previous data structure, but new fields have been added that are necessary to support new features such as audio tracks, MP4 renditions, and others.
If you were already using the plugin previously, you may notice that when entering an entry that has a video, it changes to 'Changed' status. This occurs because the new video data is retrieved and stored in Contentful's data. It's like an automatic resync that runs.
This is expected behavior and only occurs with videos uploaded before the new version or if changes are made to videos outside of Contentful, as it synchronizes automatically.
Note about migrating from the old Contentful extension
Before releasing the Contentful App, Mux had an officially supported Contentful extension.
The underlying data structure has not changed, so you can safely migrate to the app without losing data by following these steps:
- Uninstall the extension (now your video fields should look like raw JSON)
- Install the app
- On the configuration screen, apply the Mux App to the video fields that you had before