Integrate with Prepr
Prepr is a headless content management system created for adaptive websites. Prepr works with Mux out of the box. No configuration needed.
Mux is enabled for every new Prepr account by default. You can upload your videos to Prepr, add them to a content model and query their URLs to display them on your website. Follow the steps below to get started.
Using Mux with Prepr
Upload video content to Prepr
- Create a free Prepr account before you get started.
- Log in to the Prepr and navigate to the Media page.
- Simply drag and drop audio/video files from your local folders into the Media page directly.
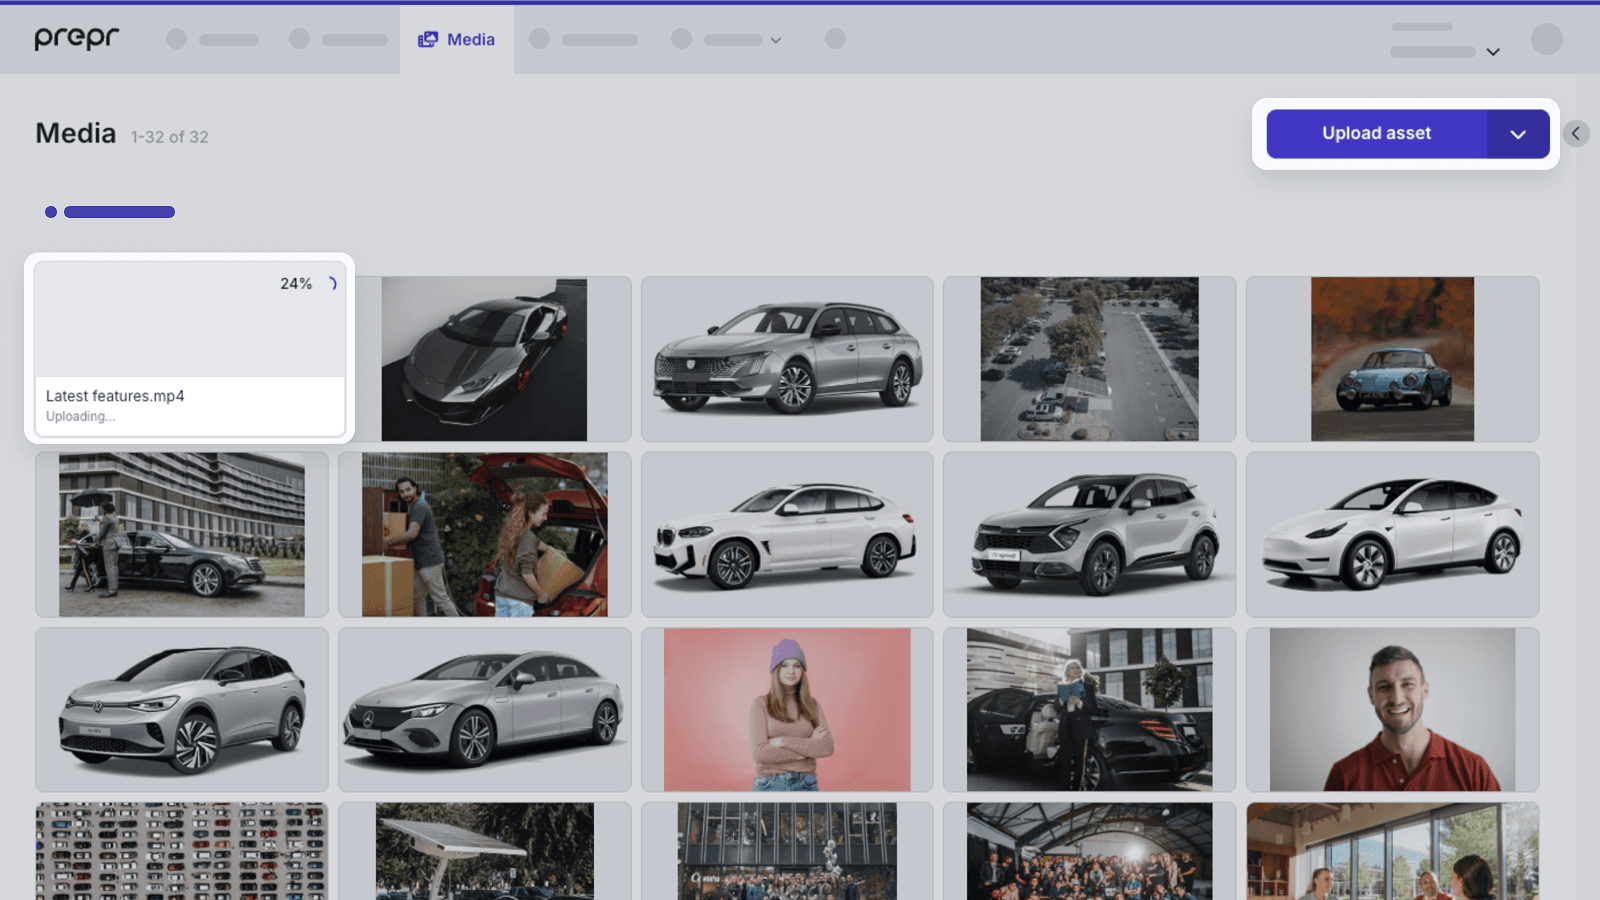
Once uploaded, the videos are ready to be used in content items.
Add live streams to Prepr
- Navigate to the Media page.
- Click the Upload asset dropdown and choose the Add live stream option.
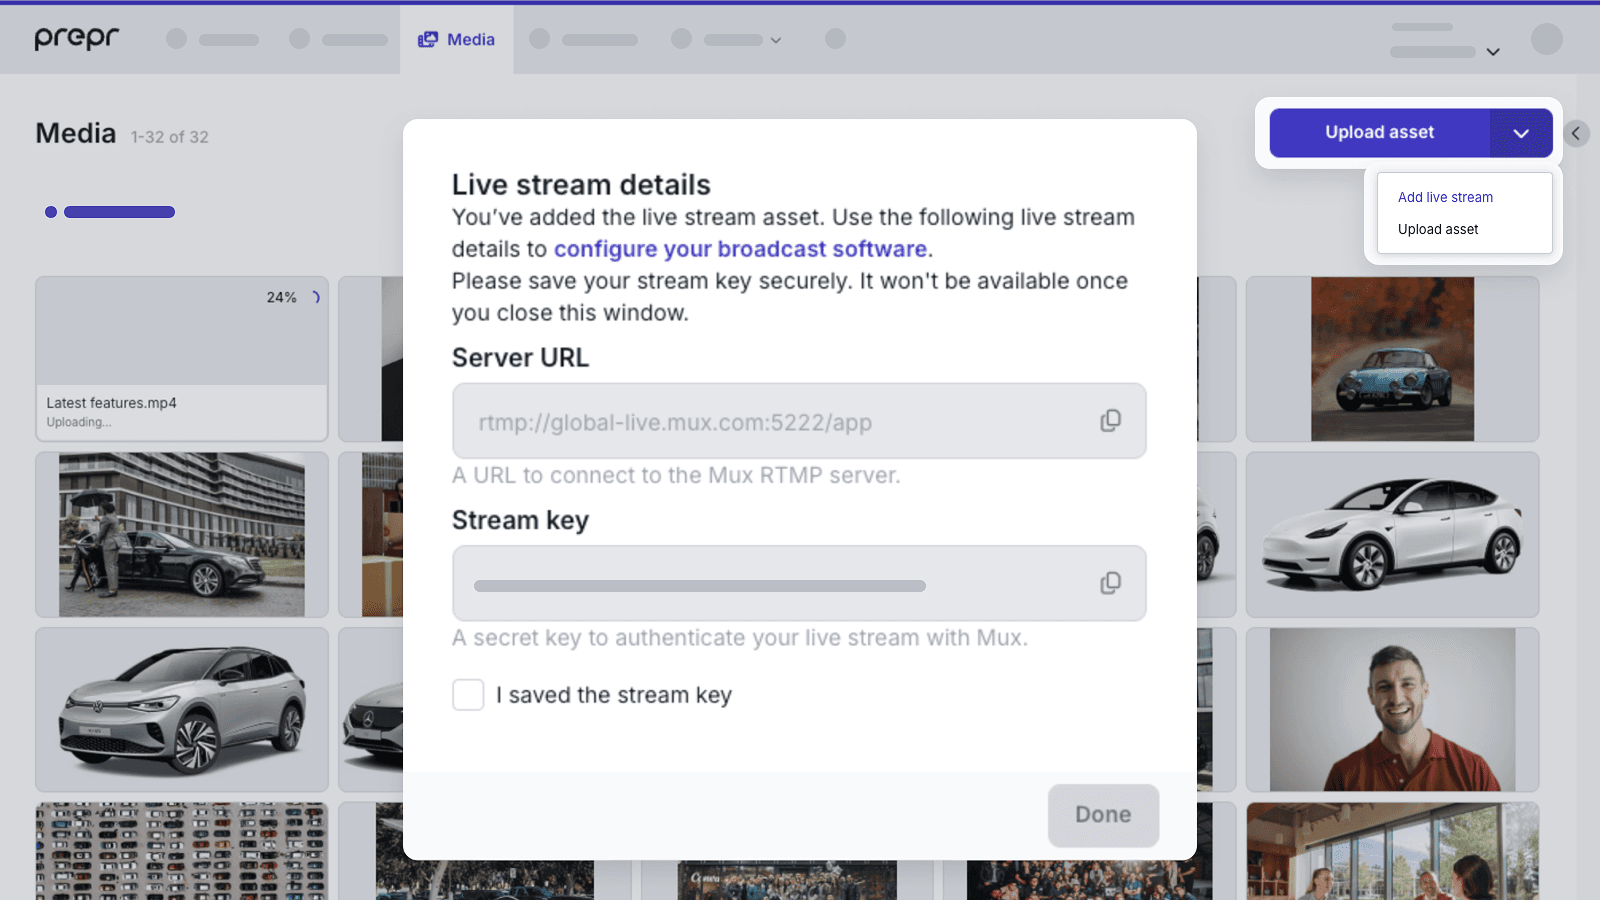
- Enter the broadcasting details as described in the Start broadcasting a live stream guide.
The livestream asset is now ready to be used in content items with an asset field.
Add videos to content items
Once your video(s) have been uploaded, you can add them to a content item. Follow the steps below to do this.
- Navigate to the Content page.
- Create a new content item or open one of your existing content items with an assets field.
- Simply drag and drop audio/video files from your local folders into the field directly or click the assets field to add the video you previously uploaded to the Media page.
- Save or publish the content item to make the video available to the front-end application.
Querying the GraphQL API
Now you can query the URLs or playback IDs of your videos to embed them on your website.
To learn how to play video content on your website, please follow these instructions provided by Mux.
Your query could look something like the example below. In this example, Posts is the name of your content model and videos is the name of the assets field. It has various options:
- The HLS streaming URL is returned by default as the
urlfield. - The playback ID can be returned by using the
playback_idfield. - You can use the
resoption to request MP4 versions in high, medium and/or low quality to support legacy browsers that do not support HLS. - You can query the duration of video content using the
durationoption. - The cover image can be requested using the
coverfield. It is adjustable using width, height, animated, and time arguments.
{
  Posts {
    items {
      videos {
        hls: url
        playback_id
        mp4High: url(res: "high")
        mp4Medium: url(res: "medium")
        mp4Low: url(res: "low")
        duration
        cover
      }
    }
  }
}
Using additional Mux features in Prepr
Static Renditions
By default Prepr uses the plus quality level, MP4 support is enabled on all accounts. This option will create Static Renditions for the Asset and will make MP4 files available for download to client devices using the url field.
Captions/Subtitles
While editing an asset from the Media page, content editors can easily upload their own captions file (supported formats are .vtt and .srt) by clicking the + Add subtitles link. Take a look at Add subtitles/captions to videos for more details.